
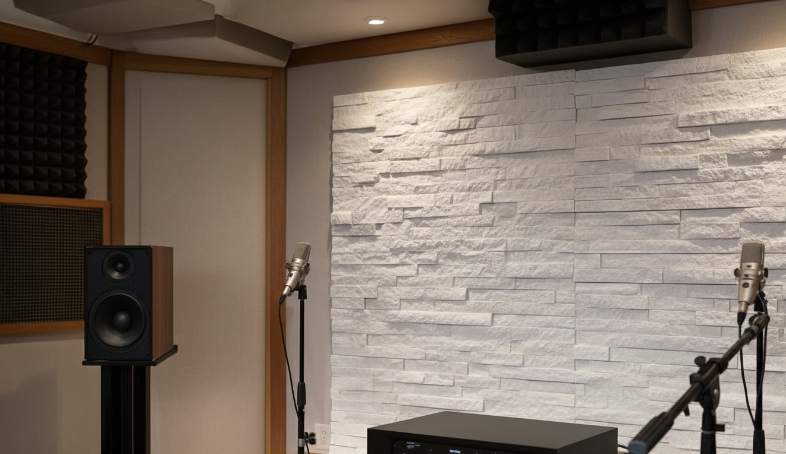
Acoustic Wall Design is the difference between a compliant installation and expensive rework, schedule delays, and warranty claims that erode profit margins. In high-end home theaters, stacked stone acoustics that look premium can still produce harsh reflection hotspots, uneven RT60 decay, flutter echoes, and low-frequency coupling that force costly remediation or client dissatisfaction.
This guide acts as a technical SOP for audiophiles and installers: it explains how stacked stone interacts with reflection, diffusion, absorption and mass; details placement strategies for accent walls, rear-stage and full-wrap options; compares veneer versus full-thickness mounting, backing cavities and decoupling; and lays out a practical workflow—measure, mock, install, retune—complete with RT60 targets, speaker/screen integration tips, hybrid treatment plans and an installer checklist to deliver predictable acoustic results.
Trends in Home Theater Design: Stacked Stone Usage
Stacked stone offers premium visual impact but requires engineered acoustic, mounting, and logistics strategies to meet home-theater RT60 and structural targets.
Acoustic performance and mitigation strategies for stacked stone walls
Natural stacked stone reflects energy strongly at mid and high frequencies, so plan absorption to control reverberation and preserve speech and dialogue clarity. For dedicated home theaters aim for an RT60 in the range of 0.25–0.45 seconds; measure with an RT60 or impulse-response test after fit-out and add targeted absorption if any 0.5–1 octave band exceeds the target.
Create a ventilated assembly and decouple the veneer to reduce direct reflections and structure-borne vibration. Provide an air cavity behind the veneer, back the stone with mineral wool where possible, and use resilient channels or a furring system to isolate the stone from framing. Treat primary reflection points with absorptive panels while reserving stone for diffusing zones to balance sightlines and sound.
- Target RT60: 0.25–0.45 s for dedicated home theaters; verify with measurements post-install.
- Ventilated cavity: 25–50 mm behind stone veneer plus 50–100 mm mineral wool (≈40 kg/m³) for mid-frequency absorption.
- Decoupling: install resilient channels or furring at manufacturer spacing—typically 400–600 mm centers—to reduce structure-borne vibration.
- Surface strategy: limit stone to 20–40% of side/rear wall area and treat first-reflection points with absorptive panels or acoustical fabric.
- Measurement follow-up: run RT60 or impulse-response tests and add narrow-band absorption where RT60 exceeds targets.
Optimal placement and wall configurations for visual impact and sound control
Place stacked stone as a feature on rear or side walls rather than directly behind primary speakers or projection screens to avoid uncontrolled reflections at listening positions. Use stone as a visual anchor—full-height on one wall—then balance the room with absorptive treatment at first-reflection zones and the ceiling to preserve audio fidelity.
Use engineered panel geometries and corner units to keep diffusion predictable and the look continuous. Wrap corners with matching L-corners, employ interlocking Z-Shape or S-Shape panels to conceal vertical joints, and stagger panel heights/depths to add diffusion without creating large flat reflective planes.
- Avoid placing stone directly behind speakers or screens; locate it on rear/side feature walls.
- Wrap corners with matching L-corners to preserve texture continuity and predictable scattering.
- Use interlocking Z-Shape or S-Shape panels to conceal vertical joints and produce a continuous scattering surface.
- Stagger panel heights/depths by 1–3 cm to create controlled diffusion without large flat reflective zones.
- Plan coverage: treat one wall full-height as the primary visual feature; limit other stone to accent bands aligned with seating rows.
Material selection, panel specifications and installation best practices
Choose stone by hardness and finish: quartzite or slate for durable, UV-stable interiors, and natural cleft or seamless finishes to control surface scattering. Favor interlocking Z-Shape/S-Shape panels and pre-fabricated L-corners for tight male-female joints; CNC diamond-blade precision improves on-site fit and reduces visible substrate lines.
Install stacked stone over a rigid cement board substrate—do not rely on drywall to support veneer weight. Use polymer-modified thinset that meets ANSI 118.4 and 118.11, and add stainless mechanical anchors where panel weight requires it. Design anchorage and substrate for static loads in the 40–60 kg/m² range for heavier or rough-profile panels, and plan crate handling for pallet gross weights near 900–1,000 kg.
- Preferred materials: quartzite or slate; natural cleft or seamless finishes to tune diffusion.
- Standard panel sizes: 150 × 600 mm or 150 × 550 mm; thickness 10–25 mm (standard) up to 35 mm (premium/rough).
- Typical weights: ~30–40 kg/m² for flat panels; ~55 kg/m² for rough profiles—design substrate and anchors accordingly.
- Mounting: install on cement board; use polymer-modified thinset (ANSI 118.4 / 118.11) and stainless anchors as needed; design for 40–60 kg/m² static load.
- Logistics: verify same-batch quarry consistency (≈95% hue uniformity). Typical trial MOQ and private-label minimum: 300 m²; lead times: 10–25 days depending on stock.
- Handling: expect plywood crates with pallet gross ≈900–1,000 kg; plan staging space and lifting equipment prior to delivery.
- Quality control: request pre-shipment visual verification (photos/videos) of finished crates and plan crate-handling procedures by weight.
How Stacked Stone Interacts with Sound (Acoustic Principles)
Stacked stone changes room acoustics by reflecting and scattering sound; plan mass, texture, and backing early to hit measurable RT60 and NRC targets.
Material Density, Surface Texture, and Frequency Response
Dense natural stones—slate, quartzite, sandstone, granite, and marble—provide high surface mass that reflects low frequencies and reinforces room brightness. Use panel data in design: standard modules run 150×600 mm or 150×550 mm with thicknesses between 10–35 mm (premium rough faces to 35 mm). Expect flat panels to weigh roughly 30–40 kg/m² and rough profiles to approach 55 kg/m²; account for that mass in acoustic and structural calculations.
Surface finish controls mid and high-frequency behavior. Natural cleft and split-face textures increase scattering and diffusion across mid-to-high bands, while seamless or polished surfaces behave as specular reflectors. Because natural stacked stone offers low intrinsic absorption, designers must pair stone with absorptive elements or tuned cavities when they need measurable reductions in reverberation.
Architectural Integration: Backing, Cavity, and Mounting Strategies to Improve Absorption
Improve practical absorption by treating the assembly, not the stone alone. Place mineral wool or acoustic insulation directly behind stone panels and specify a minimum 50 mm depth at roughly 40 kg/m³ to raise mid/high-frequency absorption. Introduce an air cavity between stone and substrate; tune cavity depth between 20–50 mm to improve low‑mid response and deepen the cavity for better low-frequency control when space allows.
- Use resilient mounts: install furring channels or decoupling clips and select clips that provide ≥10 mm isolation where vibration control matters.
- Seal perimeters and vertical joints with continuous acoustic sealant to minimise flanking and air leaks; use interlocking Z‑ or S‑shape panels and matching L‑corners to conceal seams while reducing leakage paths.
- For exterior or high‑salinity environments, specify quartzite or granite and verify substrate framing and fixings can support the product weight (use the weight/m² figures in structural calculations).
Specification, Mockup Testing, and Performance Targets for Project Delivery
Set measurable acoustic targets in contract documents: define desired RT60 improvement (typical target: reduce RT60 by 0.2–0.5 s in open‑plan rooms) and require in‑situ absorption values as NRC or octave‑band coefficients. Call out applicable test standards current to 2026: use ASTM E2235 for in‑situ absorption, ISO 354 for laboratory absorption, and ASTM E413 or ISO 10140 for assembled partition/transmission testing.
- Require a pre‑construction mockup (build 2–4 m² with the intended cavity, backing, and mounting). Measure in‑situ and iterate the assembly until the contract targets pass.
- Put a panel schedule on drawings that lists material type, panel size (150×600 mm or 150×550 mm), thickness (10–35 mm), weight/m² (30–55 kg/m² depending on finish), interlocking model, matching L‑corners, and acceptance criteria for same‑batch hue uniformity (~95%).
- Specify acceptance testing: submit lab certificates or on‑site test reports per ASTM E2235/ISO 354 and require photo/video verification of installed mockup before full production and shipment.
Premium Stacked Stone for Faster Installs

Benefits and Limitations of Stacked Stone for Home Theaters
Stacked stone gives premium texture but requires targeted absorption and engineered fixings to meet home-theater acoustic and load requirements.
Acoustic performance: reflection, diffusion and required absorptive treatments
Natural stacked stone is a hard, dense surface that raises mid-to-high frequency reflections and creates stronger early reflections near listening positions; leave it untreated and you risk reduced speech/dialogue intelligibility and a “bright” room character. Surface geometry controls behavior: shallow, flat faces scatter mainly high frequencies, while deeper, angled faces broaden scattering and act more like diffusors across mid frequencies.
Stone provides negligible low‑frequency absorption, so treat bass separately. Engineered acoustic panels can reach NRCs up to 0.95 at 1.5″ thickness, a level natural stone will not match. Place absorbers strategically and combine varied stone depths (standard 10–25 mm, up to 35 mm on premium/rough pieces) and irregular stacking to break flutter and widen the reflection profile.
- Identify first‑reflection points and cover 20–40% of each lateral wall area near the primary listening position with absorptive panels or recessed absorbers.
- Install dedicated bass trapping (sealed corner traps or porous membrane/bass panels) to control room modes and low‑end buildup.
- Use varied panel depths and irregular stacking patterns, or add purpose-built diffusors, where you want controlled scattering instead of hard specular reflections.
- For screen or front walls, combine stone with micro‑perforated baffles or fabric‑wrapped absorbers behind the stone to preserve texture while controlling mid/high reflections.
Structural requirements and fixing methods for stone veneer on theater walls
Design with weight in mind: standard flat gestapelter Stein weighs roughly 30–40 kg/m² (8–12 lbs/sq.ft); rough textured panels can approach 55 kg/m². Typical panel sizes run 150 × 600 mm or 150 × 550 mm with thickness 10–25 mm standard, up to 35 mm for premium pieces, so verify wall load capacity and local code limits before proceeding.
Prepare substrates and attachments to distribute dead load and resist dynamic forces. Use a rigid backing—minimum 12 mm plywood or cement board—fastened at 150–300 mm centers on wood studs. Bond panels with a full‑bed polymer‑modified thinset (ANSI 118.4 / 118.11 compliant) and back the adhesive with mechanical fixings: stainless anchors, Z‑clips, or masonry screws sized per load calculations. In seismic or heavy‑load jurisdictions, specify rated mechanical anchors, interlocking profiles, and consult a structural engineer.
- Substrate: install minimum 12 mm plywood or cement board; do not rely on single‑layer drywall to support veneer weight.
- Adhesive: use polymer‑modified thinset meeting ANSI 118.4/118.11; avoid organic mastics in interior applications where moisture or long‑term bond strength matters.
- Mechanical fixings: specify stainless steel anchors, Z‑clips or masonry screws; size and spacing per engineering load calculations.
- Seismic/heavy‑load action: require mechanical anchors rated for stone veneer, use matching L‑corners and interlocking Z/S profiles to maintain load continuity, and engage a structural engineer for permited projects.
Design constraints, procurement and serviceability for home-theater integration
Specify modular interlocking profiles (Z/S‑shape) with CNC diamond‑blade precision for concealed vertical joints and consistent fit; source same‑batch quarry material to achieve ~95% hue uniformity and order matching L‑corners for wrap‑around continuity. Remember Top Source Stone operates B2B only: typical minimums and shipping logistics make small residential orders inefficient—trial/private‑label MOQ sits at about 300 m² and pallet/crate shipments dominate distribution.
Plan serviceability and environment controls before you install stone. Locate speakers, conduits and service access panels in design drawings so you can provide removable enclosures or pre‑built cavities behind the veneer. Account for thermal mass: stone increases wall thermal inertia and can alter HVAC response in a tightly sealed theater, so allow return/vent clearances and test cooling with the room closed. Maintain natural stone with vacuuming and neutral detergent only; avoid high‑pressure washing and apply a breathable sealer if humidity runs high.
- Procurement: plan around MOQ ~300 m²; use authorized dealers or wholesalers to aggregate smaller projects.
- Service planning: mark speaker, conduit and access locations on the substrate before stone installation; provide removable service panels or in‑wall enclosures for electronics and vents.
- Logistics: expect crate/pallet shipments (standard pallet options cover ~30–38 m² per pallet); confirm port weight limits (typical USA port standard ~17.5 tons) and lead times (in‑stock 10–15 days, production 20–25 days for a 20GP container).
- Maintenance: vacuum and wash with neutral detergent only; avoid pressure washers and use a breathable sealer in rooms with elevated humidity to protect the installation without trapping moisture.
Design & Installation Guide for Home Theaters with Stacked Stone
Plan structural support, substrate, and AV rough-in early to avoid rework and ensure safe, acoustically balanced stone feature walls.
Pre-construction planning and structural load calculations for stacked-stone feature walls
Calculate the dead load using manufacturer data and design the framing to carry the cumulative weight plus a 20% safety factor. Use the provided weights as baseline: standard flat panels ≈ 30–40 kg/m² (8–12 lbs/ft²) and rough panels ≈ 55 kg/m². Determine the tributary area for each stud or anchor, multiply by panel weight, then add allowances for finishes and any mounted equipment (shelves, TVs, speakers).
Specify substrate and reinforcement: for wood-frame walls, install a minimum 12 mm cement backer board or 12 mm exterior-grade plywood fixed to studs. Where studs carry stone, add continuous plywood blocking (min 12 mm) and concentrate blocking so framing at the feature wall does not exceed 400 mm centers. For suspended or framed assemblies, check floor live-load capacity and design engineered brackets or steel channels if the assembly exceeds about 100 kg per linear meter. Document control joints and movement allowances at wall-to-ceiling and wall-to-wall transitions to prevent cracking from thermal or seismic movement.
- Use 30–40 kg/m² for standard panels, 55 kg/m² for rough panels when modeling loads.
- Apply 20% safety factor to cumulative wall loads in structural calculations.
- Specify minimum backing: 12 mm cement board or 12 mm exterior plywood; continuous blocking at high-load zones.
- Provide engineered brackets/steel channel supports when >100 kg/m linear load expected.
- Include documented control joints and movement gaps at transitions for thermal/seismic resilience.
Substrate preparation, moisture control, and vibration isolation (decoupling)
Inspect and true the substrate before install: plumb the wall, remove paint, laitance, and loose material, and correct deviations greater than 5 mm over 1 m. On framed walls at risk of humidity or mechanical condensation, install a continuous moisture barrier (vapour retarder) behind the stone but avoid trapping moisture between the stone and insulated cavities. On concrete or masonry, clean to near-white and follow adhesive maker profile and saturation guidance before bonding.
Where sound flanking or structure-borne vibration matters, decouple the stone assembly: use resilient channels or acoustic isolation clips behind a 12 mm plywood or cement-back board to break direct mechanical paths into studs. Provide a temporary mechanical ledger at the base for dry-fitting and remove it only after adhesive achieves initial set. Verify finish flatness: keep finish plane deviation ≤ 3 mm over 1 m so interlocking panels seat correctly.
- Correct surface deviations >5 mm/1 m; maintain ≤3 mm/1 m finish flatness for interlocking panels.
- Install continuous vapour retarder on framed walls where HVAC or humidity risk exists, but provide drainage paths—do not trap moisture.
- Use resilient channels or isolation clips with 12 mm backer to decouple and reduce flanking.
- Clean and, if required by adhesive, saturate concrete/masonry to meet adhesive manufacturer’s surface-profile spec.
- Fit temporary ledger support during dry-fit; remove only after adhesive develops initial cure strength.
Electrical and low-voltage rough-in for AV, speakers, and service access behind stone
Reserve conduit paths and service chases before stone goes up: run 25–32 mm conduit for multi-cable HDMI/HDBaseT, Cat6A, control and power bundles. Use in-wall CL2/CL3-rated speaker cable and size by run length: 16 AWG for runs under 10 m, 14 AWG for 10–20 m, and 12 AWG for runs over 20 m or for high‑power subs. Label both ends of every cable and produce a wiring map so technicians avoid removing finished stone during troubleshooting.
Provide power properly: supply at least one dedicated 20 A circuit for the AV rack and consider separate dedicated circuits for high-power amplifiers and subwoofers. Locate recessed mounting boxes and removable service panels behind planned equipment zones and set them 600–900 mm above finished floor where practical. Specify whole-rack surge suppression plus UPS; add an isolation transformer or line conditioner if you detect ground-loop noise during commissioning.
- Reserve 25–32 mm conduit for multi-cable runs; route before stone installation.
- Use CL2/CL3-rated speaker cable: 16 AWG (<10 m), 14 AWG (10–20 m), 12 AWG (>20 m or subs).
- Provide at least one dedicated 20 A circuit for AV racks; add separate circuits for heavy amplifiers/subs.
- Install recessed boxes and removable access panels at 600–900 mm AFF in equipment zones.
- Specify whole-rack surge suppressor/UPS and line conditioning; document cable labels and wiring map at rough-in.
Stone panel layout, mechanical fixing, adhesive selection, and installation sequence
Plan panel layout to minimize small edge cuts by dry-laying full sheets first; use standard Top-Quellstein panel sizes 150 × 600 mm or 150 × 550 mm and thicknesses from about 10–35 mm (up to 35 mm for premium rough profiles). Prefer interlocking Z- or S-shape panels and matching L-corners to hide vertical joints and deliver a seamless architectural finish. Choose adhesive by substrate and exposure: polymer‑modified cementitious thinset for interior dry areas and high-strength epoxy for heavy panels, wet zones, or irregular substrates.
Specify mechanical anchors in addition to adhesive: use stainless steel expansion anchors into masonry or stainless toggles into plywood-blocked studs, with primary anchors at the top and vertically spaced at 300–400 mm for heavy panels. Follow a controlled installation sequence: set a base ledger, butter adhesive onto substrate and back of panels, engage interlocks and clamp lightly, insert mechanical fixings while adhesive cures, remove ledger, and finish exposed edges. Allow thinset to reach initial set (typically 24–48 hours) and follow epoxy cure times per manufacturer—commonly ~24 hours—before loading or removing protection. Do not over-grout dry-stack faces; use color-matching mortar only where specified, and apply a penetrating stone sealer to cut edges after final cleaning.
- Panel sizes: 150×600 mm or 150×550 mm; thickness 10–35 mm (up to 35 mm for rough).
- Adhesives: polymer-modified thinset for dry interior; high-strength epoxy for heavy/wet/irregular areas.
- Mechanical fixing: stainless expansion anchors (masonry) or stainless toggles into plywood blocking; anchor spacing 300–400 mm vertically.
- Installation sequence: set base ledger → apply adhesive/butter panels → seat interlocks/clamp → insert mechanical fixings → remove ledger → clean and seal.
- Cure times: thinset initial set 24–48 hours; epoxy per manufacturer (typically ~24 hours). Protect wall until full cure.
- Edge treatment: avoid heavy grout on dry-stack faces; seal cut edges after cleaning.
Acoustic integration, measurement, and commissioning in home theater environments
Design acoustics around stone’s reflective character: gestapelter Stein scatters and reflects sound, so balance a stone feature wall with absorbers and bass traps. Target an RT60 of roughly 0.3–0.5 s across 125 Hz–4 kHz for clear dialog and controlled tonal balance in typical home-theater volumes. Place broadband absorbers at first reflection points on side walls and ceiling, and fit tuned bass traps in corners to tame modal build-up caused by the room’s dimensions.
Set speaker positions following recommended layouts—LCR close to the screen and surrounds at about 90–110°—and isolate any direct-radiating speakers from the stone surface with resilient mounts to prevent structure-borne vibration. Use measurement tools (calibrated microphone, REW or equivalent, RTA) to capture frequency response and RT60, then iterate absorber and diffuser placement based on measured modes and slap echoes. Seal penetrations behind stone, provide lined removable access panels, and mount AV racks on vibration-absorbing feet while leaving 50–100 mm clearance for ventilation.
- Acoustic targets: RT60 ≈ 0.3–0.5 s across 125 Hz–4 kHz for home-theater clarity.
- Treat first reflections with broadband absorbers; place bass traps in corners for low-frequency control.
- Keep LCR close to screen; set surrounds at 90–110°; avoid flush-mounting direct-radiating speakers to stone without isolation.
- Measurement workflow: measure baseline → identify modes and reflections with calibrated mic/REW → add absorbers/diffusers → re-measure and iterate.
- Isolation and service: seal penetrations, install lined access panels, use vibration mounts for racks, maintain 50–100 mm ventilation clearance.
- Troubleshooting checklist: add porous absorbers for mid/high glare; add diffusers at offending reflection points for ringing; retune speaker positions or add tuned traps for uneven bass.
Acoustic Treatment Strategies (Stacked Stone + Panels)
Combine stacked stone and engineered absorbers to deliver branded aesthetics while meeting NRC targets and structural load limits on commercial projects.
Layered assembly: mounting stacked stone over acoustic panel systems
Top Source Stone panels arrive as 150 × 600 mm or 150 × 550 mm modules with standard thickness between 10–25 mm and premium up to 35 mm; expect a dead load of roughly 30–40 kg/m² for flat panels and about 55 kg/m² for rough profiles. Specify the exact panel model and send structural loads to the project engineer early so the wall framing, ledger, or backup structure can confirm capacity before work starts.
Assemble the wall as a layered system: fit a rigid backer (12.5 mm cement board or exterior plywood) fixed to studs at 400 mm o.c., apply a polymer‑modified cementitious mortar rated for natural stone, and add stainless‑steel anchors or clips at panel edges—and at 300–400 mm spacing in heavy or rough areas—to secure shear loads. Place rigid or semi‑rigid absorptive boards (mineral wool or engineered wood‑fiber) directly to the backer prior to stone installation, and retain the designed air cavity (25–100 mm) where required for tuning.
- Panel geometry & mass: 150×600 mm or 150×550 mm; thickness 10–25 mm (up to 35 mm premium); dead load ~30–40 kg/m² (flat) & ~55 kg/m² (rough).
- Substrate: 12.5 mm cement board or exterior plywood, fixed to studs at 400 mm o.c.; verify structural capacity for combined stone, mortar and absorber loads.
- Adhesive + mechanical: use polymer‑modified cementitious mortar (ANSI 118.4/118.11 performance) and stainless‑steel anchors/clips at edges or every 300–400 mm for heavy sections.
- Acoustic layer: install rigid/semirigid absorbers (mineral wool board or engineered wood‑fiber) to the backer before stone; maintain a 25–100 mm air cavity to tune performance.
- Interlocking handling: specify Z‑shape/S‑shape interlocking panels and matching L‑corners to conceal vertical joints and transfer shear across modules.
Tuning acoustic performance: cavity depth, absorber selection, and diffusion strategies
Set performance targets for occupied spaces: aim for NRC 0.60–0.85 in open‑plan offices and meeting rooms to improve speech intelligibility and reduce masking. Use the stone finish as a diffusive surface while relying on the engineered absorber layer to supply true absorption—stone scatters energy, absorbers remove it.
Push low‑mid absorption by combining a 50–100 mm air cavity with 50–100 mm of mineral wool at densities between 40–80 kg/m³; that assembly shifts effective absorption downward into the lower mid band. Add decoupling (resilient channels or isolation clips) between studs and the backer to reduce structure‑borne transmission and improve low‑frequency response. Where stone covers only part of a wall, place a perforated or slotted facing in front of the absorber to broaden the system bandwidth, and use staggered panel offsets and the stone’s irregular surface to scatter energy across 500–4000 Hz instead of creating strong specular reflections.
- NRC targets: design to 0.6–0.85 for occupied collaboration spaces and meeting rooms.
- Low‑mid control: provide 50–100 mm air cavity plus 50–100 mm mineral wool (40–80 kg/m³) to extend absorption into lower mids.
- Decoupling: install resilient channels or isolation clips between studs and backer to raise low‑frequency performance and reduce flanking paths.
- Perforated/slotted backing: use micro‑perforated panels or slotted wood/metal facings where stone coverage is partial to broaden absorption bandwidth.
- Surface diffusion: exploit stacked stone irregularity and staggered offsets to scatter energy in the 500–4000 Hz band rather than producing mirror‑like reflections.
Mechanical fixing, weatherproofing, and finishing details for durable hybrid walls
For exterior or moisture‑exposed installations, install a breathable weather barrier behind the backer, provide a vent/weep at the base of the cavity, and slope flashings to drain water away from the assembly. Avoid full‑surface rigid grout that traps moisture; leave movement joints and drainage paths so water exits the cavity instead of accumulating behind the stone veneer.
Specify corrosion‑resistant hardware: use stainless‑steel anchors and fasteners compatible with natural stone and the substrate to prevent staining and failure. Require same‑batch quarry sourcing and pre‑shipment visual verification to avoid on‑site color mismatch on large runs. Design removable inspection panels or access points so technicians can check absorber condition, anchor integrity and mortar bonds; schedule periodic inspections and resealant work as part of long‑term maintenance.
- Weather control: fit a breathable weather barrier, provide weep/vent at base of cavity, and slope flashings to drain moisture away from the wall assembly.
- Movement joints: leave 6–10 mm joints at perimeters, plane changes and penetrations; avoid full‑surface rigid grout that can trap moisture behind stone.
- Corrosion resistance: use stainless‑steel anchors and corrosion‑resistant fasteners matched to stone and substrate materials.
- Quality control: specify same‑batch quarry consistency, require pre‑shipment visual verification and batch certificates for large runs to prevent color mismatch on site.
- Maintenance access: provide removable panels or inspection hatches for absorber and anchor inspection; schedule periodic checks of mortar bond and sealant integrity.
Factors to Consider When Choosing Stacked Stone
Choose stone by performance, manufacturability and logistics up front to avoid site rework, customs delays, and acoustic surprises.
Material Selection and Quarry Consistency — stone type, HS code, and color control
Select the stone by mechanical performance and appearance. Use quartzite or granite when you need superior exterior wear, UV stability and salt‑air resistance; choose slate for pronounced texture on interior or feature walls where tactile shadow lines matter. Standard materials include Slate, Quartzite, Sandstone, Granite and Marble; specify the HS codes for customs planning — Slate 6803.00.90 and Quartzite 6802.93.11 — to prevent clearance errors.
Control color by sourcing from the same quarry vein per order: require same‑batch quarry consistency to target ~95% hue uniformity across a batch. Ask the supplier for same‑batch sample panels and demand pre‑shipment visual verification (high‑res photos and timestamped videos) before you release the final balance payment.
- Specify material by use case (quartzite for exterior; slate for textured interiors).
- Declare HS codes on purchase orders: Slate 6803.00.90; Quartzite 6802.93.11.
- Request same‑batch sample panels and pre‑shipment photos/videos prior to final payment.
Panel Geometry, Edge Finish and Joint Strategy — panel types, finishes, and on-site fit
Define panel geometry to match the installation workflow. Use standard rectangles 150 × 600 mm (6″×24″) or 150 × 550 mm (6″×22″) for linear dry‑stack runs; pick interlocking Z‑Shape or S‑Shape panels and matching L‑corners to eliminate on‑site mitering at 90° transitions and preserve texture continuity. Specify the face finish — natural cleft, split‑face, or seamless — to align with the design language and cutting requirements.
Require CNC diamond‑blade edge precision for interlocking male‑female fits so installers can hide vertical joints and substrate. Choose thickness to match structural and backing needs: standard 1.0–2.5 cm, rough/premium up to 3.5 cm; thicker panels increase weight and can reduce the need for secondary backing or furring systems.
- Panel sizes: 150×600 mm or 150×550 mm for standard runs.
- Interlocking: Z‑Shape / S‑Shape with CNC diamond‑cut edges to conceal vertical joints.
- Finishes: Natural cleft, split‑face, seamless — pick by visual and cutting needs.
- Specify matching L‑corners to cut onsite labor and ensure texture continuity at corners.
Structural Loading, Environmental Performance and Logistics — weight, durability, packing, MOQ and lead times
Calculate wall loading from panel weights: flat panels run about 30–40 kg/m² (8–12 lbs/ft²); rough panels up to 55 kg/m². Use these numbers to size the substrate, anchors and fasteners and to confirm that the framing or masonry can accept the live load. Confirm environmental ratings up front — the stone offered is inherently UV stable, salt‑air and high‑humidity resistant for GCC/marine climates and freeze‑thaw resistant for northern installations.
Plan logistics to avoid cost and port issues: cartons measure 61×15×13 cm with standard boxes at 7 pcs (0.63 m²) or 8 pcs (0.72 m²), and rough panels at 5 pcs (0.45 m²). Use standard pallets 110×110 cm (height 68 or 82 cm) with 48 or 60 boxes per pallet; a 20GP typically loads 25–30 pallets for a max coverage of ~750–860 m² (standard panels). Note USA port weight limits: default 17.5 tons; heavier 24–26.5 tons require destination approval. Set MOQ and payment terms: 300 m² minimum for trials/private label, and T/T 30% deposit, 70% before shipment. Lead times (2026): in‑stock dispatch 10–15 days; production for a 20GP 20–25 days.
- Use panel weights (30–40 kg/m² flat; ~55 kg/m² rough) to size substrate and anchors.
- Carton: 61×15×13 cm; boxes: 7 pcs (0.63 m²) or 8 pcs (0.72 m²); rough: 5 pcs (0.45 m²).
- Pallets: 110×110 cm; 48 or 60 boxes per pallet; 20GP: 25–30 pallets (~750–860 m² coverage).
- Verify USA port weight rules (17.5 t standard; 24–26.5 t needs approval) before finalising carrier and destination docs.
- MOQ: 300 m²; Payment: T/T 30% deposit, 70% balance before shipment; Lead times: 10–15 days in‑stock, 20–25 days production for 20GP.
- Action checklist: calculate total wall weight, confirm substrate/fastener specs, choose pallet option for optimal coverage, and request pre‑shipment photos/videos.
Case Studies & Layout Examples
Specify profile, load capacity, and single-batch sourcing up front to prevent color mismatch, structural rework, and shipping delays.
Interlocking Z-/S-Shape Layout for Exterior Cladding — Seamless-joint & wind-load strategy
Use the Z-Shape or S-Shape interlocking panels when you require concealed vertical joints and a continuous textured face; the CNC diamond-blade precision male–female connection camouflages joints and preserves a seamless appearance across long façades. Standard panel sizes are 150 × 600 mm or 150 × 550 mm with thicknesses normally 10–25 mm and up to 35 mm for rough/premium profiles—expect flat assemblies to weigh about 30–40 kg/m² and rough stacks to approach 55 kg/m², so specify substrate and fixing capacity whenever projected live load exceeds 40 kg/m².
- Panel spec: 150×600 mm or 150×550 mm; thickness 10–25 mm (up to 35 mm premium).
- Mass: flat ≈ 30–40 kg/m²; rough ≈ 55 kg/m²—design fixings for the higher value.
- Joint strategy: use full interlock continuous runs and matching L-corners at 90° transitions to retain texture and color continuity.
- Weatherproofing: combine mechanical anchors sized for wind loads with a flexible, breathable joint sealant; engage a structural engineer for wind-load calcs.
- Procurement: order whole runs from the same quarry vein—expect ~95% hue uniformity within a batch; note MOQ for private-label/custom boxes at 300 m².
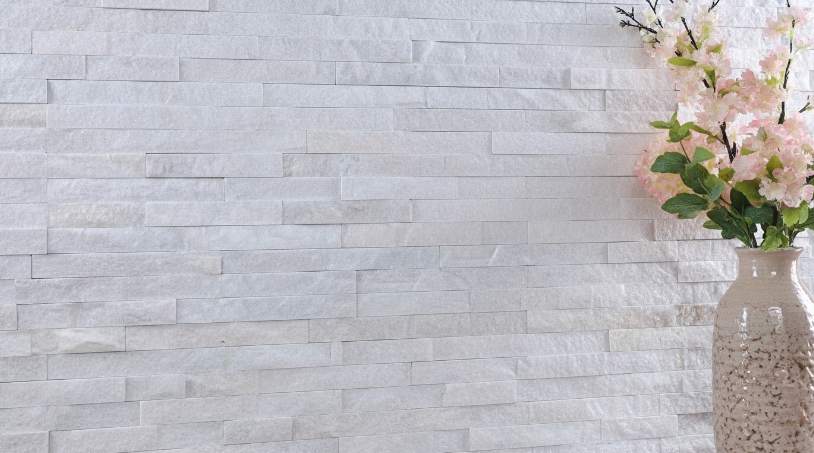
Rectangle Panel Modular Layout for Interior Feature Walls — acoustic integration and substrate prep
Select straight-edge rectangle panels for dry-stack or linear installations where tight, repeatable sightlines matter; finishes include natural cleft, split-face, or seamless. Use the standard 150 × 600 mm or 150 × 550 mm panels (10–25 mm typical) and plan substrate and acoustic backing to match the panel mass—30–40 kg/m² is common and requires furring channels or a rigid substrate rated for that load.
Treat stone as a diffuser, not a primary absorber: pair gestapelter Stein with an absorptive backer such as mineral wool or a perforated acoustic board to control mid–high frequencies and improve speech intelligibility. Stagger horizontal seams (typical offset 150 mm) to reduce repetitive patterning, specify matching L-corners to avoid on-site wrap cuts, and request pre-shipment photos or videos for finish sign-off.
- Acoustic backer: install mineral wool or perforated acoustic board behind stone to absorb mid–high frequencies.
- Mounting: use furring channel or rigid substrate rated to support ≥30–40 kg/m²; verify tie spacing and fastener shear for 40+ kg/m² loads.
- Layout rule: stagger horizontal seams ~150 mm to avoid banding and plan lighting/gap reveals for shadow definition.
- Corners/QA: specify matching L-corners and require pre-shipment visual verification to confirm texture and hue before final payment.
Mixed-Panel & Corner Layout for Commercial Lobbies — on-site sequencing, packaging and logistics
Combine interlocking panels on primary façades with rectangle modules on secondary planes to balance seamless expression and installation economy; use pre-fabricated L-corners to maintain continuity at transitions and reduce field cutting. Pack and stage material by elevation to prevent cross-matching: mark every box with color, model, and elevation, and request pre-shipment verification images to confirm batch consistency before shipment.
Plan crates, pallets, and containers to match site sequencing and port limits: cartons measure 61 × 15 × 13 cm with standard boxes holding 7 pcs (0.63 m²) or 8 pcs (0.72 m²) and rough boxes 5 pcs (0.45 m²). Use plywood crates (110 × 110 cm) with Option A carrying 48 boxes (~30.24 m² standard) or Option B carrying 60 boxes (~37.80 m²); expect average gross crate weight 900–1000 kg. A 20GP typically loads 25–30 pallets delivering about 750–860 m² (standard) or 480–540 m² (rough). Follow MOQ and lead times: trial/private-label MOQ 300 m², in-stock dispatch 10–15 days to Xingang, production 20–25 days for a 20GP. Standard commercial terms: T/T 30% deposit, 70% before shipment; plan for US port weight limits (17.5 t) or arrange heavier-weight approval ahead of booking.
- Carton data: 61×15×13 cm; 7 pcs (0.63 m²) or 8 pcs (0.72 m²); rough: 5 pcs (0.45 m²).
- Pallet options: 110×110 cm plywood crates; Option A = 48 boxes (~30.24 m²), Option B = 60 boxes (~37.80 m²); crate weight ~900–1000 kg.
- Container planning: 20GP = 25–30 pallets; max coverage ≈ 750–860 m² (standard) or 480–540 m² (rough).
- Lead times & MOQ: MOQ 300 m²; in-stock dispatch 10–15 days to Xingang; production 20–25 days for 20GP.
- On-site sequencing: stage crates by elevation, mark boxes for color/model, and request pre-shipment photos/videos to ensure batch match.
- Commercial terms: T/T 30% deposit, 70% balance before shipment; confirm destination port weight approval for loads above 17.5 t.
DIY vs Professional Installation
Choosing DIY or pro installation changes schedule, cost, structural risk, and acoustic outcome—select by area, panel weight, and site climate.
Selection criteria: when DIY is viable and when to hire pros
Use DIY on small, well-defined accent work: single feature walls, fireplace surrounds, or patch repairs under about 10–15 m². Interlocking Z‑Shape or S‑Shape panels simplify alignment and hide vertical joints, which narrows skill requirements and reduces finishing time. Treat panel weight as a hard threshold: standard panels around 30–40 kg/m² (8–12 lb/ft²) will often bond reliably with heavy‑duty adhesives, while rough/premium panels near 55 kg/m² demand mechanical anchorage and a structural review.
Hire professionals when you face complex transitions (wrap‑around L‑corners, soffits, floor‑to‑ceiling edges), exterior exposure in freeze‑thaw or high‑salinity climates, or project logistics that cross B2B supply limits. Top Source Stone operates strictly B2B; small end‑user projects must route through dealers or contractors and plan around MOQ, pallet packing, and crate handling.
- DIY suited: ≤10–15 m², interlocking Z/S panels, standard weight 30–40 kg/m².
- Hire pros: rough panels ≈55 kg/m², complex corners/soffits, exterior freeze‑thaw or salt environments, projects requiring engineer sign‑off.
- Supply note: plan via dealers/contractors to meet Top Source Stone MOQ and pallet/crate logistics.
DIY workflow and required tools, materials, and prep
Prepare the substrate: verify structural soundness, remove contaminants, and confirm flatness within manufacturer tolerances. Use cement board or masonry backing for interior stone; never rely on unsupported drywall for full‑height stacked stone. For exterior work add a drainage plane and waterproofing membrane where moisture exposure exists. Plan panels by size—Top Source Stone standard panels measure 150 × 600 mm or 150 × 550 mm, with thickness from 1.0–2.5 cm (standard) and up to 3.5 cm for rough types—and order matching pre‑fabricated L‑corners for clean wraps.
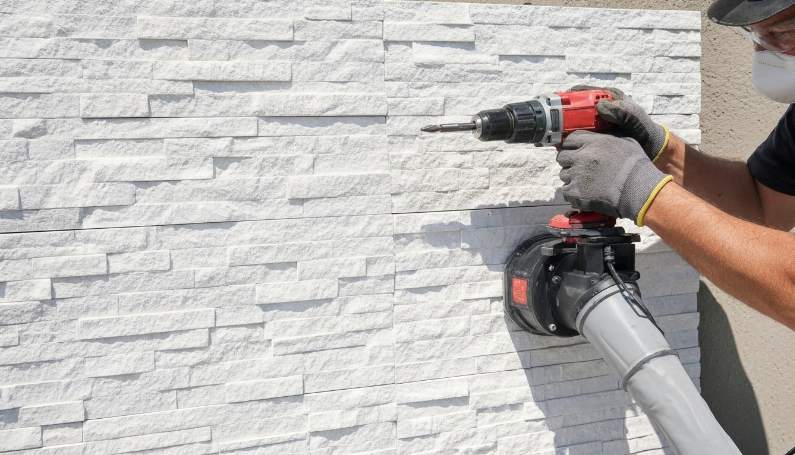
Cut and set panels with appropriate tools and adhesives. Use a wet saw fitted with a CNC diamond blade or an angle grinder/bridge saw with a diamond wheel; wear PPE and control water to suppress dust. For interior dry areas apply polymer‑modified cementitious thinset (meet ANSI 118.4 / 118.11); for exterior or heavy panels install full‑bed mortar plus stainless steel anchors or ties and mechanical fasteners. Back‑butter where needed, ensure full contact bedding, stagger joints per guidance, and use interlocking profiles to conceal substrate. Plan logistics: cartons cover 0.63–0.72 m² (7–8 pcs/box); order pallets in multiples (48 boxes ≈ 30.24 m²; 60 boxes ≈ 37.80 m²) and include 5–10% waste allowance. Crates average 900–1,000 kg—arrange forklift/tail‑gate and at least two installers for larger panels.
- Site prep: cement board or masonry substrate; drainage plane and waterproofing for wet/exterior areas.
- Cutting: wet saw with CNC diamond blade; angle grinder or bridge saw with diamond wheel; PPE, water control.
- Adhesive: polymer‑modified thinset (ANSI 118.4/118.11) for interiors; full‑bed mortar + stainless anchors for exterior/heavy panels.
- Material takeoff: 0.63–0.72 m²/box; pallet: 48 boxes ≈30.24 m²; order 5–10% extra for cuts/waste.
- Handling: crates ≈900–1000 kg—arrange forklift and two or more installers for precise placement.
Professional installation: benefits, cost drivers, and risk controls
Use professional installers when project scale, schedule, finish quality, or warranty demands exceed DIY capacity. Installers deliver tighter joints, consistent coursing, and higher throughput—critical for commercial façades and high‑visibility interiors. Expect primary cost drivers: labor rates, substrate preparation, engineered mechanical anchoring for heavy panels, custom L‑corner fabrication, and increased waste on complex patterns. Pros can also manage B2B procurement, pallet/container orders and lead times—Top Source Stone lists in‑stock dispatch at 10–15 days and production around 20–25 days.
Control risk with contracting best practices: require engineer sign‑off for rough/heavy panels (>50 kg/m²), verify freeze‑thaw and salt‑resistance for exposed sites, and insist on same‑batch quarry consistency and pre‑shipment visual verification to limit color variance (~95% hue uniformity within batch). Specify CNC diamond‑blade precision cutting for premium interlocks, retain extra material from the original crate for future repairs, and approve a project mockup before full installation to lock finish, coursing, and color.
- Primary benefits: faster schedule, consistent finish, and professional warranty documentation.
- Cost drivers: labor, substrate prep, mechanical anchors for heavy panels, custom L‑corners, and pattern waste.
- Procurement controls: pros handle B2B orders, pallet/container logistics; expect 10–15 day dispatch (in‑stock) or 20–25 day production lead time.
- Risk controls: require engineer sign‑off for >50 kg/m² panels, request same‑batch supply and pre‑shipment images, approve mockup, and keep spare crate material for repairs.
Maintenance, Durability, and Long-Term Performance
Routine inspection, correct detailing, and timely repairs minimize lifecycle cost and protect warranty on natural stacked stone assemblies.
Routine inspection and cleaning protocols for natural stacked stone
Schedule inspections to catch weathering, joint movement, and biological growth before they escalate. Inspect exterior walls at least once per year in severe climates, every 2–3 years in mild climates, and immediately after major storms or freeze‑thaw events. During each inspection, document findings with photos and note locations using a grid or elevation tag so you can track changes over time.
Follow a controlled cleaning sequence to avoid damage: remove loose debris by dry‑brushing, pre‑wet the surface, apply a neutral pH stone cleaner, agitate with a soft brush, then rinse with low‑pressure water through a soft‑nozzle spray. Avoid acids, strong alkalis, and bleach; always test a small patch before full-scale cleaning. Use rated scaffolding or OSHA‑compliant fall protection for elevated work and avoid high‑psi pressure washing near thin panels and interlock joints.
- Visual checks: loose or displaced panels, separated vertical joints, hairline cracks, efflorescence, mortar loss at L‑corners and interlocks.
- Cleaning sequence: dry‑brush → pre‑wet → neutral pH cleaner → soft‑brush agitation → low‑pressure rinse (soft nozzle).
- Chemical rules: do not use acids, strong alkalis, or bleach; use manufacturer‑approved neutral cleaners and a test patch.
- Safety: use rated scaffolding or OSHA‑compliant fall protection; avoid concentrated jetting on joints and thin panels.
Managing environmental degradation: freeze-thaw, salinity, UV and moisture control
Specify materials and details that match the exposure regime. Top Source Stone stacked panels deliver inherent UV stability and ASTM‑type freeze‑thaw resistance suitable for Northern climates, and quartzite and slate options resist salinity and high humidity for GCC and coastal projects. Apply protective coatings only when the project specification requires them and after testing for appearance and vapor permeability.
Design the enclosure to evacuate water and accommodate movement: provide a continuous drainage plane, terminate with through‑wall flashing and weep paths at shelf angles, and install flashings at all terminations to prevent trapped moisture. Include vertical and horizontal movement joints sized 6–12 mm at intervals defined by a thermal movement study and follow substrate deflection limits for veneer systems. Size substrate and anchors for panel dead loads: flat panels ≈ 30–40 kg/m² (8–12 lb/ft²) and rough panels ≈ 55 kg/m²; verify anchors and substrate capacity against these loads before installation.
- Material selection: quartzite or slate for high-salinity coastal exposure; specify coatings only after test patch verification.
- Drainage details: continuous drainage plane, through‑wall flashing, shelf‑angle weeps, and sealed terminations.
- Movement joints: provide 6–12 mm vertical/horizontal joints per thermal study and project specification.
- Structural loads: design anchors/substrate for 30–40 kg/m² (flat) or ~55 kg/m² (rough) panels; confirm anchorage schedule.
Repair, repointing and replacement workflow for long-term performance
Triage damage methodically: photograph each defect, record panel module size (150×600 mm or 150×550 mm), thickness (1–2.5 cm standard; up to 3.5 cm premium), and finish (natural cleft, split‑face, seamless). Use that record to determine if you need targeted repointing, re‑bedding, or full panel replacement and to support warranty or batch tracking.
When replacing panels, protect interlocks and adjacent modules: remove mortar around the affected unit carefully to avoid damaging Z/S male‑female connections; install matching L‑corners or replacement interlocks to preserve the visual wrap. Re‑bed panels with polymer‑modified cementitious mortar for exterior work, use stainless‑steel anchors where mechanical support is necessary, and set panels within a ±2 mm alignment tolerance. Order replacements from the same quarry vein to retain 95% hue uniformity and verify pre‑shipment photos or samples. After repointing, allow the mortar/adhesive to cure per manufacturer directions, then apply a breathable silane/siloxane water‑repellent only after a test patch confirms appearance and vapor permeability. Close each work item by verifying flashing integrity and water tightness, then log the repair date, materials, and batch codes for warranty traceability.
- Initial triage: photograph damage, record module size, thickness, finish, and location.
- Removal: remove surrounding mortar carefully; protect Z/S interlocks and L‑corners.
- Fixing: re‑bed with polymer‑modified cementitious mortar; use stainless‑steel anchors where required; maintain ±2 mm alignment tolerance.
- Color control: order same‑batch replacements to preserve ~95% hue uniformity; verify pre‑shipment visuals.
- Repointing and sealing: match mortar color, allow manufacturer cure time, apply silane/siloxane after test patch confirms appearance and vapor permeability.
- Verification and recordkeeping: confirm joint integrity and no water ingress at flashing; log date, materials, and batch codes for warranty traceability.
Cost Considerations and Return on Investment for Audiophiles
Accurate material, freight and installation math converts aesthetic stone choices into measurable ROI for dealers and project owners.
Material and logistics cost breakdown (per m²)
Top Source Stone cartons come in clear coverage units you can model directly: standard panels ship 7 pcs/box = 0.63 m² or 8 pcs/box = 0.72 m²; rough panels ship 5 pcs/box = 0.45 m². Standard panel sizes measure 150 x 600 mm with a 150 x 550 mm option; thickness runs 1.0–2.5 cm for standard lines and up to 3.5 cm for premium rough faces. Use those panel dimensions and thicknesses to calculate your material cost per m² and your on-site waste from cutting and layout when you prepare quotes.
Translate weight to freight cost by using the mass estimates: flat panels ≈ 30–40 kg/m², rough panels ≈ 55 kg/m². Compute freight_cost_per_m² = total_freight / container_coverage, using usable 20GP coverage of 750–860 m² for standard panels (480–540 m² for rough). Pallet options affect per-unit freight: Option A (48 boxes) ≈ 30.24 m²; Option B (60 boxes) ≈ 37.80 m². Model cashflow impact with the MOQ policy (300 m²) and payment terms (T/T 30% deposit, 70% balance before shipment). Add holding and financing cost for lead times: in-stock dispatch 10–15 days; production 20–25 days.
- Carton dims: 61 × 15 × 13 cm; use box coverage to plan pallet stacking and compute crate cube.
- Weight to freight conversion: multiply m² by 30–40 kg/m² (flat) or 55 kg/m² (rough) to check whether the US port weight limit (≈17.5 t) or heavy-weight approvals (24–26.5 t) will apply.
- Import coding: Slate HS 6803.00.90, Quartzite HS 6802.93.11 — include duties, handling and port charges into landed cost per m².
Installation, labor and structural cost drivers
Use panel dead loads (30–55 kg/m²) as the primary input when specifying substrate capacity, anchors and bracket systems. Confirm local structural limits before you finalize fastening schedules: calculate point loads for brackets and verify the substrate (cement board, masonry) rather than drywall. Choose mechanical anchors rated for the calculated loads and specify adhesive compatible with polymer-modified thinset (ANSI 118.4 / 118.11) for durable bonds in interior and exterior conditions.
Drive labor costs down by selecting interlocking Z- or S-shape panels and matching L-corners to reduce cutting, joint finishing and on-site fabrication. Plan handling around crate sizes and pallet gross weights (~900–1000 kg): stage forklift or hoist access, reserve laydown space, and schedule offload windows to avoid demurrage. Require same-batch quarry consistency (95% hue uniformity) and pre-shipment visual verification to prevent costly on-site color remakes.
- Design input: use 30–40 kg/m² for flat finishes, 55 kg/m² for rough when sizing anchors and brackets.
- Productivity levers: specify interlocking panels and pre-matched L-corners to cut installation time and reduce waste.
- Handling plan: cartons 61×15×13 cm; pallet gross weight ~900–1000 kg — plan forklift capacity and staging to avoid damage and delays.
- Quality control: require same-quarry batching, offer pre-shipment photos/videos, and enforce arrival inspections to eliminate rework costs.
- Budget checklist: include substrate remediation, membrane/decoupling layers for acoustic needs, L-corners and trims, and a verified waste factor from a mock-up layout.
Acoustic performance impact and ROI calculation method for audiophile projects
Natural stacked stone contributes mass and surface diffusion: use the panel mass per m² as an input to sound transmission loss and STC estimates, and remember stone reflects mid–high frequencies so pair it with absorptive treatments for room tuning. For audiophile rooms, specify decoupled substrates and absorptive backers to reduce transmission and control reverberation; use interlocking panels to preserve continuous mass and minimize flanking paths that degrade low-frequency performance.
Calculate ROI with a clear formula and landed-cost inputs so commercial decisions remain objective. Compute total_project_cost as material_cost + freight_per_m² + installation + substrate_mods + finishing, then compute ROI = (value_added + maintenance_savings + operational_benefit) / total_project_cost. Divide quoted 20GP freight by usable container coverage (750–860 m²) to get freight_per_m², and add import charges and HS-code related costs (Slate 6803.00.90; Quartzite 6802.93.11) to land the unit price. Model life-cycle savings: stone gives UV stability, high salinity and humidity resistance, and freeze–thaw durability — spread the upfront cost over a multi-decade service life when you report payback and margin scenarios.
- ROI formula: ROI = (value_added + maintenance_savings + operational_benefit) / total_project_cost.
- Freight step: freight_per_m² = quoted_freight_for_20GP / usable_coverage (use 750–860 m²), then add duties, handling and local port fees to get landed cost.
- Acoustic strategy: combine heavy stone mass for transmission loss with absorptive panels or decoupled backers to control reverberation and preserve low-frequency integrity.
- Commercial protection: leverage Direct Quarry Source pricing and B2B-only distribution to protect dealer margins when you build resale and profit models into the ROI.
- Life-cycle inputs: assume multi-decade service life — factor UV stability and freeze–thaw resistance into a 20–30 year amortization for high-durability selections.
Abschluss
Proper installation of stacked stone isn’t just about looks—it ensures structural safety, regulatory compliance, and reliable acoustic performance. Correct mounting, substrate preparation, and coordination with speaker and HVAC placements protect the wall, reduce flanking transmission, and extend system longevity.
Next, review your room’s current wall and speaker setup and measure RT60 and modal behavior before committing to a stone install. Contact Top Source Stone or your authorized dealer for project-ready samples, technical specifications, and pre-shipment visual verification to streamline installation and meet your acoustic targets.
Häufig gestellte Fragen
Does stacked stone help with room acoustics?
Stacked stone is not listed among the engineered acoustic panel materials described in the research. Architectural acoustic panels are designed specifically to absorb, diffuse, or block sound; stone may provide some irregular surface diffusion but is not optimized to absorb mid-to-high frequencies or improve speech intelligibility in the predictable way that purpose-built panels do.
2. Is stone good for home theater walls?
Home theaters need control of reflections and mid-to-high-frequency energy to maintain clarity. The research highlights wall-mounted acoustic panels (fabric, foam, wood, metal) as engineered solutions for that task; stone is primarily aesthetic and not a listed acoustic panel material, so for reliable acoustic performance use panels or combine stone with wall-mounted treatments such as wood or fabric panels that also offer design adaptability.
3. Does a stone wall reduce noise from other rooms?
The research focuses on engineered treatments that absorb, diffuse, or block sound; it does not identify stone walls as a standard acoustic blocking or absorption material. To reduce noise between rooms reliably, use solutions designed for sound control—particularly wall-mounted acoustic panels and retrofit treatments that target mid-to-high-frequency transmission like speech.
4. How to improve sound in a room with a stone wall?
Because wall-mounted installations are the fastest-growing retrofit method and are effective for mid-to-high frequencies, add wall-mounted acoustic panels to a room with stone walls. Choose from fabric, foam, wood, or metal panels (wood offers strong design adaptability) and place them on primary reflection points to absorb or diffuse sound and improve speech intelligibility and occupant comfort.
5. Stone vs. acoustic panels for sound quality?
Acoustic panels are purpose-built to absorb, diffuse, and block sound and are proven to manage mid-to-high-frequency noise; the research lists fabric, foam, wood, and metal as common panel materials. Stone is not described as an engineered acoustic panel in the research and should be treated primarily as an aesthetic finish—use acoustic panels when sound quality is the priority, or pair panels with stone for both performance and appearance.
