
Commercial masonry projects often fail at the corners, where misaligned joints or visible gaps can undermine the entire facade’s aesthetic. Choosing between prefabricated L-shaped units and field-cut miters is a decision that affects the visual finish, structural durability, and the long-term maintenance of the building envelope.
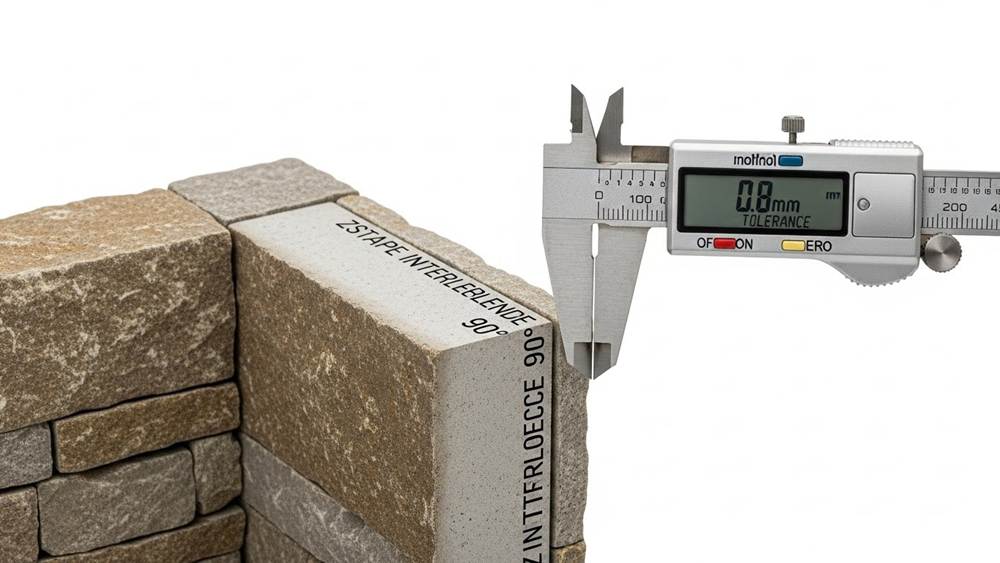
This guide examines the technical specifications and cost structures of both methods. We look at the benefits of factory-controlled environments—where prefab units can reduce labor time by 50%—and compare them to the precision requirements of field-cutting, which demands specific tools like 90 psi pneumatic clamping to prevent tear-out. The following sections also detail material selection for trim, anchoring protocols for window edges, and the standards for maintaining 0.8 mm alignment tolerances.
The Two Schools of Corner Treatment: Prefabricated vs. Field-Cut
Corner treatment follows two primary paths: prefabricated L-shaped units and field-cut mitering. Prefab units utilize factory-controlled environments to ensure bond strength and color consistency, while field-cutting provides the adaptability needed for irregular site dimensions and specific return requirements on long wall runs.
Factory-Assembled Corner Units and Quality Control Standards
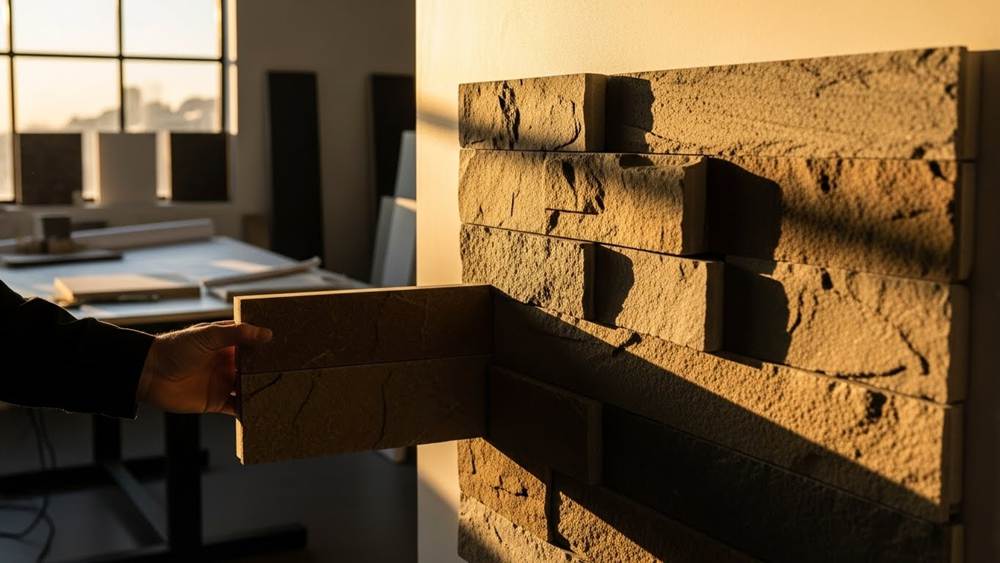
Factory-built façade elements provide design flexibility that often exceeds manual site-built assemblies. Manufacturing these components in climate-controlled environments ensures high-strength epoxy resin bonds between the stone and the substrate. This controlled process eliminates the variability introduced by weather and site conditions, resulting in a more predictable structural bond.
Using prefabricated panels reduces the need for specialized masonry tools and heavy cutting equipment at the job site. This shift simplifies the installation process and lowers the technical barrier for on-site crews. Strategic 2026 logistics planning favors prefab units, as they allow for faster shipping and significantly reduce the packaging waste typically associated with raw material shipments.
Field-Cut Miter Specifications for Custom Site Geometry
Technical specifications for field-cut corners require a minimum 50 ft wall base with a 3 ft return at the corners to maintain structural integrity. This method allows installers to achieve an exact fit for interior and exterior corners on non-standard architectural angles that factory units cannot accommodate. It remains the standard choice for projects involving irregular site dimensions and long, continuous wall runs.
Manual assembly requires skilled labor to address alignment issues and transport tolerances found in raw panel shipments. To reach the necessary 45-degree miter precision, crews should use infrared-guided cutting equipment. This technology ensures the tight joints and clean finishes required for high-end masonry work, providing the customization needed for complex site-built corners.
Advantages of Prefab Corners: Speed, Strength, and Consistency
Prefabricated L-shaped corners eliminate the need for complex on-site miter cuts, ensuring a seamless visual transition and structural integrity. By using factory-bonded units, installers achieve professional results significantly faster while maintaining a consistent 90-degree alignment that field-cutting cannot reliably replicate in 2026 construction environments.
| Component | Specification | Performance Metric |
|---|---|---|
| Primary Corner Posts | 100 x 100 SHS | Resistance for up to 10 storeys |
| Steel Standard | BS EN 10346 | Weather-resistant exterior stability |
| Panel Weight | 8 – 13 lbs/sqft | Low structural reinforcement needs |
| Assembly Window | 6 – 8 Weeks | Reduced on-site construction time |
Installation Efficiency and Visual Alignment
L-shaped corner pieces remove the requirement for 45-degree miter cuts on-site and reduce labor time by up to 50%. These units utilize factory-controlled Z-shape interlocking systems to hide joints and prevent visible grout lines, which maintains a natural stone appearance across the facade. Uniform 90-degree angles ensure the stone texture flows naturally around edges without the jagged gaps typical of manual field cutting. This standardization allows for a predictable assembly timeline of 6 to 8 weeks on-site for large-scale pre-engineered structures.
Material Durability and Structural Load Capacity
High-strength epoxy resin adhesives create a permanent bond between the natural stone and the panel base to resist stone detachment over the life of the building. Corner-supported modules utilize 100 x 100 SHS (Square Hollow Sections) to provide the compression resistance required for buildings up to 10 storeys. BS EN 10346 compliant steel sections offer reliable weather resistance and structural stability for exterior applications. These lightweight panels, weighing between 8 and 13 lbs/sqft, eliminate the need for heavy footings or additional structural reinforcement during the design phase.
The Technical Challenge of Field-Cutting 45-Degree Miters
Field-cutting 45-degree miters often results in tear-out and misaligned profiles due to manual clamping instability. Achieving a seamless join requires pneumatic pressure of 90 psi and hardened steel jigs (57-60 HRC) to eliminate vibration and blade wander on stone or wood-based materials.
| Technical Component | Specification | Operational Impact |
|---|---|---|
| Pneumatic Clamping | 90 psi @ 10 CFM | Eliminates material slippage during climb-cutting. |
| Dust Management | 700 CFM Total | Prevents debris buildup between the workpiece and fence. |
| Jig Material | 57-60 HRC Steel | Ensures rigid stability for scoring narrow or hard stock. |
| Drive System | Servo-driven Ball Screws | Provides high-precision rail guidance for repeatable angles. |
Geometry and Alignment Hurdles in Manual Cutting
Manual setups frequently cause tear-out on profiled hardwood and MDF. Without specialized side-pressure clamping, the material shifts when the blade engages the grain. Handheld tools lack the stabilized 90 psi pneumatic support found in industrial machinery, making the cut susceptible to vibration-induced inaccuracies that compromise the final join.
Maintaining fence parallelism requires digital gauges to reach sub-degree accuracy. Replicating these tolerances in field conditions is difficult without fixed machine tables and high-precision square rail guides. Blade wander on narrow stone or wood stock remains a constant risk when using standard saws that do not feature rigid vise jigs to lock the workpiece in place.

Technical Specifications for Production-Grade Miters
Industrial miter machines like the M45 rely on 700 CFM total dust collection via dual 4-inch ports. This high-volume extraction prevents debris from settling between the workpiece and the machine fence, a common cause of cut depth inconsistencies. Pneumatic systems must maintain a steady 90 psi at 10 CFM to secure parts firmly against the fences and eliminate in-process slippage.
Hardened steel vise jigs rated at 57-60 HRC provide the necessary rigidity for 45-degree scoring on varied materials. Modern production environments achieve 150-175 mitered units per 8-hour shift by using servo-driven ball screws for rail guidance. These systems use 3-phase electrical power and high-speed cycles to produce perfect corners that manual field methods cannot reliably replicate.
Elevate Your Architectural Projects with Authentic Stacked Stone

Selecting the Right Trim and Transition Materials
Proper selection for 2026 projects relies on matching material durability with application geometry. Extruded aluminum alloy 6063 is preferred for crisp edge detailing, while stainless steel or brass suits high-traffic floor transitions. Key specifications include a 3/8-inch minimum joint depth and 18-inch bend radius for curved installations.
Material Performance and Composition Standards
Extruded aluminum alloy 6063 provides superior corrosion resistance and sharper edge definition compared to traditional roll-formed steel. This alloy selection impacts long-term structural integrity, especially in environments with varying moisture levels where standard metals might degrade. For projects requiring specific aesthetic finishes, anodized aluminum, stainless steel, and solid brass options for same-height floor transitions ensure compatibility with diverse stone textures.
The functional differences between extruded and roll-formed metals determine the final quality of edge finishing. Using specialized profiles for transitions ranging from 2.5mm to 8mm in height allows for precise alignment between stacked stone panels and adjacent surfaces. Selecting the correct material prevents premature wear and ensures the transition remains a durable component of the building envelope.
Technical Geometry and Installation Tolerances
Installers must maintain a minimum joint cavity depth of 3/8 inch (9mm) to accommodate standard transition profiles. This depth is necessary for the trim to sit flush and provide a secure anchor point for the stone. For ceiling transitions, 120-inch slip joints manage thermal expansion and contraction, preventing the material from warping as temperatures fluctuate within the structure.
Curved applications require a minimum 18-inch bend radius to prevent material crimping and maintain visual continuity. Dynamic curving capabilities allow for straight and curved products on single continuous pieces, which reduces the number of visible joints. If ceiling drops exceed 3/8 inch below the grid flange, adjustable trim clips provide the necessary secure fastening to hold the system in place without compromising the alignment of the panels.
Installation Norms for Window/Door Edges and Top Caps
Professional installation requires corner fixings placed within 150–250mm and intermediate spacing limited to 700mm. Maintain rough opening clearances of 10–12mm to allow for proper sealing and thermal expansion, while adding central supports for units wider than 1800mm to prevent sagging.
Structural Anchoring and Fixing Intervals
Anchoring window or door frames requires strategic fastener placement to ensure long-term stability. Placing primary corner fixings between 150mm and 250mm from the external corner provides the frame with maximum leverage against structural movement. Installers should maintain intermediate fixing centers at 600mm to 700mm to distribute the weight across the building envelope. Every installation needs at least two fixings per jamb and sill to keep the frame secure and prevent shifting over time.
Wide openings require specific reinforcements to prevent structural failure. For window thresholds exceeding 1800mm, add central head and sub-sill fixings to stop the frame from bowing under its own weight or wind pressure. This additional support keeps the unit square and functional throughout its service life, preventing issues with sash operation or air leaks.
Clearance Tolerances and Weatherproofing Standards
Accurate rough opening clearances allow for thermal movement and effective sealing. Maintain a gap between 10mm and 12mm at the head, jambs, and sill to provide enough space for shimming and the application of energy-efficient sealants. Door frames require a minimum 6.35mm gap between the frame and any exterior trim, siding, or masonry to prevent moisture from becoming trapped against the frame. This spacing also allows materials to expand naturally without putting pressure on the door unit.
The mounting seam should measure between 10mm and 30mm. Fill this space with energy-efficient sealants compatible with the specific building substrate to ensure a weather-tight bond. For any window or door unit where the trim opening is wider than 600mm, use sill support bars to distribute the load effectively. These bars prevent the sill from sagging, which protects the integrity of the lower weather seal and prevents water infiltration.
Color and Texture Matching Protocol Between Corner and Panel
Achieving a perfect match requires a 4×4 ft sample range to establish acceptable color variance and a minimum 3/4-inch quirk return on corners. Using ASTM C33 sand and white cement for pigmented mixes ensures aggregate exposure and matrix tones remain uniform across all cast pieces.
Range Verification and Sample Approval Standards
Production teams create 4 ft. x 4 ft. (1.2 m x 1.2 m) sample panels to establish the baseline for aesthetic acceptance. These large-scale mock-ups demonstrate the full range of color and texture variation across three to five distinct units, providing a more accurate representation of aggregate distribution than smaller samples. While 12 x 12 x 2 inch design reference samples work well for initial finish verification, the larger range panels govern the final manufacturing standards.
Maintaining consistency throughout the project requires a single authority for acceptance. This centralized judgment ensures that the subjective evaluation of aggregate density and matrix tone remains steady across different production cycles. Sourcing all raw materials from the same batch or quarry section further reduces the risk of natural geological shifts that could cause visual discrepancies between corner units and flat wall panels.
Technical Detailing for Aggregate Uniformity
Precise geometric specifications prevent finishing issues at the edges of precast units. Maintaining a quirk return size of at least 3/4 inch (20 mm), or 1.5 times the maximum aggregate size, ensures that the concrete mix flows evenly without trapping aggregate or causing segregation. For exposed finishes utilizing 1/2-inch aggregate, implementing a 1/4- or 5/16-inch radius for edge rounding provides a durable transition and minimizes the likelihood of chipping at the joints.
Standardizing matrix tones involves using ASTM C33 sand and white cement to provide a neutral base for pigmentation. This combination keeps the background color consistent, allowing the natural colors of the aggregate to stand out. Utilizing 12-inch corner returns influences the casting geometry of all adjacent pieces to create balanced shadow lines. For projects requiring more depth, deeper 3-inch quirk returns can articulate panel thickness and enhance the visual transition between the building’s planes.
Final Thoughts
Project requirements and site geometry drive the choice between these two methods. Standard installations benefit from the speed and structural predictability of factory-assembled units. These components lower labor costs and ensure a consistent finish through climate-controlled bonding processes. When architectural plans involve non-standard angles or irregular wall runs, field-cut mitering provides the necessary adaptability, provided the crew uses precision equipment to prevent material damage and ensures tight joints.
Successful facade execution relies on matching installation techniques with specific material standards. Using high-strength epoxy bonds and weather-resistant steel supports helps the building envelope withstand environmental stress. Precise alignment and proper clearance for thermal expansion prevent future maintenance issues like stone detachment or seal failure. These technical decisions create a durable exterior that maintains its visual quality and structural integrity over time.
Preguntas frecuentes
Are prefabricated corners more expensive than field-cutting stone?
Prefabricated corners cost significantly less than on-site cutting. Industry data indicates prefab elements range from $55 to $350 per square foot, while traditional field-cutting methods cost between $100 and $500. Choosing prefab units reduces project timeframes by up to 50% and cuts labor expenses in half.
How can I finish edges cleanly without using visible trim?
Miter the stone edges at a 45-degree angle to create a seamless join for outside corners and wall niches. For transitions where stone meets drywall, apply color-matched caulk or a minimalist slim-profile edging like Schluter Jolly to maintain a clean aesthetic without bulky trim pieces.
Is extra reinforcement necessary for a 45-degree miter joint?
Adhesive alone is structurally insufficient for most miter joints and susceptible to separation. Professional installers reinforce these joints using splines, biscuits, or dowels. For decorative applications, adding mechanical fasteners or V-nails within 15 minutes of adhesive application prevents joint failure under stress.
What is the standard protocol for transitioning stacked stone to window frames?
Use dedicated trim pieces, typically 2¼ inches wide, or GSM trim flashing with a 3-inch minimum vertical leg. Set the trim back 1¾ to 2¼ inches from the frame edge to ensure proper clearance. The installation surface must remain plumb within ¼ inch over a 10-foot span to ensure a flush transition.
How do manufacturers align textures between corner pieces and flat panels?
Manufacturers use precision miter equipment to maintain strict alignment tolerances. Premium grade products limit edge alignment variance to 0.8 mm (0.031”) and keep end-match misalignment under 5 mm (0.197”) to ensure the stone texture flows seamlessly around the corner.
Which adhesive colors work best for hiding seams in a miter cut?
Select a manufacturer-recommended joint adhesive that matches the specific panel color for the best aesthetic result. Specialized systems offer over 250 specific adhesive colors to ensure the seam remains invisible and the finished corner appears as a solid, continuous piece of stone.
