Installing stacked stone corners correctly enhances the overall appearance and durability of your project. When you nail the corners, everything else falls into place—they’re the foundation of a clean, professional look.
This guide simplifies the process with clear, precise steps to achieve a professional finish. You’ll learn the techniques that separate amateur work from expert craftsmanship.
Follow along to learn how interlocking and mitered corners differ and how to install each effectively. We’ll walk through the entire process, from prep work to final adjustments, so you can tackle this project with confidence.
Herramientas & Materials Needed for Stone Veneer Installation
Getting the right tools and materials upfront makes the difference between a frustrating install and a smooth one. Here’s what you need to gather before you start, so you’re not running back to the supply store halfway through the project.
| Item | Description | Notes |
|---|---|---|
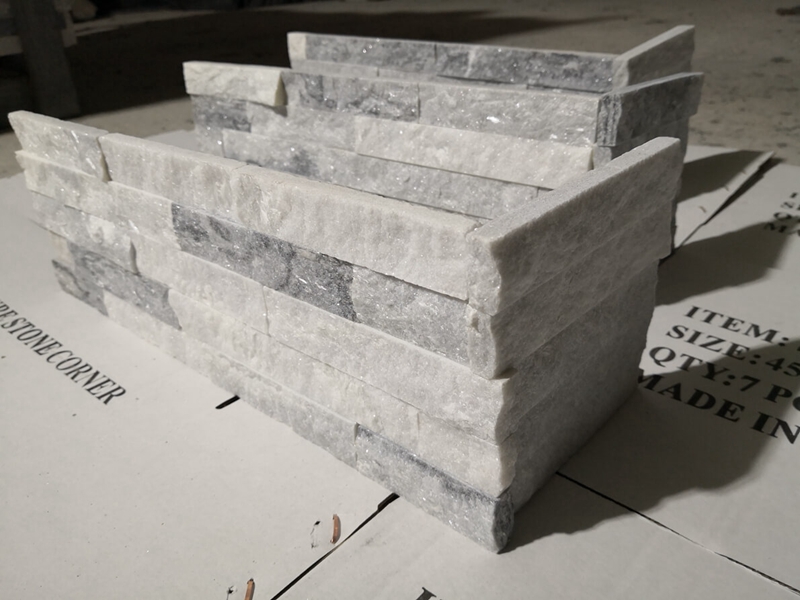
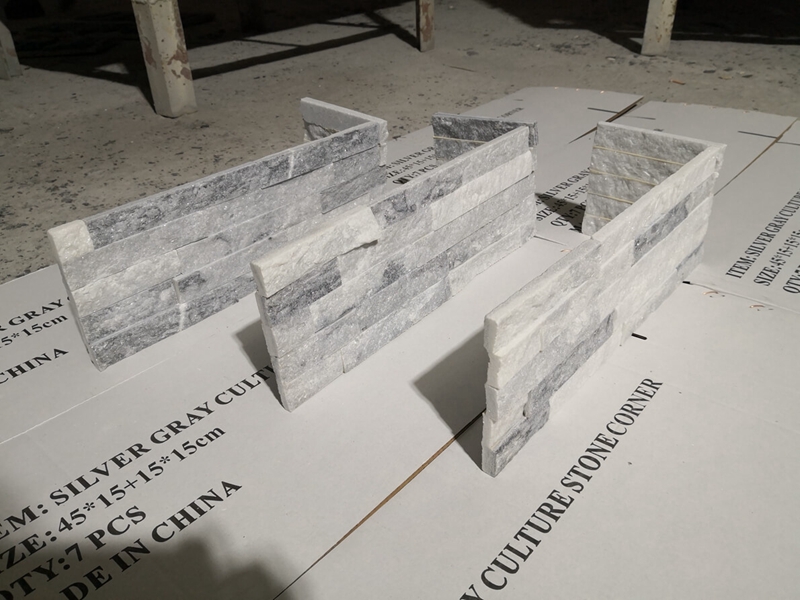
| Stacked stone panels | Flat panels and corner pieces | Choose interlocking or mitered corners based on your design preference |
| Mortar and mortar paste | For adhering panels to substrate | Use the recommended mix for stone veneer to ensure proper bonding |
| Trowel and grout bag | To spread mortar and fill joints | Pick the right size for precision work and clean joints |
| Diamond wet saw | For cutting stone veneer | Essential for making miter cuts on corners and fitting panels around obstacles |
| Metal lath and scratch coat | Surface preparation for masonry walls | Apply before setting panels to create a stable base |
| Moisture vapor barrier | Protects substrate from moisture | Required for exterior installations or areas prone to dampness |
| Level and measuring tape | For layout accuracy | Check alignment continuously to keep everything plumb and square |
| Safety gear | Gloves, goggles, dust mask | Protect yourself during cutting and mortar work—stone dust and sharp edges are no joke |
Step 1: Prepare and Level the Installation Surface
You can’t build a solid foundation on a weak base, and the same goes for stacked stone corners. Start by cleaning your wall thoroughly—sweep away dust, scrape off loose paint, and remove any debris that’ll interfere with adhesion. Think of this step as setting the stage for everything that follows.
If you’re working with masonry or wood framing, you’ll need to attach metal lath and apply a scratch coat. This creates the grippy surface your stone needs to stay put for years. Don’t skip this—it’s what separates a professional installation from one that fails in a few months.

For exterior walls or any damp-prone areas, install a moisture vapor barrier before you do anything else. Water damage is the silent killer of stone installations, and this simple layer protects your investment from behind-the-scenes deterioration.
Grab your level and check the surface for flatness. Even small bumps or dips will throw off your alignment down the line, making corner installation a headache. Address any unevenness now by filling low spots or grinding down high points—you’ll thank yourself when those corners slide into place perfectly later.
Step 2: Install the Starter Strip and Position Corner Pieces
Now you’re setting up the foundation that’ll keep everything aligned. Start by attaching your starter strip along the base line—take your time here and check that it’s perfectly level. This strip supports all your panels above it, so if it’s off even slightly, you’ll notice it later.
Here’s where corners become your priority: place them first, before any flat panels. You’re working with either interlocking two-piece corners or mitered one-piece styles, depending on your system. Keep that 2.5 to 3-inch gap from the wall corner—this space is where your corner pieces will sit.
Secure each corner piece with galvanized screws or whatever fasteners your manufacturer recommends. Check vertical alignment as you go. When these corners are set right, they become your visual anchor. Everything else will build off them, so you want them straight and solid from the start.
Elevate Your Projects with Authentic Ledger Stone
Add timeless natural beauty and versatile design options with our high-quality paneles de piedra contable. Perfect for contractors, distributors, and designers seeking durable, easy-to-install stone that enhances any interior or exterior space.

Step 3: Install Flat Panels and Blend with Corners
Once your corner pieces are locked in place, you’re ready to bring the rest of your wall to life. Start installing your flat panels right next to the corners, working outward from left to right. This approach keeps your most visible seams clean and lets you build momentum as you move across the wall.
Here’s the key: avoid stacking mortar joints directly on top of each other in consecutive rows. Offsetting them creates that natural, hand-laid stone look you’re after. Think of it like brickwork—stagger the seams so the eye flows smoothly across the surface instead of catching on vertical lines.
As you work, pay close attention to how your flat panels meet the corner pieces. Careful edge alignment and consistent joint filling will make the transition seamless. If you’re working with natural stone veneer, this is where your patience pays off—each piece should nestle into place like it belongs there.
When you need to trim panels or fit them around obstacles, reach for a diamond wet saw. It gives you clean, precise cuts without chipping the stone face. Mark your cuts clearly, and remember: measure twice, cut once. Custom fits take a little extra time, but they’re what separate a professional-looking installation from an amateur one.
Step 4: Adjustments, Caulking, and Finishing Touches
Once your corner pieces are in place, you’ll need to fine-tune the alignment. Don’t worry if things aren’t perfectly level at first—you’ve got about half an inch of vertical play in each piece. Gently shift the overlapped sections up or down until your horizontal lines run true across both walls. This small adjustment makes a huge difference in the final look.
Next, grab your caulk gun. Seal every joint where panels meet corners and around any openings like windows or doors. This step isn’t just cosmetic—it’s your defense against moisture sneaking behind the stone and causing damage down the road. Use a high-quality exterior-grade caulk that matches your stone color.
For inside corners, you might need custom fits. J-channels work great for panelized systems, but if you’re working with piedra natural, a scribe-and-cut method gives you that seamless transition. Take your time here—precision pays off.
Finally, wipe away any excess mortar while it’s still workable. Let everything cure according to the manufacturer’s guidelines before exposing it to weather or heavy traffic.
Expert Tips & Avoiding Common Installation Mistakes
Getting stone veneer corners right comes down to learning from what doesn’t work. The mistakes people make are predictable, and the good news is they’re all preventable. Let me walk you through the pitfalls and how to sidestep them.
| Common Mistake | Solution / How to Avoid |
|---|---|
| Ignoring surface prep or uneven substrate | Start by cleaning the wall thoroughly and leveling any bumps. If you’re working with masonry, apply metal lath and a scratch coat to create a stable foundation. Skipping this step compromises everything that follows. |
| Installing flat panels before corner pieces | Set your corner assemblies first. They act as visual anchors and make the rest of the installation align naturally. This approach gives you confidence and prevents awkward adjustments down the line. |
| Overlapping mortar joints between courses | Stagger your joints as you work upward. This breaks up the pattern visually and distributes structural stress more evenly. The result looks authentic and performs better long-term. |
| Skipping moisture barrier on exterior walls | Always install a proper moisture barrier behind exterior applications. Water damage hidden behind stone veneer is expensive to repair. This simple step protects your structure from years of potential problems. |
| Poor cutting technique causing uneven fits | Use a wet saw with a diamond blade and mark your cuts clearly before making them. Cut as you go since each row has unique requirements. Clean edges make a professional difference. |
Best Practices for Surface Preparation & Mortar Mixing
Getting your foundation right makes all the difference. You’re not just slapping stone on a wall—you’re creating a bond that needs to last for years. Let me walk you through the prep steps that separate a professional installation from one that’ll have you troubleshooting down the road.
Start by applying a proper scratch coat over your metal lath or masonry substrate. This textured layer gives your mortar something to grip onto, and it’s non-negotiable if you want optimal adhesion. Think of it as creating tiny anchors across your entire surface.
When mixing mortar, follow the manufacturer’s specifications exactly. The consistency should resemble creamy peanut butter—not too wet, not too stiff. If you’re working in hot or dry conditions, pre-wet your surfaces lightly. This prevents the substrate from sucking moisture out of your mortar too quickly, which would compromise the bond before it has time to cure properly.
Here’s a technique that’ll boost your installation quality: backbuttering. Apply a thin layer of mortar directly to the back of each veneer panel before pressing it onto the wall. This increases the contact area between stone and substrate, giving you:
- Better adhesion and longer-lasting results
- Fewer voids or air pockets behind the stone
- Improved resistance to moisture infiltration
These preparation steps might add time to your project, but they’re what transform a good installation into one that stands the test of time.
Frequently Asked Questions About Stacked Stone Corners
What are stacked stone corner pieces and why use them?
Stacked stone corner pieces are pre-molded or naturally cut stones designed to wrap around exterior and interior corners, creating a seamless transition between two walls. They save you time and eliminate the need for complex miter cuts while giving your project a polished, professional appearance.
Can I cut my own 45-degree angled corners instead of buying corner pieces?
You can cut your own mitered corners using a wet saw with a diamond blade, but it requires precision and experience. Pre-made corner pieces are often more reliable and save significant time, especially if you’re new to stone installation.
Are interlocking corner panels more expensive than mitered ones?
Interlocking corner systems typically cost more upfront but reduce labor time and waste. If you’re doing a large project or value speed and consistency, the extra investment often pays off in efficiency and fewer cutting errors.
How do interlocking corner systems function during installation?
Interlocking corners slide over adjacent flat panels and snap into starter clips or strips. You’ll install your flat panels first, leaving space at the corner, then secure the corner piece with screws—no mortar or complex cuts needed.
What surface types are best suited for stacked stone veneer installation?
Clean, level surfaces like plywood, concrete, drywall, and masonry work well. The substrate must be structurally sound and properly prepared—sometimes requiring a scratch coat or moisture barrier depending on your material and climate.
Your Stacked Stone Corner Project Is Complete
You’ve just wrapped up one of the trickiest parts of any stone veneer install. When you prep your surfaces right, set those corners first, and blend your panels with care, you’re not just finishing a project—you’re building something that’ll look sharp and hold up for years.
The corners set the tone for everything else. You nailed them, and now your walls have that crisp, polished edge that makes the whole space feel intentional. Take a step back and appreciate what you’ve built.
If you want to lock in that quality for the long haul, think about sealing your stone veneer. It’s a simple step that keeps moisture out and protects your work from the elements. You’ve come this far—might as well finish strong.
