
Sourcing durable kitchen backsplashes determines the long-term profitability of residential renovation projects. While resin-based imitations offer lower upfront costs, they frequently fail under thermal stress, leading to costly warranty claims and dealer reputation damage.
We utilize 100% natural quartzite and slate that meet rigorous ASTM heat-cycle standards. Our Z-shape panels feature CNC diamond-blade edges and 95% same-batch hue uniformity to eliminate visible joints and ensure professional-grade project consistency.
Is a Stacked Stone Backsplash Practical for a Busy Modern Kitchen?
Natural stacked stone provides high heat resistance and durability for modern kitchens. CNC-precision interlocking panels and proper sealing minimize maintenance while offering better long-term ROI than synthetic alternatives.
Heat Resistance and Structural Durability in Cooking Zones
Standard kitchen environments subject backsplashes to extreme temperature fluctuations and high humidity. While resin-based faux stone can warp or discolor near professional-grade ranges, natural mineral compositions remain stable under intense heat. This makes quartzite and slate particularly effective for high-output cooking zones.
- Material Stability: 100% natural quartzite and slate handle direct heat exposure without the melting risks associated with plastic-based imitations.
- Moisture Performance: High salinity and humidity resistance prevent structural degradation in heavy prep areas or coastal climates.
- UV Stability: Natural minerals do not fade when exposed to direct sunlight from kitchen windows, maintaining color consistency for decades.
From a B2B perspective, sourcing 100% natural stone ensures fewer product liability claims. We prioritize materials that meet ASTM standards for freeze-thaw and heat cycles, providing a reliable solution for dealers serving both residential and commercial kitchen contractors.
CNC Diamond-Blade Precision for Seamless Maintenance
The biggest concern with stacked stone in a kitchen is grease accumulation in the crevices. Traditional hand-cut stones often leave irregular gaps that act as “dirt catchers.” Precision engineering solves this by creating tighter tolerances between each modular panel.
- Interlocking Design: Z-shape and S-shape panels utilize a male-female connection system to camouflage vertical joints and eliminate visible “stepped” gaps.
- Cutting Standards: CNC diamond-blade edges ensure every 6″ x24″ panel fits flush, reducing the surface area where cooking oils can settle.
- Sealing Protocol: Applying a high-quality impregnating sealer fills the natural pores of the stone, making the surface oil-repellent.
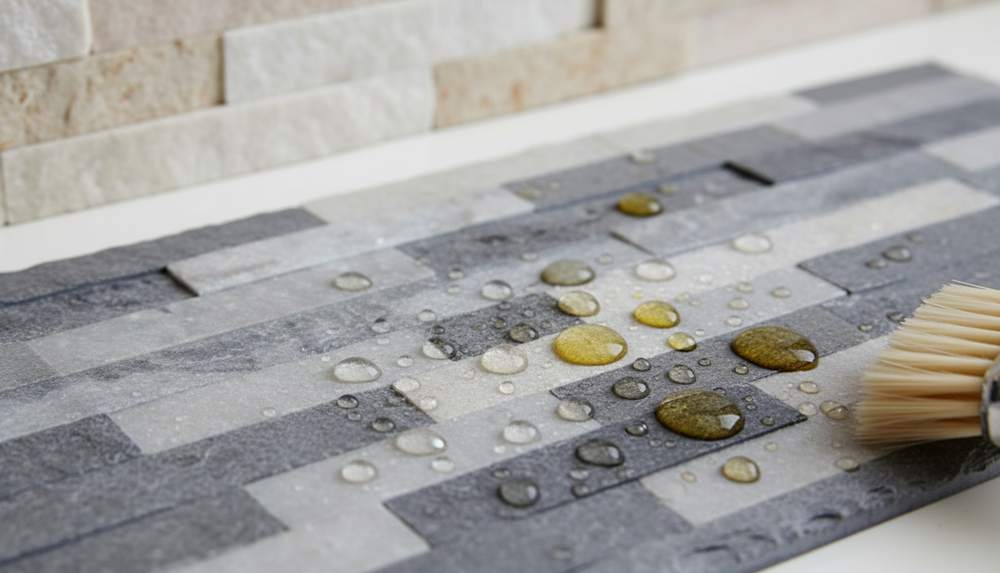
Maintenance in a busy kitchen doesn’t have to be difficult. Using a stiff-bristled brush with pH-neutral stone cleaners allows for quick removal of splatter. Because Top Source Stone controls the supply chain from the quarry to the crate, we ensure same-batch consistency, so the texture remains uniform across the entire wall, making cleaning more predictable and efficient.

Managing Grease and Splatter: Professional Sealing and Cleaning Strategies
Apply penetrating sealers immediately to block oil. Use pH-neutral bio-enzymatic cleaners and soft brushes to remove grease from stone textures without damaging the mineral surface.
| Maintenance Phase | Product Type | Functional Goal |
|---|---|---|
| Post-Installation | Penetrating Sealer | Invisible oil-resistant barrier |
| Daily Cleanup | pH-Neutral Soap | Surface degreasing |
| Deep Extraction | Bio-Enzymatic Degreaser | Digesting organic cleft residue |
| Annual Upkeep | Solvent-Based Sealer | Maintain 95% hue uniformity |
Implementing Bio-Enzymatic Degreasers for Textured Surfaces
Standard kitchen cleaners often fail in the deep crevices of piedra natural. Bio-enzymatic cleaners provide a superior solution by utilizing non-pathogenic bacteria to consume organic grease and oil residues trapped within the stone’s natural clefts. This biological action targets the root of the buildup without requiring abrasive force that could damage the stone face.
- Microbial Digestion: Active bacteria break down complex fats into water and carbon dioxide.
- Mineral Protection: pH-neutral chemistry preserves the structural integrity of Slate and Quartzite panels.
- Deep Agitation: Soft-bristle brushes reach into the deep shadows of the Rough Series without causing surface scratches.
- Pressure Control: Avoiding high-pressure washing prevents forced moisture from compromising the substrate or epoxy bond.
Post-Installation Sealing with Penetrating Stone Protectors
Natural stone is inherently porous, so sealing is not optional for kitchen environments. Applying a premium penetrating sealer immediately after the epoxy adhesive cures creates a subsurface shield. This protector allows the mineral to breathe while effectively blocking cooking splatters from entering the stone’s core.
- Invisible Barrier: Penetrating sealers soak into the pores rather than sitting on top, preserving the natural split-face aesthetic.
- Maintenance Efficiency: Sealed 100% natural stone facilitates faster daily cleanup by keeping oils on the surface.
- Long-term Aesthetics: Annual re-sealing in high-splatter zones behind cooktops maintains the 95% hue uniformity required for high-end designs.
- Material Specificity: This protocol is essential for porous materials like Copper Canyon slate or Arctic Golden quartzite to prevent permanent staining.
Factory-Direct Pricing on Premium Ledger Panels

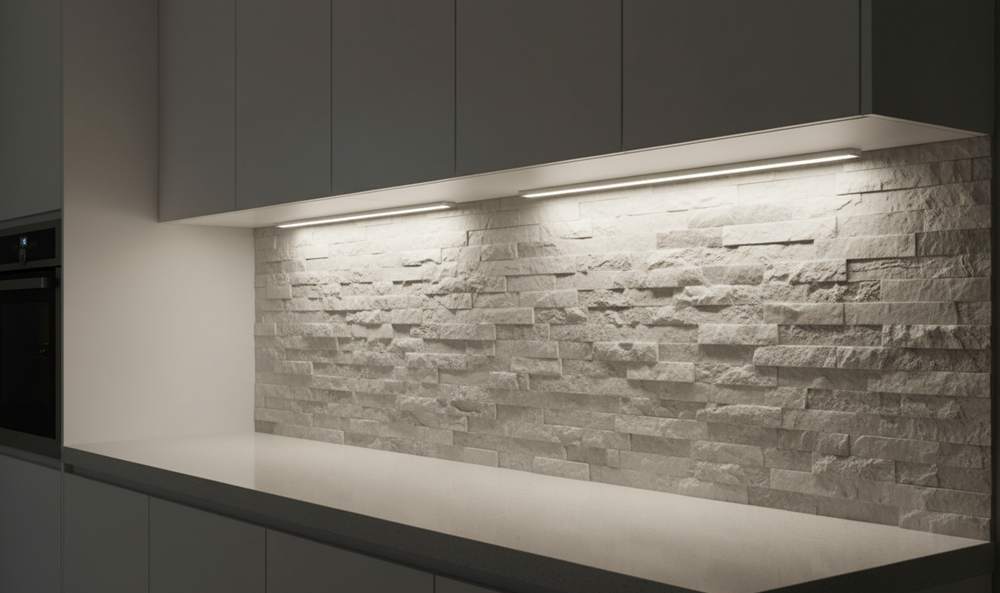
Lighting Your Backsplash: How to Integrate Under-Cabinet LED Strips?
Mount low-voltage LED tapes 1–2 inches behind the cabinet face frame before installing stone panels to ensure hidden wiring and a balanced 120-degree light spread.
Strategic Placement for Uniform Light Distribution
Placement determines the success of the lighting array. We recommend positioning LED strips exactly 1 to 2 inches behind the cabinet face frame. This specific distance allows the 120-degree light beam to distribute evenly across the stone surface without creating hot spots or heavy shadows at the top of the backsplash.
Installation requires a clean substrate for long-term adhesion. We use denatured alcohol to prep the cabinet undersides, ensuring the self-adhesive tape bonds permanently. To keep the power system entirely concealed from view, we follow these technical layout requirements:
- Wiring Concealment: Route jumper wires through 1/2-inch drilled passageways in cabinet sides before mounting the light strips.
- Connection Integrity: Test polarity and all wiring connections before the final stone installation to avoid complex adjustments once the panels are set.
- Surface Prep: Scrub the mounting area with alcohol to remove grease or sawdust that might cause the adhesive to fail over time.
Accentuating Natural Split-Face Textures with Precision Alignment
The primary goal of under-cabinet lighting is to emphasize the architectural depth of the stone. Natural split-face ledger stone features depth variations ranging from 1cm to 3.5cm. Using grazing light from above creates shadows that highlight these unique mineral textures, providing a premium aesthetic for high-end kitchen projects.
Manufacturing precision directly impacts how light interacts with the wall. We utilize CNC diamond-blade cutting for our Z-shape panels to ensure the interlocking edges are tight. This precision prevents light from catching on irregular vertical joints, which often occurs with standard straight-cut panels. We maintain visual consistency across the installation with these specifications:
- Wall Transitions: Use matching L-corners to synchronize texture and shadow patterns at every 90-degree turn.
- UV Stability: Our 100% natural stone panels offer high UV stability, ensuring the continuous LED exposure will not cause fading or discoloration.
- Joint Camouflage: The interlocking “male-female” connection system on Z-shape models eliminates visible stepped gaps that LEDs often expose.
Modern Kitchen Trends: The Rise of White Marble Micro-Ledger Panels.
White marble micro-ledger panels offer a high-margin, modular alternative to slabs, providing 3D texture and seamless installation for premium 2026 kitchen designs.
Aesthetic Versatility of Natural Marble in Minimalist Kitchens
The design market is shifting away from flat, glossy subway tiles. Modern residential interiors now favor 3D micro-ledger textures that add tactile depth to kitchen backsplashes. This movement prioritizes organic surfaces that break the monotony of minimalist cabinetry without cluttering the visual field.
Arctic White and Glacier White marble dominate these specifications. These materials maximize natural light reflection, a critical requirement for modern open-plan kitchens. Unlike porcelain or faux alternatives, authentic natural stone provides unique vein patterns that cannot be replicated, ensuring every installation is distinct.
CNC Diamond-Blade Precision and Seamless Interlocking Design
Precision manufacturing makes these textured panels viable for high-end backsplashes. We utilize advanced engineering to ensure the stone is easy to handle and visually consistent across large orders. This level of detail eliminates the “DIY look” often associated with cheaper, hand-cut stone products.
- Interlocking System: Z-shape and S-shape panels utilize a male-female connection to camouflage vertical joints and eliminate visible “stepped” gaps.
- Hue Uniformity: CNC diamond-blade cutting ensures 95% color consistency within a single batch, preventing patchy installations.
- Thin-Profile Engineering: Standard thickness of 1cm to 2.5cm allows for installation on existing substrates without requiring extra structural footings or heavy-duty anchors.
By controlling the production from the quarry to the crate, we maintain the structural integrity needed for high-traffic cooking zones. These panels resist heat and maintain their UV stability, providing a durable solution for both residential and commercial kitchen environments.
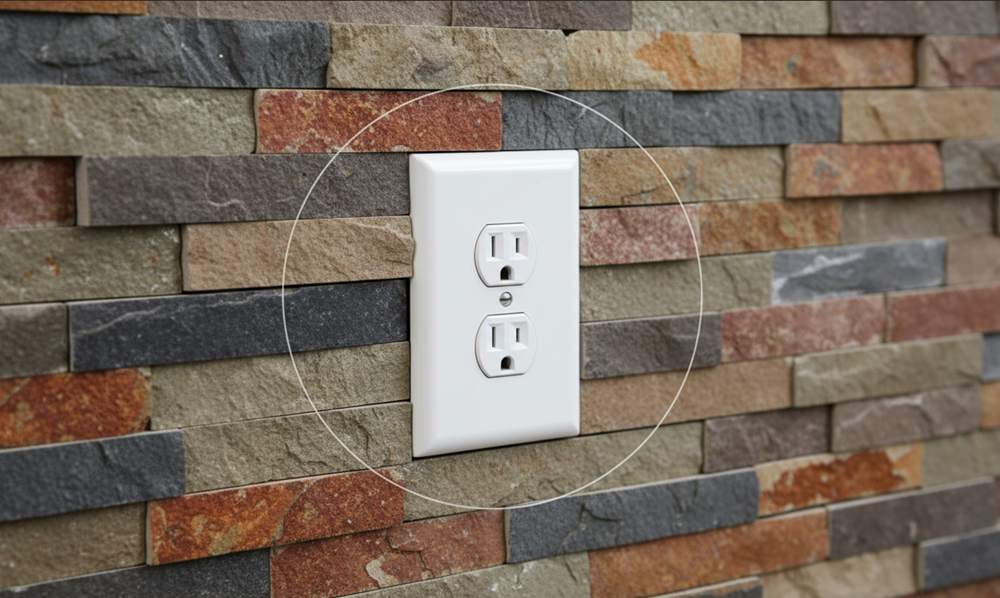
Precision Installation: How to Handle Electrical Outlets and Switches?
Bridge the 1cm to 3.5cm stone depth with box extenders and GFCI outlets for a safe, professional-grade finish that meets modern building codes.
Safety Protocols and Box Extension Basics
Before touching any wiring, disconnect the power at the main breaker box. Use a voltage tester to confirm the circuit is dead. This simple step prevents accidents on-site and is the baseline for any professional installation.
- Box Extenders: Install UL-listed electrical box extenders to bring the outlet flush with the new stone surface.
- GFCI Compliance: Use Ground Fault Circuit Interrupter receptacles to meet 2026 safety standards for kitchens and moisture-heavy zones.
- Secure Wiring: Connect hot, neutral, and ground wires to their correct terminals to prevent electrical arcing behind the revestimiento de piedra.
- Voltage Testing: Always verify the dead circuit before starting work to ensure installer safety.
Precision Cutting for 1cm-3.5cm Stone Thickness
Piedra fuente superior panels feature a thickness range from 1cm up to 3.5cm for premium rough-cut varieties. This depth requires longer mounting screws and precise cutting to ensure the outlet cover plate sits level against the textured natural stone.
- Screw Selection: Account for the 1cm to 3.5cm thickness variation when choosing mounting screws for the outlet.
- CNC Precision: Use CNC diamond-blade tools to create clean, rectangular cutouts that match the electrical box dimensions.
- Interlocking Layout: Arrange Z-shape panels carefully around the outlet to maintain the seamless pattern while allowing the cover plate to overlap the cut edges.
- Structural Bonding: Back-butter the stone around the box to ensure a permanent bond that prevents movement when plugging in appliances.
For the best results, have the stone fabricator cut the outlet holes during the initial layout. If the stone texture is particularly rough, use an angle grinder to slightly flatten the area where the cover plate makes contact. This ensures a professional, flush finish that avoids unsightly gaps between the stone and the hardware.
Preguntas frecuentes
Are stacked stone backsplashes difficult to clean in a high-use kitchen?
The textured surface of piedra natural traps more debris than flat tile, but the cleaning process remains manageable with the right tools. We recommend using a stiff-bristled brush instead of a rag to reach into the crevices of the split-face surface. Regular application of a stone sealer every 12 months prevents grease from penetrating the pores, making it easier to wipe away splatters with pH-neutral dish soap and warm water.
Is natural stacked stone safe for installation directly behind a gas stove?
Yes, our 100% natural slate and quartzite panels are inherently heat-resistant and non-combustible. Unlike engineered quartz, which contains flammable resins that may yellow or crack near high heat, piedra natural handles the thermal output of professional-grade ranges. For 2026 building code compliance, ensure you install the stone over a fire-rated substrate like cement board rather than standard drywall.
How do you handle electrical outlets on uneven stone surfaces?
To accommodate the 1cm to 3.5cm thickness of our panels, use electrical box extenders to bring the outlet flush with the stone face. For our ‘Rough Series’ or high-relief ledgestone, installers often use a diamond-blade grinder or Dremel tool to create a flat recessed area so the outlet cover sits snugly against the wall without gaps.
Does the stone color vary significantly between different boxes?
Because we source our material from the same quarry vein for each 2026 production run, we maintain a 95% hue uniformity within a single batch. While piedra natural always features organic variations, our direct quarry control minimizes the ‘patchy’ look common in low-grade retail products. We suggest dry-laying panels from multiple crates before installation to ensure a balanced distribution of tones.
What is the best way to remove stubborn grease stains from unsealed stone?
If grease penetrates the stone, apply a poultice made of baking soda and water. Mix two teaspoons of baking soda with one tablespoon of water to create a thick paste, spread it over the stain, and let it sit for 15 minutes before scrubbing with a soft brush. Avoid using vinegar, lemon juice, or abrasive bleach, as these can etch the minerals and dull the natural finish of the stone.
