
A stacked stone mailbox can transform your home’s curb appeal while offering durability that lasts for years. You’re investing time and effort into this project, so getting it right the first time matters.
This guide walks you through each phase of construction, from selecting materials to finishing touches. You’ll learn the practical steps that lead to a professional-looking result.
Before you start, check your local USPS regulations for mailbox height and placement requirements. Many homeowners have had to rebuild because they didn’t verify these rules upfront, and you can avoid that frustration with a quick call to your local post office.
ツール & Materials Needed for Construction
Before you break ground, let’s make sure you’ve got everything lined up. A 積み重ねられた石 mailbox isn’t overly complex, but gathering your tools and materials upfront will save you trips to the hardware store and keep your momentum going. Think of this as your project shopping list—nothing fancy, just the essentials to get the job done right.
| Item | Details/Specs | Quantity |
|---|---|---|
| Concrete mix | Quick-setting formula for a solid footing that cures fast | 1-2 bags |
| CMU blocks | Standard concrete masonry units for building the core structure | 4-6 blocks |
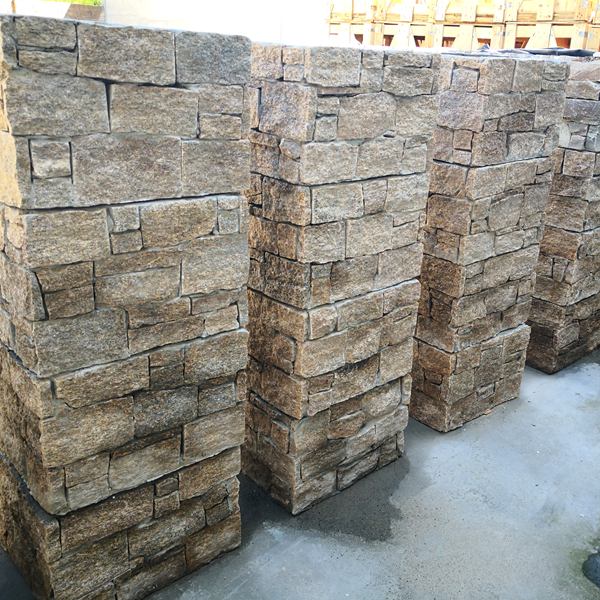
| Stacked stone veneer panels | Natural stone or high-quality synthetic options to match your home’s style | As per pillar size |
| Mortar & grout | For bonding blocks and adhering stone panels securely | Sufficient amount |
| Rebar or metal stakes | Reinforces the footing and adds structural stability | 2-4 pieces |
| 4×4 or 6×6 wooden post | Treated lumber for the structural core support | 1 piece |
| Mailbox insert | Standard USPS-approved mailbox that fits your design | 1 piece |
| Capstone | Decorative top piece that protects the structure and adds a finished look | 1 piece |
| Trowel and level | Essential for applying mortar smoothly and keeping everything straight | 1 each |
| Sealer | Protects natural stone from weather damage and staining | 1 container |
| Safety gear | Gloves, safety goggles, and a dust mask to protect yourself during construction | 必要に応じて |
Step 1: Prepare and Pour the Concrete Footing
A solid foundation sets the stage for everything that comes next. Before you break ground, take time to choose your location carefully. Check with your local postal service and municipality to confirm the mailbox height and placement rules in your area—this prevents costly mistakes down the road.
Start by digging your footing hole about 12 to 18 inches deep, making it wide enough to support the weight of your stone pillar. Reinforce the footing with rebar or metal stakes to add structural strength and prevent settling over time.
Mix your concrete according to the manufacturer’s instructions and pour it evenly into the hole. Level the surface carefully, then let it cure fully before moving forward. This patience pays off in the stability and longevity of your mailbox.

Step 2: Build the Core Structure with CMU Blocks
Once your footing’s fully cured, you’re ready to start stacking. Lay your CMU blocks one at a time, spreading mortar evenly on the bottom and sides of each block. Work slowly here—rushing leads to crooked pillars that’ll haunt you every time you check the mail.
Keep a level handy and check both horizontally and vertically after placing each block. You want that pillar standing perfectly straight, not leaning like it’s had a few too many. If you’re planning to mount your mailbox insert directly to the structure, consider embedding a treated 4×4 wooden post inside the hollow cores of the CMU blocks as you build up. This gives you solid wood to screw into later.
Stack your blocks to the height specified by your local postal regulations—usually around 41 to 45 inches from the ground to the bottom of the mailbox. Fill the cores with concrete as you go for added stability, especially if you’re in an area with freeze-thaw cycles or strong winds.
Step 3: Apply Stone Veneer Panels Over Core
This is where your mailbox transforms from a plain concrete shell into that beautiful stacked stone feature you’ve been picturing. You’ll need the mortar recommended by your veneer manufacturer—don’t skip this detail, because the wrong adhesive can cause panels to slip or crack over time.
Start at the bottom and work your way up, just like laying real stone. Press each panel firmly against the CMU blocks, making sure there’s full contact with no air pockets. If you’re using an interlocking system, overlap the panels as designed—this creates that seamless, natural look without visible grout lines.
When you reach corners and edges, you’ll need to cut some panels to fit. A wet saw with a diamond blade works best for clean cuts. Many kits include L-shaped corner stones that wrap around edges beautifully—use them if you have them, because they’ll save you time and give you sharper, more professional-looking corners.
Take your time with this step. A rushed job shows up quickly in uneven gaps or misaligned stones, and those mistakes are tough to fix once the mortar sets.
Elevate Your Projects with Genuine Ledger Stone
Experience authentic natural stone that brings unique texture and timeless beauty to any design. Our interlocking ledger stone offers fast installation, lasting durability, and versatile styles to inspire contractors, designers, and distributors alike. Partner with us for quality that stands the test of time and projects that truly stand out.

Step 4: Install Mailbox Insert and Finish with Capstone
You’re almost there—this final step brings everything together. Start by securing your mailbox insert, making sure it meets USPS height and accessibility requirements. The opening should face the street, and the bottom of the mailbox typically sits 41 to 45 inches from the ground. Double-check your local postal regulations before you lock anything in place.
Next, attach your decorative capstone to the top of the pillar. Use a quality adhesive mortar or epoxy to create a watertight seal—this cap isn’t just for looks; it prevents rain and snow from seeping into the stone joints and causing damage over time. Press it firmly and let it cure completely.
Take a step back and inspect your work. Check the mailbox alignment from the street, fill any gaps in the mortar joints, and wipe down the stone one last time. You’ve just built something that’ll stand strong and look great for years to come.

Material Comparison: Natural Stone vs. Synthetic Veneer
Choosing the right material for your stacked stone mailbox can make or break your project. You’re not just picking a look—you’re deciding how much time, money, and muscle you’re willing to invest. Natural stone delivers that authentic, premium feel, but it comes with real weight and cost. Synthetic veneer, on the other hand, gives you a similar aesthetic without the heavy lifting or the hefty price tag.
| Attribute | 天然石 | Synthetic Veneer |
|---|---|---|
| Strength & 耐久性 | Very high, long-lasting. Natural stone like granite and limestone can stand up to decades of weather without losing its integrity. | High, weather-resistant. Modern synthetic materials resist impact, UV exposure, and moisture without cracking or fading. |
| Weight | Heavy (100+ lbs). You’ll need a solid foundation and possibly extra hands to set it up properly. | Light to moderate (26-44 lbs). Easy to transport, handle, and install on your own. |
| Cost | Higher ($700–$1,500+). The premium look comes with a premium price, especially if you’re going custom. | Lower ($300–$800). Budget-friendly without sacrificing the visual impact you’re after. |
| Maintenance | Low; occasional sealing. A quick clean and reseal every few years keeps it looking sharp. | Minimal; cleaning only. Most synthetic materials are designed to be wash-and-forget. |
| Installation Difficulty | More labor-intensive. Expect to spend more time leveling, mortaring, and securing each stone. | Easier, faster install. Many kits slide right over a standard post and lock into place. |
Common Mistakes & How to Avoid Them
Building a stacked stone mailbox can be incredibly rewarding, but a few missteps can cost you time, money, and—worst case—a rebuild. Let’s walk through the most common pitfalls and how to sidestep them so your mailbox stands strong and looks great for years to come.
| Common Mistake | Solution / How to Avoid |
|---|---|
| Ignoring USPS mailbox height rules | Measure precisely and verify current USPS standards before you start building. Your carrier needs easy access, and the last thing you want is to rebuild because you’re an inch or two off. Check the USPS guidelines and your local codes to get the exact height and setback distance from the curb. |
| Uneven footing or poor curing | Level your footing carefully and allow concrete to cure for at least 24-48 hours—longer in humid or cold conditions. A rushed footing can lead to settling, cracks, and a leaning mailbox. Take your time here and you’ll save yourself major headaches down the road. |
| Insufficient mortar between veneer panels | Apply consistent mortar thickness and press each panel firmly to ensure solid adhesion. Skimping on mortar or leaving gaps can cause panels to loosen or fall off, especially after freeze-thaw cycles. Think of mortar as the glue holding your design together—don’t skimp. |
| Skipping sealing of natural stone | Apply a high-quality stone sealer after installation to protect the surface from moisture, stains, and UV damage. Natural stone is porous and can absorb water, leading to discoloration, efflorescence, or cracking over time. Sealing is quick and pays off big in longevity. |
| Not reinforcing wooden post inside core | Embed your post properly or use a sturdy CMU block core for structural support. A flimsy or poorly anchored post can’t handle the weight of stone veneer or natural stone, especially in high winds or if a vehicle bumps it. Reinforce well and your mailbox will stand strong for decades. |
Maintenance Tips for Longevity and Appeal
You’ve built something beautiful—now let’s keep it that way for years to come. Regular care isn’t just about looks; it’s about protecting your investment from the elements.
Start with the basics: clean your stone surfaces every few months using a soft brush and mild detergent mixed with water. Steer clear of acidic cleaners like vinegar or citrus-based products—they’ll eat away at natural stone and damage sealers over time.
If you used natural stone, reseal it every 2-3 years to lock out moisture and prevent staining. Think of this as sunscreen for your mailbox—it creates a protective barrier against rain, snow, and UV damage.
Once a year, walk around your mailbox and inspect the mortar joints carefully. Look for hairline cracks or gaps where water could sneak in. Catch these early and patch them right away—water infiltration is the number one enemy of masonry structures, especially during freeze-thaw cycles.
Frequently Asked Questions About Stacked Stone Mailboxes
How much does it cost to build a stone mailbox pillar?
You’re looking at $300 to $600 for synthetic kits, $400 to $900 for stone veneer options, and $700 to $1,500 or more if you’re going with natural stone. The price jumps when you add custom caps, address plaques, or hire a professional installer.
Do I need a building permit for a mailbox pillar?
It depends on your local regulations. Some municipalities require permits for structures above a certain height or weight, so check with your city or county building department before you start digging.
How deep should the concrete footing be?
Plan for at least 24 to 36 inches deep, especially if you’re building with natural stone. You want the footing below the frost line in your area to prevent shifting and cracking over time.
What are the USPS rules for mailbox height and placement?
The mailbox opening should sit 41 to 45 inches above the road surface, and the front of the box needs to be 6 to 8 inches back from the curb. Always verify with your local post office before installation to avoid costly mistakes.
Can I use faux stone veneer instead of real stone?
Absolutely. Stone veneer and high-quality synthetic materials give you the look of real stone at a fraction of the weight and cost, and they’re much easier to install yourself.
Bringing It All Together
Following these clear steps ensures a durable, attractive mailbox pillar that boosts curb appeal. You’ve learned the essentials—from measuring height and distance from the curb to selecting materials that match your home’s style. By choosing quality materials and respecting local rules, you’re set for a successful weekend project.
Consider adding lighting or decorative plaques next to further personalize your build. These finishing touches turn a functional mailbox into a true statement piece. You’ve got the blueprint—now it’s time to bring your vision to life and create something you’ll be proud of every time you pull into your driveway.
