Applying the right Cutting & Tooling (Pro Guide) methods is the difference between a profitable masonry project and a site riddled with material waste and labor delays. When crews use improper techniques on thin stone veneer, they risk shattering expensive inventory and failing to meet strict silica safety standards. This lack of precision often leads to rejected work and increased liability from dust exposure, directly impacting a firm’s bottom line and professional reputation.
This technical guide provides a field-tested protocol for managing stone fabrication on-site. We examine the operational trade-offs between wet saws and angle grinders, the selection of diamond blades for specific mineral compositions, and the exact process for creating clean 45-degree mitered edges. By standardizing these cutting procedures and safety measures, installers can maintain high production speeds while ensuring every stone fits the architectural requirements without cracking or chipping.
Wet Saws vs. Angle Grinders: Which is better for on-site cutting?
Professional installers balance high-volume precision with job-site mobility by utilizing a wet saw for baseline production and an angle grinder for technical field adjustments.
Precision and Clean Edges with Wet Saws
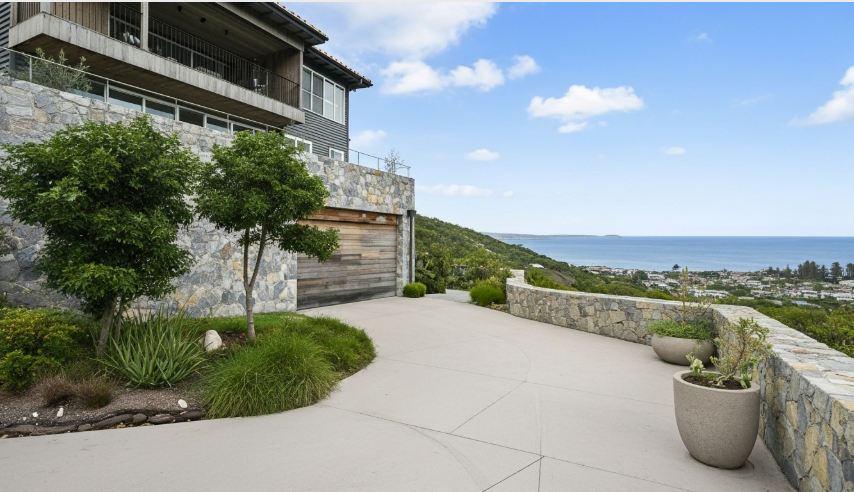
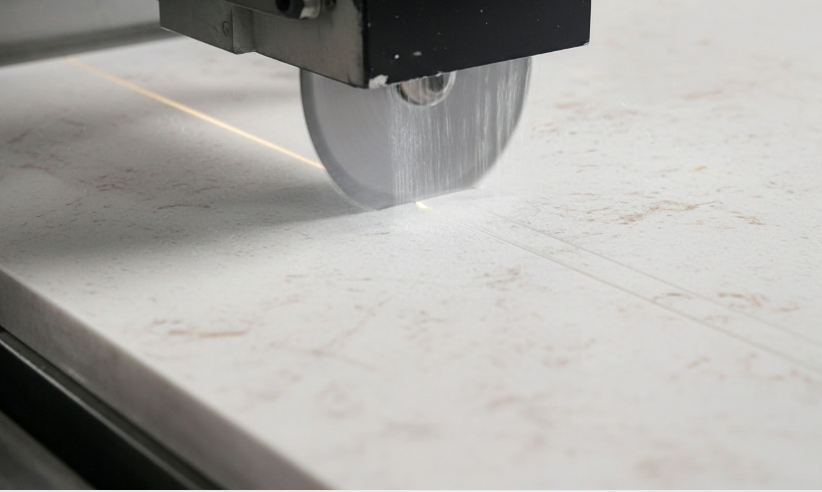
Wet saws serve as the primary tool for high-volume cutting where edge integrity and finish quality remain the top priorities. The stationary design provides a stable platform that is essential for processing the 100% natural stone materials provided by Top Source Stone, ensuring that the individually sawn-back surfaces remain perfectly flat for maximum adhesion.
- Continuous water flow cools the diamond blade, which prevents stone chipping and extends tool life when cutting dense materials like quartzite.
- Table-mounted guides allow installers to make perfectly straight, repeatable cuts for standard veneer pieces.
- The wet cutting process naturally suppresses silica dust, helping contractors meet 2026 safety standards for job-site air quality.
| Performance Factor | Wet Saw (Primary) | Angle Grinder (Utility) |
|---|---|---|
| Best Application | Bulk production & straight cuts | L-notches & outlet cutouts |
| Dust Control | High (Integrated water system) | Low (Requires HEPA vacuum) |
| Edge Finish | Smooth, minimal chipping | Rough (Requires sanding) |
Portability and Custom Notching with Angle Grinders
Angle grinders offer the mobility needed for field adjustments and complex cuts that a stationary wet saw cannot handle. While the wet saw handles the heavy lifting, the grinder is the go-to tool for the “last mile” of the installation, where bespoke fitting is required.
- Contractors use grinders for L-shaped notches and cutouts around electrical outlets or plumbing fixtures.
- Dry cutting with a grinder eliminates the need for water management systems in finished interior spaces, provided LEV systems are used.
- Small-diameter blades allow for more control during delicate trimming of thin slate or marble pieces.
Operational Efficiency and Tool Selection for 2026 Projects
Successful on-site execution involves a hybrid approach, using both tools to balance speed with detail. This strategy ensures that the natural variation and bespoke random-lay pattern of the loose stone veneer are preserved without compromising project timelines.
- We recommend using wet saws for the bulk of the installation to maintain a consistent pace and professional finish.
- Keep angle grinders on hand for the final 10% of the project, focusing on corner adjustments and custom miters.
- Modern cordless grinders in 2026 provide enough power for quick stone adjustments without the trip hazards of power cords.
Choosing the Right Diamond Blade for Quartzite and Slate
Selecting the correct diamond matrix determines whether you achieve a precision architectural edge or suffer from heat-induced fractures and blade glazing on high-density minerals.
Turbo and Segmented Blades for Quartzite Applications
Quartzite ranks exceptionally high on the Mohs scale, often exceeding granite in density. This mineral structure generates extreme friction, which standard blades cannot dissipate. Turbo rim blades provide the necessary cooling and speed for quartzite, utilizing a serrated edge that pulls air and water into the cut to prevent the stone from scorching or “burning” during deep passes. For exterior facades where installers must trim thick quartzite panels, segmented blades offer the most efficient debris removal, ensuring the cutting path remains clear of abrasive slurry.
Success with quartzite depends on a high diamond concentration in the rim. Because the stone is so hard, a low-quality blade will simply bounce or “glaze” over the surface. We recommend blades specifically engineered with a high-grade industrial diamond grit that maintains its sharp edge against the dense mineral structure of Top Source Stone’s quartzite varieties.
Continuous Rim Blades for Slate Panel Precision
Slate features a layered, metamorphic structure that presents a different challenge: delamination. Using a segmented blade on slate often causes “spalling” or chipping along the natural cleft lines. Continuous rim blades offer the smoothest finish by providing constant contact with the material. This lack of vibration is essential for maintaining the clean lines required for high-end interior feature walls and modern architectural cladding.
| Blade Type | Optimal Material | Technical Advantage |
|---|---|---|
| Turbo Rim | Hard Quartzite | Fast cooling; prevents stone scorching |
| Continuous Rim | スレート & 大理石 | Zero-chip edges; prevents delamination |
| Segmented | Thick Exterior Stone | Maximum debris removal for bulk cutting |
Matching Metal Bond Hardness to Stone Density
The effectiveness of a diamond blade depends on the “metal bond”—the matrix that holds the diamonds in place. Counter-intuitively, soft-bond blades work best for hard quartzite. This allows the matrix to wear away quickly enough to consistently expose new, sharp diamond grit. If you use a hard-bond blade on quartzite, the metal will not wear down, the diamonds will round off, and the blade will stop cutting.
Conversely, hard-bond blades extend tool life when cutting softer or more abrasive materials like slate or sandstone. These materials wear down the matrix rapidly; a hard bond ensures the blade doesn’t disappear prematurely. While “universal” blades exist, 2026 industry standards favor material-specific bonds to maximize both cut quality and tool longevity.
Blade Diameter and RPM Compatibility for 2026 Equipment
Modern cutting equipment requires precise synchronization between the blade size and the tool’s rotational speed. Contractors should follow these equipment guidelines for Thin Stone Veneer installations:
- Standard 4-inch to 4.5-inch blades fit most handheld grinders used for on-site adjustments of individual sawn-back loose stones and corners。
- Large-scale wet saws for commercial projects utilize 10-inch or 14-inch blades to handle full-depth cuts in a single pass, maintaining better thermal control.
- Verify that the blade’s maximum RPM rating exceeds the tool’s output; running a low-RPM blade on a high-speed grinder is a significant safety hazard and compromises cutting accuracy.
Boost Profits with Factory-Direct Stacked Stone

How to cut 45-degree miters for custom edges?
Precision miter cutting creates the authentic masonry corner wrap look, turning thin stone veneer into a visual duplicate of full-depth structural stone.
Adjusting the wet saw for precise bevel cuts
Achieving accurate 45-degree miters on natural stone requires a stable wet saw with a tilting head or a dedicated miter block. We calibrate the saw blade using a machinist square before the first pass to ensure the angle is dead-on. Since quartzite and slate have high mineral density, a high-quality continuous rim diamond blade is necessary to prevent the micro-chipping that occurs with segmented blades.
Water management is the most overlooked factor in miter quality. We run the water at full pressure to lubricate the cut and cool the blade. This constant cooling prevents the stone from cracking under thermal stress. Slow, consistent feed rates allow the diamond matrix to grind the stone efficiently without forcing the blade out of alignment.
| Performance Metric | On-Site Custom Miter | Factory L-Shape Corner |
|---|---|---|
| Installation Time | 15–20 minutes per piece | Instant (Direct Set) |
| Visual Appearance | Visible adhesive seam | Seamless masonry wrap |
| Labor Savings | Baseline labor cost | Up to 30% reduction |
Securing stone panels to prevent vibration
Vibration during the cutting process is the primary cause of jagged edges and broken fragments. We place the stone pieces face down on a rubber-mat surface. This setup protects the natural texture of our Ice White or Blue Quartzite from scratches while providing the friction needed to hold the stone steady.
- Apply steady, even pressure when feeding the stone into the blade to maintain a straight line.
- Use support rollers for larger stones to prevent the weight from snapping the miter as the cut completes.
- Inspect the back of the sawn-back stone for any debris that could cause the piece to wobble on the tray.
Refining the mitered joint for seamless installation
Field cuts rarely result in a perfect joint without manual refinement. We use a variable-speed angle grinder equipped with a 200-grit diamond polishing pad to lightly smooth any burrs on the mitered edge. This step is critical for high-end residential projects where tight tolerances are expected.
Before applying adhesive, we dry-fit the two mitered pieces on a flat surface to verify the fit. We use high-strength epoxy color-matched to the specific slate or marble variety to hide the seam. This attention to detail ensures the bespoke random-lay pattern looks like a single, solid piece of stone once installed。
Factory-made L-shaped corners as an efficient alternative
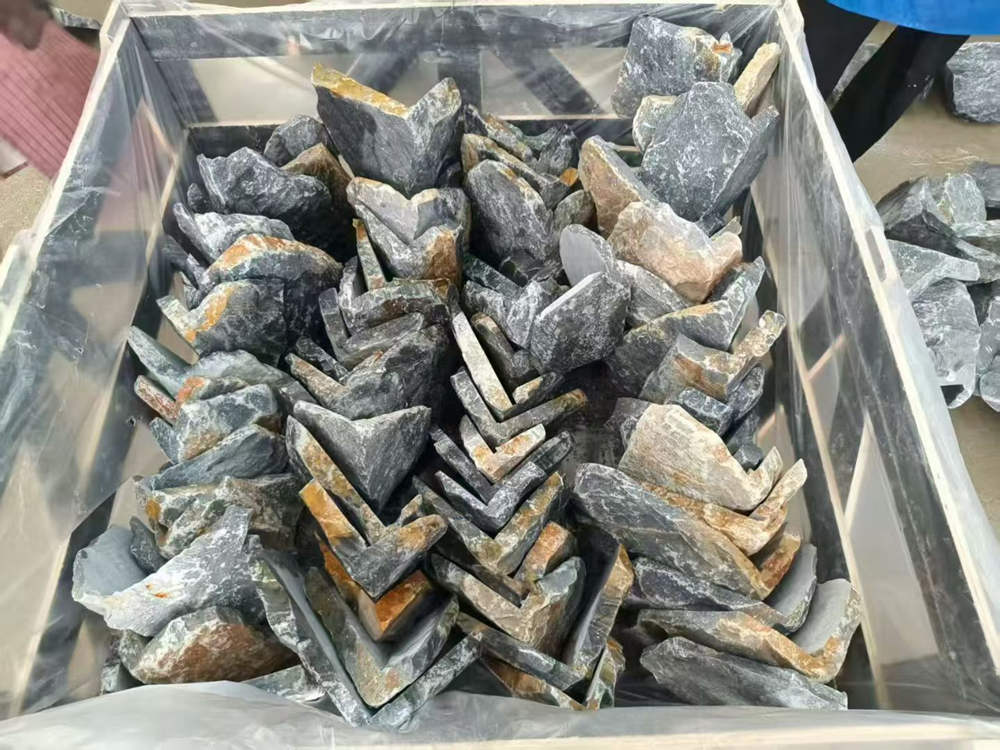
While custom miters offer flexibility for non-standard angles, using pre-fabricated L-shaped corners significantly lowers on-site labor costs. Top Source Stone provides matching L-shaped units with a 150–250mm long side and a 50–100mm short side. These factory-sawn corners provide full-depth visual integrity without the risks associated with manual mitering.
We recommend installing factory corners first to establish a perfectly vertical starting point for the rest of the wall. This approach simplifies the installation of the sawn-back loose stone and ensures the corners remain the strongest point of the wall cladding. Custom miters should be reserved only for unique architectural features that cannot be addressed with standard corner wraps.
Managing Dust and Silica Safety on the Job Site
Professional stone fabrication in 2026 requires a hierarchical approach to silica safety, prioritizing source suppression through wet-cutting and HEPA-integrated ventilation to maintain air quality below strict Permissible Exposure Limits.
Prioritizing Engineering Controls and Wet-Cutting Systems
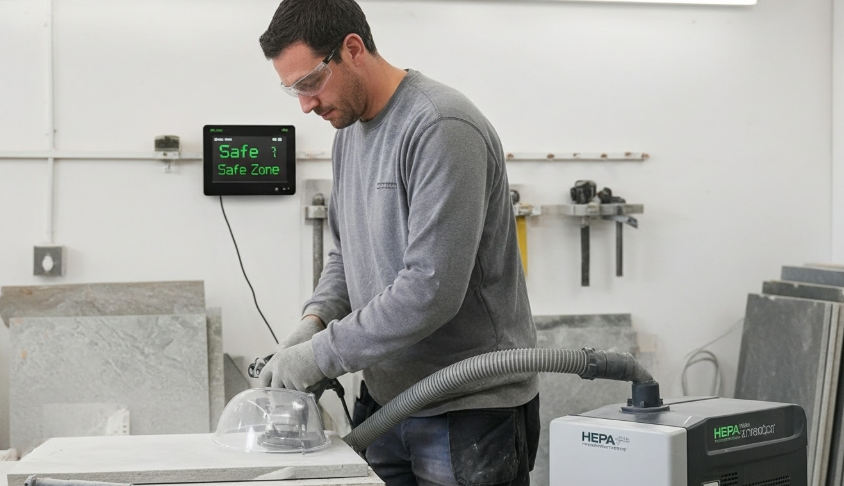
Wet cutting stands as the primary defense against respirable crystalline silica. High-performance wet saws equipped with continuous water feeds trap nearly 90% of dust at the point of contact, preventing microscopic particles from entering the breathing zone. For dry-trimming tasks on sawn-back thin stone veneer, technicians must utilize handheld grinders fitted with vacuum shrouds and HEPA-filtered extractors to capture fine particulates immediately at the source.
- Operate wet saws with high-volume water feeds to ensure total saturation of the cutting path.
- Connect all handheld power tools to M-class or H-class HEPA extractors for any necessary dry adjustments.
- Establish dedicated cutting stations isolated from the primary work area to prevent dust migration across the project site.
Developing a Site-Specific Exposure Control Plan
Safety management depends on a clear, written exposure control plan tailored to the specific environment. This document identifies every high-risk task and dictates the required engineering controls for each activity. A designated competent person leads daily inspections to verify that all dust suppression equipment remains fully operational. Maintenance crews must replace traditional dry sweeping with wet mopping or HEPA-filtered vacuums to avoid re-suspending settled dust into the air.
- List every specific task involving natural stone and the corresponding engineering controls required.
- Appoint a safety officer to enforce compliance and inspect equipment before the start of every shift.
- Prohibit the use of compressed air for cleaning dust-laden surfaces or clothing.
Implementing Respiratory Protection and PPE Standards
Personal protective equipment serves as a necessary secondary layer when engineering controls cannot fully mitigate environmental risks. In confined spaces or areas with restricted airflow, workers must use NIOSH-approved respirators selected based on measured silica concentration levels. Mandatory medical evaluations and annual fit testing ensure every crew member can use the equipment safely and effectively. To prevent cross-contamination, store all reusable respirators in sealed, clean containers during off-hours.
- Select respirators with an Assigned Protection Factor (APF) appropriate for the specific job site conditions.
- Complete mandatory fit testing and medical clearance for all employees before they handle stone-cutting tasks.
- Sanitize and store respiratory gear in dedicated, dust-free lockers to maintain hygiene standards.
Monitoring Workplace Air Quality and PEL Compliance
Regular air quality monitoring confirms that engineering controls keep silica levels below the Permissible Exposure Limit (PEL) of 50 micrograms per cubic meter. Modern job sites utilize personal air sampling pumps to collect data across full shifts, providing an empirical basis for safety adjustments. Any employee working with natural stone for more than 30 days per year should undergo medical surveillance to track long-term respiratory health. If monitoring data shows a spike in dust concentrations, the crew must stop work immediately to upgrade ventilation or water-flow systems.
- Conduct air sampling to verify that silica levels remain consistently below 50 micrograms per cubic meter.
- Maintain detailed records of medical surveillance for staff exposed to stone dust during long-term projects。
- Adjust safety protocols instantly if monitoring equipment detects an increase in airborne particulates.
Tips for trimming stone without breaking thin pieces
Successfully trimming thin-cut natural stone requires a shift from brute force to mechanical precision, focusing on vibration dampening and incremental material removal to preserve structural integrity.
Working with high-end materials like Ice White Quartzite or Blue Diamond Ledgestone requires a specific approach to prevent waste. Because these materials are individually sawn-back to a 25–40mm thickness, they offer a flat bonding surface but remain vulnerable to impact-related fractures if handled incorrectly during the final fit.
Using Wet Saws for Precision Cuts
Wet saws provide the most stable environment for cutting thin natural stone by reducing heat and vibration. Constant water flow prevents thermal shock, a common culprit that causes thin ledger pieces to snap during dry cutting. Professional wet saws feature stable table surfaces that support the entire weight of the stone panel, effectively reducing stress on fragile corners.
- Diamond blades equipped with water cooling systems produce the cleanest edges on delicate slate and quartzite.
- The water lubrication minimizes friction, allowing the blade to pass through high-density minerals without grabbing or jerking the material.
- Full-surface support on the cutting tray prevents the “cantilever effect” where the unsupported weight of the stone causes it to break before the blade finishes the pass.
The Nipping Technique for Manual Adjustments
Small, incremental removals prevent the shock of a single strike from traveling through the stone and causing a full break. This technique is essential for irregular edges where a standard saw cannot reach or when trying to maintain a bespoke random-lay pattern. By taking small sections of stone repeatedly, you maintain control over the fracturing process.
- Use carbide-tipped nippers or a trimming hammer to remove stone in tiny fragments rather than large chunks.
- Work from the outer edge inward to ensure the structural core of the thin piece remains intact.
- Apply this approach specifically for field adjustments around outlets, plumbing, or tight corners.
Optimizing Chisel Angles to Prevent Spalling
The physics of the strike determines whether the stone splits cleanly or shatters. When using hand tools on 100% natural stone veneer, the angle of the tool determines how energy dissipates through the mineral layers. Directing energy incorrectly leads to spalling—unintended surface chips that ruin the aesthetic of the face.
- Maintain a 70-degree angle on tracing chisels to facilitate a clean split without crushing the stone surface.
- Point the tool toward the center of the stone piece during strikes to direct energy away from vulnerable edges.
- Use a 90-degree angle only for initial tracing lines to create a guide for deeper, angled cuts.
Impact Control and Hammer Selection
Force management is critical when working with industry-standard thin-cut veneers. Overpowering a cut is the fastest way to destroy a piece of premium quartzite or granite. Instead of heavy blows, use a high-frequency, low-impact strategy to guide the stone’s natural cleavage planes.
- Select a 2-to-3 pound trimming hammer to provide enough mass for the cut without requiring excessive swing force.
- Use light, repeated strikes along a pre-marked line to build microscopic cracks that eventually connect.
- Avoid heavy, single blows that distribute energy unpredictably across the natural clefts of the stone, ensuring zero-repeat natural variation remains intact without structural failure.
結論
Applying professional cutting techniques and safety standards ensures clean edges and a seamless fit for bespoke random-lay patterns. Proper tool selection protects the integrity of natural quartzite and slate while keeping the workspace compliant with silica dust regulations. These methods reduce material waste and help installers achieve an authentic masonry look with efficiency.
Review our technical specifications or request a stone sample to see how our sawn-back veneer simplifies on-site labor. You can reach out to Top Source Stone to discuss bulk sourcing and project requirements for your next architectural project.
よくある質問
What is the best blade for cutting stone veneer?
The best choice is a high-quality diamond blade. For thin natural stone veneer, a continuous rim diamond blade provides the cleanest, chip-free edges. For thicker or manufactured stone veneer, a turbo-rim diamond blade is preferred as it offers a faster cut while still maintaining excellent edge integrity.
Can I cut stone veneer with a tile saw?
Yes, a wet tile saw is the preferred tool for high-precision stone veneer work. It provides a stable platform for straight cuts and utilizes a constant water flow to cool the blade and stone, which minimizes the risk of cracking and ensures a professional-grade finish.
How to cut stone veneer without dust?
The most effective method to eliminate dust is wet-cutting, which uses water to trap particulates before they become airborne. If you must cut dry, you should use an angle grinder or circular saw equipped with a dust-collection shroud attached to a vacuum system with a HEPA filter.
How to prevent stone from cracking while cutting?
To prevent cracking, ensure the stone is fully supported on a flat surface to eliminate vibration. Use a sharp diamond blade and allow the tool to do the work rather than forcing it through the material. Consistent water cooling during the cut also helps dissipate heat that can cause stress fractures in the stone.
Can I use a circular saw for stone veneer?
Yes, a circular saw can be used for stone veneer if it is fitted with a diamond masonry blade. This is often used for long straight cuts on-site; however, it is critical to manage the high volume of dust produced and to use a GFCI-protected circuit if any water is introduced for cooling.
How to finish the cut edges of stone?
To finish cut edges, use a diamond polishing pad (ranging from 50 to 200 grit) or a masonry rubbing stone to smooth the sharp transition. For a more natural appearance, you can “pitch” the edge by using a hammer and chisel to lightly chip away the straight saw line, mimicking the stone’s natural cleft.
