Installing a stacked stone shower wall creates a striking, spa-like bathroom feature, but it demands meticulous waterproofing to avoid damage. Many homeowners focus on choosing beautiful stone while overlooking the critical foundation that keeps water from destroying their investment. Without proper waterproofing, even the most expertly installed stone will fail, leading to expensive tear-outs and repairs.
This guide simplifies the complex process, highlighting essential tools, materials, and the steps that matter most for a durable, attractive result. You’ll learn why the waterproofing system is far more important than the stone itself and how to avoid the common mistakes that turn dream showers into costly nightmares. Follow this step-by-step process to achieve lasting beauty and prevent problems that plague wet areas.
ツール & Materials Needed for Stone Veneer Installation
Getting your materials right from the start will save you from costly mistakes. This isn’t a typical tile project—stacked stone demands a robust foundation and proper waterproofing, or you’ll be tearing everything out within a year. Let’s break down exactly what you need and why each item matters.
| Tool / Material | Details & Specs |
|---|---|
| Cement Backer Board | Water-resistant substrate that creates a stable, moisture-proof base for shower walls—standard drywall won’t cut it here |
| Waterproofing Membrane | Liquid-applied or sheet membrane systems like Kerdi or RedGard; this is your true line of defense against water damage and mold |
| Thinset Mortar | Anti-microbial, polymer-modified formula designed specifically for stone adhesion—ensures panels stay bonded in wet conditions |
| 積み重ねられた石のパネル | Natural or engineered stone panels in a dry-stacked style; mix panels from multiple boxes during install for a natural, seamless look |
| Stone Sealer | Penetrating, natural stone-specific sealer that protects against staining and inhibits mold growth—note that sealer is not waterproofing |
| Notched Trowel | Essential for applying thinset evenly across panels; proper trowel notch size ensures full coverage and strong adhesion |
| Wet Saw | For making accurate, clean cuts on stone panels—especially critical for corners, edges, and around fixtures |
| レベル & Tape Measure | Non-negotiable tools for precise panel placement and ensuring your bottom row is perfectly level—mistakes here cascade upward |
| Grout Bag or Pointing Tools | Used for filling mortar joints if your design calls for visible grout lines; helps create a finished, professional appearance |
| Safety Gear |
|
Step 1: Prepare and Waterproof the Shower Substrate
Here’s the truth: you can pick the most stunning stacked stone in the world, but if your waterproofing fails, you’ll be ripping everything out within a year. Start by confirming your Cement Backer Board is securely fastened and that the entire surface is clean, dry, and free of dust or debris. Any weak spots or flexing in the substrate will compromise your installation.
Next, apply a continuous waterproofing membrane across every inch of the shower walls. You’ve got two solid options:
- Liquid-applied membranes like RedGard (brush or roll on multiple coats)
- Sheet membranes like Schluter Kerdi (adhered with thinset)
Pay special attention to seams, corners, and any penetrations like valve stems or niches. These are the spots where water sneaks in and causes mold or stone deterioration. A proper vapor barrier isn’t optional—it’s your only defense against moisture damage. Take your time here, because redoing this step later means tearing out the entire wall.
Step 2: Install Stone Panels with Precise Mortar Application
You’ve got your waterproofing locked in—now it’s time to bring those panels to life. This step demands precision because even small gaps behind the stone can trap water and lead to failure down the road.
Start by selecting an anti-microbial thinset mortar designed specifically for natural stone and wet environments. Regular thinset won’t cut it here—you need something that resists mold growth and bonds securely to your waterproof membrane. Mix it to a peanut butter consistency, then use a notched trowel (typically 1/4″ x 3/8″) to apply it evenly across your substrate.
Here’s where your technique matters: apply enough mortar to ensure full contact behind each panel. Any voids create pockets where moisture can accumulate, so press firmly and check for complete adhesion. Dry-stack your panels horizontally, blending pieces from multiple boxes as you go—this prevents repetitive patterns and gives you that natural, organic look you’re after.
Begin at the bottom row and work your way up. Keep a level handy and check it frequently—once these panels are set, you can’t adjust them. Take your time on that first row because it sets the stage for everything above it. If it’s off by even a fraction, that error compounds as you build upward.
Step 3: Seal and Protect the Stone Surface
Once your mortar has fully cured, it’s time to lock in your hard work with a high-quality penetrating sealer designed specifically for natural stone. This step isn’t optional—it’s what separates a shower that ages gracefully from one that becomes a maintenance nightmare. You’ll want to apply at least two coats, giving each layer enough time to soak in before adding the next.
Here’s the thing: those grooves and textured surfaces that make stacked stone so beautiful are also magnets for moisture and grime. Make sure your sealer reaches every crevice. A good sealer won’t just prevent staining—it’ll also inhibit mold and mildew growth, keeping your shower looking fresh and clean.
Let’s be clear about what a sealer does and doesn’t do. It’s not a waterproofing membrane (that should already be behind your stone). Instead, a sealer makes maintenance easier and extends the life of your stone by protecting it from everyday wear, soap scum, and mineral deposits. Think of it as a protective shield that keeps your investment looking its best.
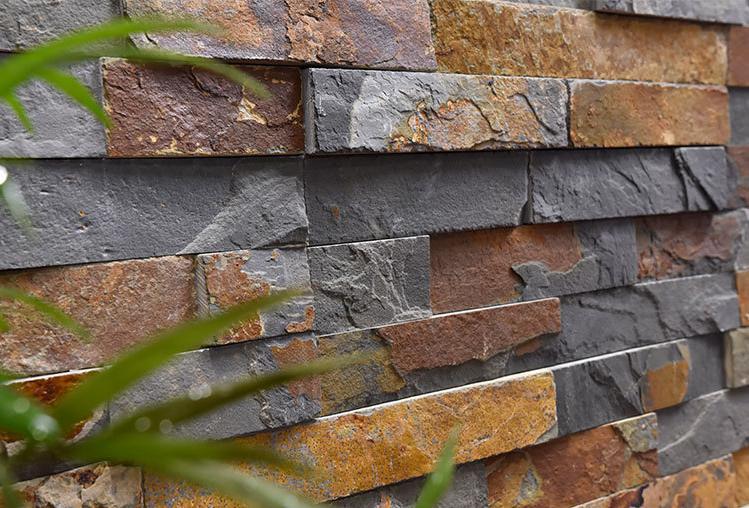
Enhance Your Projects with Authentic Ledger Stone
Explore durable, lightweight natural stone panels designed for versatile architectural styles. Perfect for contractors, designers, and distributors seeking high-quality, easy-to-install ledger stone that adds timeless value and distinct character to any space.

クリーニング & Maintenance of Stone Shower Walls
Your stone shower wall isn’t just beautiful—it’s a long-term investment. Keeping it in great shape doesn’t require fancy products or complicated routines. You just need to understand what works and what damages natural stone。
For daily cleaning, stick with a soft brush and plain water. Wipe down the walls after each shower to prevent soap scum buildup. Stay away from acidic cleaners like vinegar or citrus-based solutions—they’ll eat into the stone’s surface and dull its natural beauty over time.
When you’re dealing with stubborn stains or mineral deposits, reach for a pH-neutral cleaner made specifically for sealed stone. These products lift grime without stripping the protective sealer you’ve applied. Test any new cleaner on a small, hidden spot first.
Here’s something you can’t skip: ventilation. Run your exhaust fan during every shower and keep it going for at least 20 minutes after you’re done. This simple habit prevents moisture from settling into the grout lines and stone pores, which is where mold loves to grow. Good airflow is your best defense against long-term moisture damage.
Stone Selection: Best Materials for Wet Areas
Choosing the right stone isn’t just about looks—it’s about making sure your shower wall can handle daily water exposure without turning into a maintenance nightmare. You need a material that resists water penetration, stands up to cleaning products, and keeps its good looks for years. Let’s break down which stones work best and why.
Quartzite and Slate Advantages
Quartzite is one of the smartest choices you can make for a shower wall. Its low porosity means water has a hard time soaking in, which cuts down on staining and reduces the risk of moisture damage behind your wall. The stone’s natural hardness makes it resistant to scratches and chips, so it’ll maintain that polished look even with years of use.
Slate brings a different set of strengths to the table. Those natural clefts and rich color variations create a textured, organic look that’s perfect for an accent wall. The stone itself handles moisture well, and when you seal it properly, it becomes even more resistant to water absorption. Both quartzite and slate are less prone to surface degradation than softer stones, which means fewer repairs and less frequent resealing.
Considerations for Marble and Other Stones
Marble looks stunning, there’s no denying that. But it’s more porous than quartzite or slate, and it reacts to acidic substances—even some shower cleaners can etch the surface over time. If you’re set on marble, you’ll need to commit to diligent sealing and careful product selection. It can work, but it demands more attention.
Engineered stone offers a middle ground worth considering. These materials mimic the natural stone aesthetic while providing enhanced water resistance and more consistent performance. They’re manufactured to be less porous, which means less maintenance and better long-term durability in wet environments.
Your final choice should balance three factors: how much water exposure that specific wall will see, what design aesthetic you’re after, and how much ongoing maintenance you’re willing to handle. A feature wall that gets occasional splashes can handle a wider range of stones than a wall directly under the showerhead.
Common Installation Mistakes & How to Avoid Them
Even experienced installers can run into trouble if they skip key steps. The good news? Most failures are preventable when you know where things go wrong. Let’s walk through the biggest pitfalls and how you can sidestep them entirely.
| Mistake | How to Avoid / Fix |
|---|---|
| Insufficient waterproofing beneath stone panels | Apply a continuous waterproof membrane to every square inch of your substrate before mounting stone. Don’t cut corners—this single step protects your entire investment. Use high-quality systems like RedGard or Kerdi and follow the manufacturer’s detailing instructions for corners and transitions. |
| Using porous stones without sealing | Choose stones with low porosity ratings and seal them right after installation. Apply multiple coats according to the sealer’s instructions—typically two to three layers for shower environments. Unsealed stone absorbs water, leading to stains and mold that are nearly impossible to reverse. |
| Ignoring substrate strength or leveling | Install sturdy cement backer board and secure it to studs every 8 inches. Check your level obsessively—starting your first row even slightly off will magnify errors as you climb. A weak or uneven substrate causes panels to crack or delaminate over time. |
| Mixing panels from single box causing repetitive patterns | Open at least three boxes and blend panels randomly as you install. This creates a natural, organic look instead of an obvious repeating sequence. Take a moment to step back and preview your layout before committing with thinset. |
| Skipping maintenance leading to mold and stains | Schedule resealing every 1-2 years and clean with pH-neutral products weekly. Run your exhaust fan during showers and for at least 30 minutes afterward to reduce moisture buildup. Preventive care takes minutes but saves you from costly repairs down the line. |
Frequently Asked Questions About Stacked Stone Showers
Is stacked stone suitable for a shower wall?
Yes, but only if you install a proper waterproofing membrane first. The stone itself isn’t waterproof—you’re relying entirely on what’s behind it to keep moisture out of your walls.
How do I ensure proper waterproofing behind stone veneer?
Apply a dedicated waterproofing system like Kerdi or RedGard over cement backer board before setting any stone. Use anti-microbial thinset when adhering the panels, and make sure every seam and corner is sealed tight.
What is the best stone for high-moisture shower environments?
Slate and quartzite hold up best in wet conditions because they’re dense and less porous. Seal them properly after installation, and plan to reseal every year or two depending on use.
How difficult is cleaning a textured stone shower wall?
It takes more effort than flat tile because soap scum and mineral deposits settle into the crevices. A soft brush and pH-neutral cleaner work well, and running your exhaust fan after every shower cuts down on buildup.
Does adding a stone shower wall increase home value?
It can, especially in mid- to high-end markets where buyers expect upscale finishes. A well-executed stone shower feels luxurious and spa-like, which appeals to people looking for a standout bathroom.
Final Checklist for Your Stacked Stone Shower Project
If you follow these steps carefully, you’ll end up with a stunning, durable stacked stone shower wall that resists moisture and stays beautiful for years. The key is never skipping the waterproofing—it’s the difference between a luxurious feature and a costly disaster.
Precise installation and ongoing maintenance protect your investment. Seal your stone regularly, run the exhaust fan after every shower, and clean gently to avoid damaging the surface. When you combine advanced waterproofing systems with quality stone choices, you create a bathroom feature that delivers lasting value and transforms your space into a spa-like retreat.
