
Visible seams can undermine the look of premium stacked stone panels, frustrating both DIY installers and seasoned contractors. This guide demonstrates how to apply staggered layouts—particularly the proven 1/3 offset—to interrupt those lines and maintain an authentic finish. You’ll learn how dry-fitting, strategic cut-piece starts, and deliberate randomization work together to conceal joints, minimize waste, and deliver a wall that appears as genuinely hand-laid stone.
Why ‘Staggering’ is the #1 Most Important Step
In stacked stone panel installations, staggering is a structural and visual mandate. Poor alignment creates long seams that downgrade the finish and signal low craftsmanship. In B2B projects, especially in commercial environments, staggering safeguards brand image, extends service life, and streamlines installation. It’s the discipline that turns a wall into a repeat-business asset instead of a source of costly callbacks.
Creating a Natural, Authentic Appearance
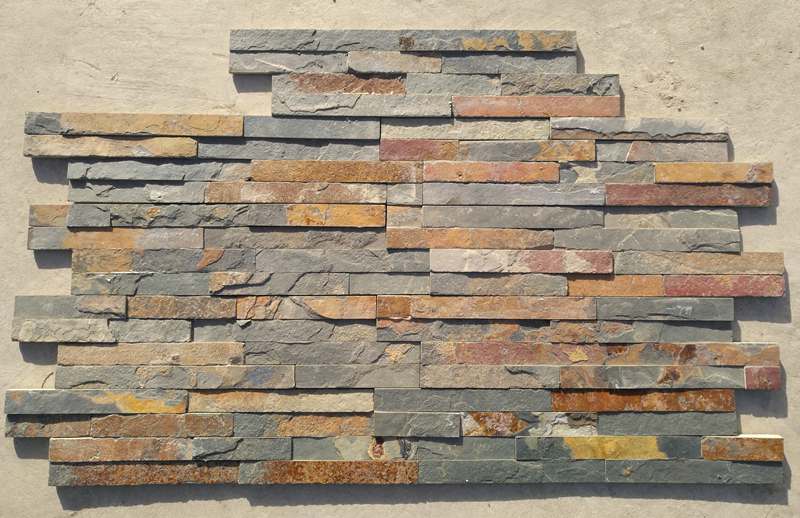
Staggering each course breaks up vertical seams so the pattern doesn’t repeat row after row, mimicking hand-laid masonry. This prevents the eye from tracking obvious lines that make installations look manufactured. In premium placements like hospitality lobbies or flagship retail storefronts, aligned seams can undermine perceived value instantly. Commercial clients pay for the look of real stone—mechanical repetition raises doubts about quality and even supplier choice. Aligning offsets into every course delivers the organic appearance without costly artisan labor.
Enhancing Structural Integrity and Durability
When panels are staggered, weight and stress are distributed across multiple seams rather than concentrated in one vertical line, reducing the risk of cracks or panel movement over time. In high-traffic or vibration-prone areas such as hotel corridors or transit hubs, the improvement in longevity is measurable. Manufacturers often specify a minimum offset, such as 8 inches, to lock the wall together for decades; ignoring these guidelines can void warranties and trigger structural failures that demand full section replacement.

Simplifying Installation and Minimizing Waste
Offsetting panels allows corner pieces to fit without complex miter cuts, enabling installers to adapt quickly to real-world conditions like uneven substrates while maintaining tight seams. Skipping the stagger forces more trimming, generates more waste, and raises the chance of installation errors. On large B2B projects, that’s not just excess material—it’s additional labor hours and the risk of claims against your crew or supply chain. Sticking to a stagger plan eliminates these risks and preserves margins.
The Stone Guru’s ‘Subway Tile’ Rule
Visible, repeating seams can undermine the impact of a stacked stone wall. The “Subway Tile” rule, adapted from brickwork, is a proven staggered layout that drives a natural flow across the surface. Applied with precision, it produces a finished look that appears bespoke, not factory assembled.
Understanding the Subway Tile Pattern for Stone Panels
In stacked stone installations, offset each course so vertical seams never align. Shift each successive row by 1/3 or 1/2 of the panel length to break up uniform joint lines and create a continuous field of stone. This method follows most manufacturer guidelines and removes the grid effect, making seams far less perceptible.
Panel Offset Strategies to Hide Seams
Use a minimum 1/3 offset; 1/2-length shifts generate greater randomness. Larger offsets reduce visible vertical lines, enhance realism, and lower the risk of lippage—uneven edges that catch light or create hazards on floors. Match offset size to panel dimensions and supplier recommendations, ensuring tall walls or commercial projects have consistent staggering to avoid stress points and repetitive joints clients view as defects.
Managing Grout and Joint Appearance
Match grout to the dominant stone color to disguise seams and reinforce continuity. For clients who want the pattern to stand out, a contrasting grout works but demands precise spacing. Maintain joint widths within manufacturer tolerances to compensate for size variations while preserving a uniform look.
Material and Finish Considerations
The staggered seam principle suits slate, quartzite, marble, ceramic, and engineered stone panels alike. Staggering balances surface variations, distributes shading evenly, and avoids visual clustering. It also optimizes light play across textured finishes and keeps shadow lines clean on smoother surfaces, reinforcing authenticity and premium design alignment.
Installation Best Practices for B2B Projects
Train crews on seam staggering before work starts and include diagrammed layouts in project documentation. Conduct on-site checks to correct misalignments immediately. Early quality control protects your brand and ensures the finished wall meets aesthetic and structural requirements, supporting client satisfaction and repeat business.
Step 1: The ‘Dry-Fit’ (Plan Your Wall First!)
Before committing to a stacked stone panel installation, run a dry-fit to validate layout, seam placement, and cut requirements. This early stage catches misalignments, controls joint patterns, and minimizes costly rework, protecting both budget and the polished look your clients expect.
What is the Dry-Fit Stage and Why It Matters
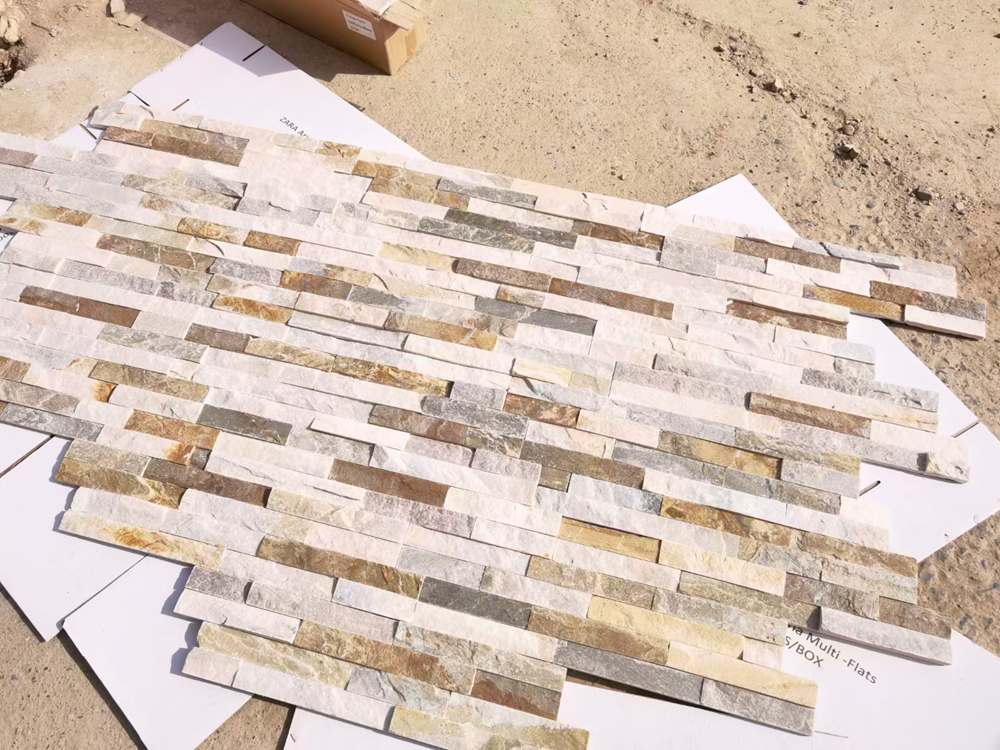
Lay panels on the ground to preview the full composition before mounting. This reveals seam positions and highlights any joints that disrupt the design. Skipping this step risks repetitive patterns that make the wall look manufactured—something high-end residential and commercial clients will quickly notice.
Key Planning Considerations During Dry-Fit
Measure total wall length and height to calculate panel counts accurately, factoring in corners, obstructions, and specialty cuts. Verify that the substrate is flat, moisture-protected, and equipped with starter strips, as correcting these after installation will derail timelines and inflate labor costs.
How to Stagger Seams Effectively
Offset vertical seams between rows by at least 8 inches or half a panel to break up patterns and replicate natural stone randomness. Position shorter or cut panels at wall ends or transitions so modifications blend discreetly into the overall layout.
Benefits of Proper Dry-Fitting
Precise dry-fitting reduces waste by directing cuts to where they add value. It flags installation challenges before crews commit, preventing delays. A clear panel map improves team efficiency, while mixing panels during dry-fit maintains balanced texture and color for a stronger final presentation and higher client satisfaction.
Upgrade Your Projects with Authentic Ledger Stone
Explore our premium ledger stone collection designed for versatile architectural styles. Enjoy natural stone’s true texture, reliable durability, and efficient installation that boosts your project’s value. Partner with us for quality materials and personalized wholesale offers.

Step 2: The ‘1/3 Offset’ (The Pro Method)
For a seamless, high-end stacked stone installation, the 1/3 offset pattern is a proven way to reduce visible seams and repetition. It demands more planning and precision than standard layouts but delivers a surface that reads as authentically quarried. Below is how to execute the method with exactness that meets or exceeds expectations for residential and commercial projects.
Understanding the 1/3 Offset Stagger Pattern
Each new row shifts by precisely one-third of a panel’s length, breaking vertical seam lines that make walls look repetitive. Alternate full panels with pieces cut to one-third and two-thirds lengths to keep seams offset. This variation mirrors natuursteen layering, producing a less predictable, more custom look than the common half-offset. In practice, 1/3 offset installations consistently generate stronger referrals due to their elevated appearance.
Measuring and Cutting Panels for the 1/3 Offset
Begin each row with a panel cut to exactly one-third length. For the base row, plan for two-thirds of panels to be cut to one-third or two-thirds length, with the rest full-sized. This controlled variation keeps the stagger uniform across wide spans. Precision tools are non-negotiable—small errors compound quickly, so measure and check consistently to avoid costly rework and the alignment flaws that diminish the premium effect.
Challenges and Solutions in Maintaining the Staggered Pattern
Strict adherence is essential, as a single miscut can disrupt subsequent rows and trigger mid-installation adjustments. Extra cuts mean more labor and increased risk of waste. Order about 10% more panels than calculated coverage to allow for miscuts and to replace panels with poor grain or color, ensuring consistency and quality throughout.
Material Planning and Waste Management
Because many pieces require precise cuts, expect a higher scrap rate than with straight or half-offset patterns and budget 10% extra material. Plan cuts in sequence—offcuts from a two-thirds panel can often serve as a one-third starter for the next row—reducing waste while maintaining visual impact and controlling costs.
Impact of the 1/3 Offset Method on Quality and Value
Reduced seam repetition produces a wall surface with authentic, upscale character. The result conveys the craftsmanship of traditional stonework without the expense of full-thickness masonry. For property owners, this realism can elevate perceived value and appeal, giving commercial spaces a design edge and boosting resale potential in residential projects.

Step 3: Starting Your Second Row (With a Cut Piece)
In commercial and large-scale stacked stone panel projects, starting the second row with a cut piece quickly elevates the final look. This approach breaks up uniformity, enables flexible panel placement, and ensures you meet both aesthetic and structural requirements without affecting schedule or quality.
Why Start with a Cut Piece?
Using a cut panel in the second row shifts vertical seams away from those in the first row, eliminating repetitive lines that can cheapen the finish. The offset replicates the natural variation of hand-laid stone, adding depth and character. On major features like facades or extended lobby walls, this method keeps the viewer’s eye moving rather than catching on a visible grid. Contractors rely on it to deliver seamless, authentic results under close inspection in premium builds.
Calculating and Preparing the Cut Piece
Measure the wall’s full run before cutting, aiming for a starter piece at least 12 inches wide to maintain interlock strength. Limit cuts to one end piece per row for now to allow for tolerance adjustments later. Use a wet saw or angle grinder with a suitable blade for natuursteen, wearing eye and hand protection. Mark the cut line precisely, considering interlocking tabs or slots, and perform a dry-fit to confirm tight, level joints before applying adhesive or fasteners—this extra step prevents costly rework.
Implementing a Staggered Joint Pattern
Install the prepared cut panel first in the second row, then follow with full panels. For each new course, shift the starting joint by at least 8 inches or vary starter panel length to further disguise seams. Avoid a rigid brick pattern, which looks artificial with stone. Varied offsets better emulate traditional stonework while improving wall bond, balancing aesthetics and durability over time.
Installation Sequence and Quality Control
With the cut piece placed, work left to right unless the manufacturer directs otherwise. Ensure every interlock is fully engaged, applying firm pressure while allowing tolerance for thermal expansion. Maintain the stagger by starting each row with an offset cut. Check course levels and verify plumb alignment regularly, inspecting seams for tightness and clean visual lines. Correct any drift or emerging pattern immediately—strict attention to these checks secures the high-end finish demanded in commercial applications.

Step 4: Randomizing Your Panels (Avoid Step-Ladders)
Repeating seam patterns in stacked stone installations undermine authenticity and are quickly noticed by clients. For B2B buyers and installers, ensuring each panel placement appears organic is essential to protect product value and brand credibility. Randomization reduces the visual risk of a step-ladder effect and delivers the high-end finish customers expect from natuursteen.
Why Randomization Matters for B2B Stone Panel Installations
Uniform seams and step-ladder patterns signal poor installation discipline, making premium stone look manufactured and lowering its perceived quality. This erodes price justification, invites customer complaints, and threatens repeat business. Avoiding obvious repetition keeps finishes aligned with the authenticity buyers pay for, reinforcing trust in your supply chain and installation teams.
Techniques for Randomizing Z-Panel Layouts
Start with a dry layout on the floor to spot and correct emerging step-ladder effects before adhesive is applied. Pull panels from multiple boxes and batches to capture the full range of color and texture variation, especially on multi-run orders. Rotate or flip pieces where design permits to break repeating motifs. When installing vertically, stagger seams by at least 6–12 inches to prevent striping and achieve a random, robust wall character.
Common Mistakes and How to Avoid Them
Skipping the dry layout often results in visible step-ladders that require costly rework. Installing panels sequentially from the same box risks repeats from identical stone veins. Failing to trim panels to break aligned seams leaves vertical lines that disrupt natural flow. Each of these errors damages the premium look and increases the risk of client dissatisfaction.
Quality Control and Inspection
Before final fixing, inspect the full installation under consistent lighting to confirm seam staggering and overall randomness. Scheduling this checkpoint protects project quality and reduces callbacks for aesthetic issues. For sourcing managers and brand owners, this discipline safeguards reputation and supports long-term customer relationships through workmanship that matches material quality.

Pro Tip: What to Do With Your Off-Cuts
Planned reuse of stacked stone panel off-cuts reduces waste handling costs, boosts margins, and delivers unexpected design advantages. When integrated into procurement and build schedules, these remnants become assets rather than landfill, keeping yield high and client satisfaction higher.
Creative Uses for Off-Cut Pieces
Repurpose clean, flat off-cuts into small-format products—coasters, bookends, lamp bases, or serving boards—that can be sold as branded merchandise or presented as client gifts. Engraving select pieces to create commemorative plaques, street address signs, or custom-branded showroom displays adds functional marketing value and personalizes the installation, setting your work apart from competitors who discard usable stone.
Functional Construction and Landscape Applications
Larger remnants can be adapted into vanity tops, fireplace hearths, shelving, or stone-faced tabletops, adding premium detail without the cost of ordering full panels for minor elements. Smaller or irregular fragments work well in mosaic pathways, patio inlays, bench surfaces, or tiered water features, enabling landscape crews to deliver high-impact exterior features from material already paid for.
Benefits of Planning for Off-Cut Reuse
Integrating reuse into take-off calculations improves yield accuracy, reduces disposal costs, and ensures every piece has a defined purpose before cutting begins. Promoting sustainable practices aligns with commercial clients and procurement departments seeking environmentally responsible partners, strengthening bid positions and trust with enterprise accounts. Each reuse channel can generate incremental revenue while adding distinctive design features that justify premium pricing.
FAQs About Hiding Seams
Even with premium interlocking stacked stone panels, poorly planned installation patterns can make seams noticeable. These answers outline practical methods to keep joints discreet, preserve a natural visual flow, and avoid repetitive layouts that compromise authenticity.
How do I hide the seams on stacked stone panels?
Stagger panels so vertical joints never align. Use interlocking Z-shaped panels to overlap edges and blend transitions. Leverage the stone’s varied thickness and surface texture to disrupt straight lines. Where needed, apply color-matched grout or sealant sparingly to conceal small gaps without drawing attention.
Do I need to stagger the panels?
Yes. Staggering is critical to avoiding visible repetition and achieving a natural masonry look. Offsetting panels breaks vertical lines that catch the eye. For best results, use consistent offsets—typically 1/2 or 1/3 panel length—for a strong visual rhythm.
What’s the best offset pattern (1/2, 1/3)?
A 1/2 offset is straightforward and delivers a balanced, uniform flow. A 1/3 offset introduces greater variation and energy but requires more precise layout planning. Select the offset that aligns with your design goals and maintain it consistently throughout.
What is the ‘checkerboard’ or ‘step-ladder’ look?
Checkerboard occurs when seams align vertically and horizontally, producing a grid-like pattern. Step-ladder happens when seams create diagonal “stairs.” Both undermine a natural effect. Prevent them by varying offsets and, when possible, mixing panel sizes.
What do I do with the ‘Z’ shape at the end of a wall?
The Z profile locks neatly into adjacent panels. At corners, use matching L-shaped components for clean transitions without awkward cuts. On straight ends, trim carefully for a consistent edge and seal exposed cuts to conceal joints and protect against wear.
Final Recommendations for Seamless Stonework
A stacked stone wall that stands out starts with disciplined staggering—offset each course by roughly 1/3 of a panel to break vertical seams, disperse stress, and deliver an authentically hand-laid appearance. Dry-fit in advance to reveal problem joints, map efficient cuts, and ensure balanced color and texture. Vary starting pieces, avoid step-ladder patterns, and use offcuts strategically to reduce waste. From the first row, commit to a precise stagger to elevate craftsmanship, protect performance, and achieve stonework that withstands close inspection in any environment.
