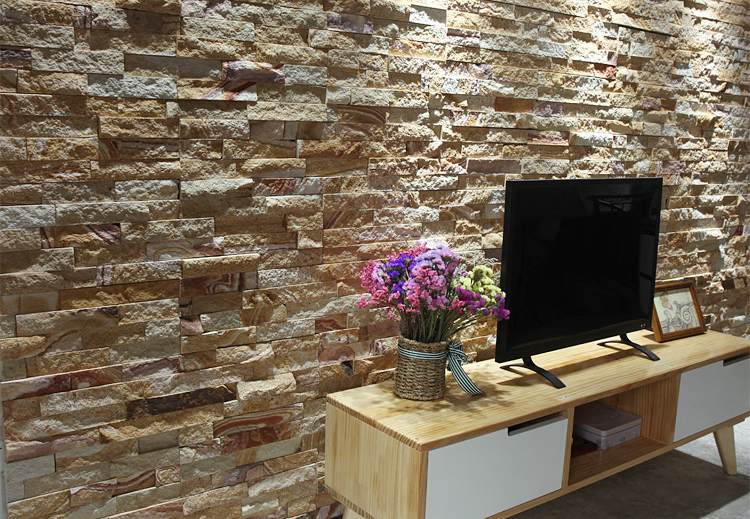
A stacked stone accent wall behind your TV transforms a plain media space into a stunning focal point. The textured surface adds depth and character that flat drywall simply can’t match. You’re not just hanging a TV—you’re creating an entertainment centerpiece that feels both natural and sophisticated.
Getting this right means more than just slapping stone on the wall. You need to think about how you’ll mount your TV securely on an uneven surface and where those cables will go. Skip the planning stage, and you’ll end up tearing into your beautiful new wall to fix problems later.
This guide walks you through every step, from preparing your wall to managing those pesky wires. You’ll learn which materials work best, how to cut around outlets and mounts, and the smart way to plan for future upgrades. Let’s build something that looks amazing and works perfectly.
Prerequisites: Tools & Materials Needed
Before you start building your stacked stone accent wall, you’ll want to gather everything upfront. There’s nothing worse than stopping mid-project because you’re missing a critical tool. Think of this as setting yourself up for success—when you have the right gear ready, the installation flows smoothly and you can focus on getting that professional finish you’re after.
| Item | Purpose | Notes |
|---|---|---|
| Stud finder | Locate wall studs for secure mounting | Essential for TV bracket placement—don’t skip this step |
| Level | Ensure stone panels align evenly | Prevents uneven surfaces that’ll haunt you later |
| Wet tile saw or angle grinder | Cut real stone panels precisely | Wear safety gear—stone dust is no joke |
| Mortar or construction adhesive | Attach stone panels to wall | Choose exterior-grade for durability |
| Notched trowel | Spread adhesive evenly | Improves bond strength for a rock-solid connection |
| Drill and heavy-duty anchors | Mount TV bracket securely | Use anchors rated for stone—your TV’s safety depends on it |
| PVC conduit (optional) | Wire management inside the wall | Facilitates easy cable updates—a smart pro-move for future flexibility |
| Sanded caulk | Fill gaps and seams | Matches stone color for a seamless look |
| Safety glasses and gloves | Protect during cutting and installation | Mandatory for user safety—protect your eyes and hands |
Step 1: Prepare the Wall Surface and Layout
Before you place a single stone, you need a clean, solid surface to work with. Start by removing any baseboards or trim around your TV area—this gives you a flush workspace and makes the final result look seamless. If your wall has existing wallpaper or loose paint, strip it off completely.
Next, grab your stud finder and mark every stud location with painter’s tape. You’ll need these reference points when it’s time to mount your TV securely. If you’re working with standard drywall, consider installing cement backer board over the entire accent wall area. This extra layer adds crucial stability and prevents flexing when you apply the stone panels.
Now comes the planning phase. Measure your TV and sketch out where it’ll sit on the wall. Mark the coverage area with a pencil, accounting for any outlets, cable boxes, or speakers you’ll need to access. Here’s the pro move most DIYers miss: install a 1-2 inch PVC conduit vertically behind where the stone will go. Run it from floor to ceiling, or at least from your outlet height to behind the TV. This simple addition lets you pull new HDMI cables, power cords, or smart home wiring through the wall anytime—without ever tearing into that beautiful stone you’re about to install.
Step 2: Cut and Install Stacked Stone Panels
This step requires patience and precision—you’re creating the foundation of your accent wall. Start by measuring each panel against your wall, marking cut lines for outlets and your TV bracket location. A wet saw with a diamond blade gives you clean, professional cuts that’ll make the finished wall look seamless.
Apply your mortar or construction adhesive using a notched trowel, spreading it evenly across the wall section or the back of each panel. You want consistent coverage—too little and panels won’t hold, too much and you’ll have messy squeeze-out. Begin your installation at the bottom edge, using plastic shims to keep everything perfectly level as you work your way up.
The beauty of quality stone panels is their interlocking Z-shaped edge system. Press each panel firmly against its neighbor, making sure those edges lock together tightly. This eliminates visible grout lines and creates that high-end, continuous stone appearance you’re after.
Once your panels are up, grab some sanded caulk that matches your stone color. Fill any small gaps or joints where panels meet around outlets or corners. This final touch blends everything together and gives you that professional finish that makes people ask, “Who did your stonework?”
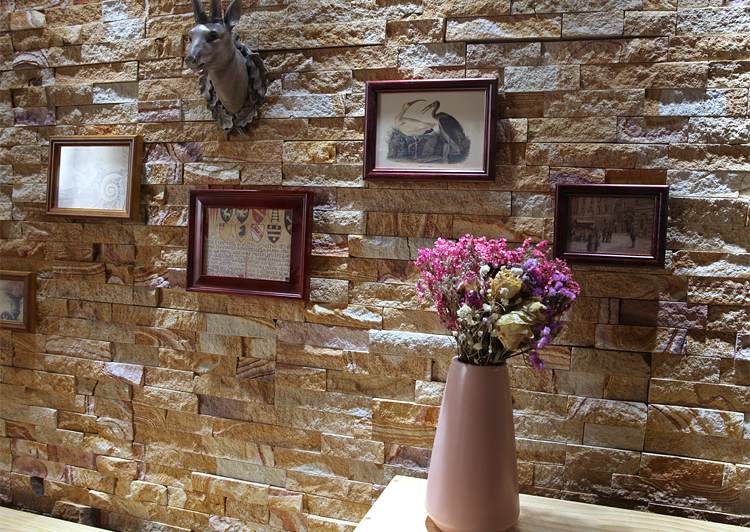
Quality Ledger Stone for Every Design
Explore our natural, handcrafted Kamień księgi products that combine timeless beauty with versatile design options. Perfect for contractors, distributors, and designers wanting premium materials that install quickly and last for decades.

Step 3: Mount the TV Safely on Stone Wall
Here’s where you protect your investment. A ułożony kamień surface isn’t your typical drywall, so mounting a TV requires extra care and the right approach. You’ll want to locate the studs behind the stone wall before you start drilling—use a stud finder or reference your installation photos if you documented the framing during construction.
If the studs don’t align with your ideal TV placement, you’ll need to install additional framing or blocking behind the stone panels. This gives you solid anchor points and prevents you from relying solely on the stone itself. When you’re ready to drill, grab masonry screws or heavy-duty anchors specifically designed for stone surfaces—standard drywall anchors won’t cut it here.
An articulating TV mount is your friend when working with uneven stone surfaces. It lets you adjust the angle and compensate for any irregular texture. Before you commit to drilling, pre-drill small pilot holes carefully to avoid cracking the stone panels. Start with a smaller bit and work your way up to the final size you need.
Once the mount is in place, test its support strength by applying gentle pressure before hanging your TV. Give the mount a firm tug and check that all anchors are secure. This simple step saves you from a costly accident down the road.

Step 4: Manage Wires and Conceal Cable Clutter
Here’s where that PVC conduit you installed earlier pays off big time. Run your HDMI cables, power cords, and any other connections through the conduit—you’ll keep everything hidden behind the stone without drilling new holes or ripping out sections later. It’s a clean, professional look that makes future upgrades or equipment swaps incredibly easy.
If you didn’t install conduit beforehand, don’t worry. You can still use surface-mount raceways painted to match your wall color. They’re not invisible, but they’re far better than loose cables dangling everywhere. Another smart move is installing recessed outlets directly behind your TV area. This keeps power cords tucked away and reduces the visual clutter that ruins an otherwise stunning media wall.
Take a few extra minutes to secure your cables tightly along their path. Use cable ties or clips to prevent sagging loops that’ll show up at awkward angles. And here’s a pro tip that’ll save you headaches down the road: label each cable at both ends. When you need to troubleshoot or upgrade your setup six months from now, you’ll thank yourself for taking this simple step.
Lighting Ideas for Stacked Stone Media Walls
The right lighting can transform your stacked stone wall from a simple backdrop into a stunning focal point. You’re not just illuminating a surface—you’re creating depth, highlighting texture, and setting the mood for your entire space.
LED strip backlighting works beautifully when mounted behind your TV or along the edges of the stone panels. This creates a subtle glow that adds depth without overwhelming the room. You can even sync it with your viewing habits for an immersive experience.
Adjustable spotlights or wall washers give you control over how the stone’s texture catches the light. Angle them to graze across the surface, and watch how shadows bring out every ridge and crevice. It’s like giving your wall a whole new dimension.
Warm light tones complement natural stone hues perfectly. They enhance the earthy, organic feel of the material while creating a cozy atmosphere. Cool whites can work too, but they tend to make the space feel more modern and stark.
Smart lighting controls let you adjust everything from your phone or voice assistant. Set different scenes for movie nights, casual TV watching, or entertaining guests. It’s convenience that matches the sophistication of your stone wall.
Common Mistakes and How to Avoid Them
Even experienced DIYers can stumble when installing a stacked stone accent wall behind a TV. The good news? Most pitfalls are easy to sidestep once you know what to watch for. Let’s walk through the most common slip-ups and the smart fixes that’ll save you time, money, and headaches down the road.
| Common Mistake | Solution / How to Avoid |
|---|---|
| Skipping wall reinforcement before mounting TV | Always locate studs with a reliable stud finder before you start. If your stone placement doesn’t line up with studs, add blocking or framing behind the wall. This ensures your TV mount has solid anchoring points—no compromises here. |
| Ignoring wire management planning | Install conduit (PVC pipe works great) inside the wall before you attach the stone. This simple step lets you easily add or swap cables later without tearing into your beautiful accent wall. Think ahead—your future self will thank you. |
| Uneven stone panel alignment | Use shims and a level constantly throughout installation. Check every few panels to catch alignment drift early. Starting with a perfectly level bottom row sets the foundation for a professional-looking finish. |
| Cutting stone panels improperly | Invest in a quality wet saw and always wear safety goggles and a dust mask. Measure twice, cut once—this old saying matters even more when working with stone. Take your time with cuts around outlets and mounts for clean, precise results. |
| Not sealing the stone | Apply a breathable stone sealer after installation and let it cure fully. This protects your stone from moisture, dust, and stains while making future cleaning a breeze. Real stone especially needs this protection to maintain its beauty over time. |
Frequently Asked Questions About Stacked Stone Walls
Is it advisable to put stone directly behind a TV?
Yes, stone behind a TV creates a stunning focal point and adds texture to your space. Just make sure you plan for proper mounting anchors and cable management before you start the installation.
How can I hide cables on a stone accent wall?
The smartest move is to install conduit (a simple PVC pipe) behind the stone during construction—this lets you run cables freely without tearing anything out later. If the wall’s already up, surface-mount raceways painted to match your stone can work well too.
What type of anchors are best for mounting a TV on stone?
You’ll want heavy-duty masonry anchors or toggle bolts rated for your TV’s weight. For uneven stone surfaces, an articulating mount gives you flexibility to adjust the angle and keeps everything secure.
Should the stone wall color be dark or light for a media wall?
Lighter stone tones reflect more light and make your room feel bigger, while darker tones create drama and help your TV screen blend in. Pick what feels right for your space and lighting—there’s no wrong answer here.
What is the approximate cost for installing a stacked stone accent wall?
Real stone typically runs higher due to material weight and labor intensity, while faux stone panels offer a budget-friendly alternative that’s easier to DIY. Your final cost depends on wall size, material choice, and whether you’re hiring pros or tackling it yourself.
Bringing It All Together
You’ve walked through every step—from prepping your wall and marking studs, to securing those stone panels with mortar, mounting your TV with robust anchors, and tucking away every wire for a clean finish. That’s no small feat. You’ve just transformed a plain wall into a natural stone centerpiece that elevates your entire living space.
Take a moment to appreciate what you’ve built. This isn’t just about hiding cables or hanging a screen. You’ve created a focal point that blends function with raw, textured beauty. And if you want to push it further, consider adding LED strip lighting behind the stone or exploring simple maintenance routines to keep that finish looking fresh for years.
Your media wall is ready. Enjoy it.
