Outdoor stone cladding can transform any space, but improper installation leads to costly repairs and a major headache. The biggest challenge? Ensuring the stacked stone stays put, regardless of weather. Successful glued stacked stone installation hinges on prep work, the right adhesive, and proven techniques.
This guide provides a step-by-step approach to achieving a durable and visually stunning result. With over 15 years of experience, Top Source Stone understands the nuances of stone products and how to ensure lasting installations. Let’s dive into the essentials for a successful outdoor project.
Prepare for Your Glued Stacked Stone Outdoor Installation
Proper preparation is key to a successful and long-lasting glued stacked stone installation. This chapter will guide you through the essential steps to ensure your outdoor project looks great and stands the test of time. We’ll cover everything from assessing your surface to gathering the right tools, making sure you’re ready for a smooth and professional-looking outdoor stone wall installation.
Preparing your surface properly ensures better adhesion and extends the life of your glued stacked stone, saving you time and money in the long run.
Assessing Your Outdoor Surface: Concrete, Brick, and More
Before you even think about gluing stone veneer, take a good look at the surface where you’ll be installing the stone. Is it concrete? Brick? Something else? Each material requires a slightly different approach. Concrete is generally a good base, but brick might need some extra attention to ensure a strong bond. Knowing your substrate is half the battle and the name of the game for a successful project.
Check for any existing damage, like cracks or crumbling areas. These issues need to be addressed before you start your glued stacked stone installation. Ignoring them can lead to problems down the road, such as the stone coming loose or the entire wall becoming unstable. A little bit of prep now can save you a whole lot of headaches later. The type of surface directly impacts the durability of the installed stone, so this step is critical.
Cleaning and Preparing the Substrate: Removing Debris and Ensuring Adhesion
Once you’ve assessed the surface, it’s time to clean it. This isn’t just a quick wipe-down; you need to thoroughly remove any dirt, dust, grease, or loose particles. A pressure washer can be your best friend here, especially for larger areas. For smaller areas, a scrub brush and some good old-fashioned elbow grease will do the trick. Ensure the surface is completely clean and dry before moving on.
Proper adhesion is crucial for outdoor stone wall installation. Consider using a primer specifically designed for stone veneer. These primers help create a strong bond between the stone and the substrate, ensuring that your stones stay put, even in harsh weather conditions. Top Source Stone offers a range of surface preparation products, including primers and cleaners, to ensure optimal adhesion and project longevity, which is a cost-effective measure when considering your entire project.
Selecting the Right Type of Glued Stacked Stone for Outdoor Use
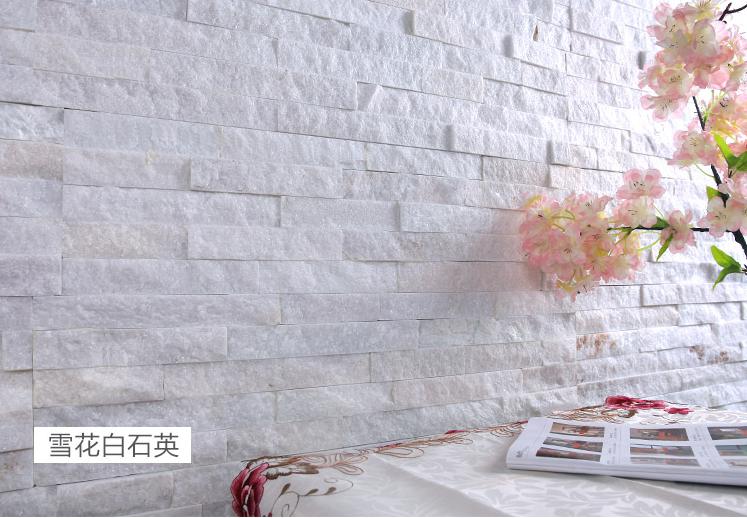
Not all stacked stone is created equal. When it comes to outdoor projects, you need to choose a stone that’s specifically designed to withstand the elements. Look for stones that are durable, weather-resistant, and suitable for your local climate. Natural stone is often a great choice, but make sure it’s properly sealed to prevent water damage.
Consider the aesthetic you’re going for as well. Do you want a rustic look or something more modern? Top Source Stone offers a variety of options to match your style and budget. Remember to factor in the weight of the stone; heavier stones may require additional support. Choosing the right stone not only enhances the appearance but also ensures the longevity of your gluing stone veneer project.
Gathering Necessary Tools and Materials: A Comprehensive Checklist
Before you start the actual installation, make sure you have all the necessary tools and materials on hand. This will save you time and frustration later on. Here’s a basic checklist:
- Stacked stone
- Adhesive (specifically designed for stone veneer)
- Primer
- Level
- Spacers
- Trowel
- Wet saw or angle grinder with a diamond blade
- Safety glasses and gloves
- Measuring tape
- Cleaning supplies (pressure washer, scrub brush, etc.)
Having everything ready before you begin ensures a smoother, safer, and more efficient preparing the surface for glued stacked stone process. Investing in quality tools can also make a big difference in the final result, making your project look professional and polished.
Glued Stacked Stone Installation: Material Cost Comparison
| Material | Cost per Square Foot (USD) | Quality Level | Durability Rating (1-10) | Installation Complexity |
|---|---|---|---|---|
| Natural Stacked Stone | $15 – $30 | Premium | 9 | Medium |
| Faux Stacked Stone | $8 – $15 | Mid-Range | 7 | Easy |
| Cultured Stone Veneer | $12 – $25 | High | 8 | Medium |
| Brick Veneer | $10 – $20 | Mid-Range | 6 | Easy |
| Concrete Stone | $7 – $14 | Basic | 5 | Easy |
The Ultimate Step-by-Step Guide to Outdoor Glued Stacked Stone Installation
Ready to transform your outdoor space with beautiful stacked stone? This chapter provides a clear, step-by-step guide to glued stacked stone installation, ensuring a professional and lasting finish. We’ll cover everything from applying the adhesive to maintaining consistent grout lines, so you can confidently tackle this project. Get ready to install stone veneer panels like a pro!
“Attention to detail during adhesive application and stone placement is crucial for achieving a strong bond and a visually appealing stacked stone wall.”
Applying the Adhesive: Techniques for Even Coverage and Strong Bonding
The right adhesive is essential for a successful stacked stone cladding outdoors. Use a high-quality, exterior-grade adhesive specifically designed for stone veneer. Apply the adhesive to the back of each stone, using a notched trowel to create even ridges. This ensures maximum surface contact and a strong bond. Avoid applying the adhesive directly to the wall, as this can lead to uneven coverage and potential adhesion issues.
Different stone types may require different adhesives. Top Source Stone offers various adhesive options recommended for specific stone materials. Ensure the adhesive is compatible with both the stone and the substrate. Applying the correct amount of adhesive is equally important. Too little, and the stone won’t adhere properly; too much, and it will squeeze out between the stones, creating a messy appearance. Practice makes perfect, so start with a small area to get a feel for the right amount of adhesive to use. Remember consistent pressure is key.
Placing and Securing the Stacked Stone: Tips for Alignment and Stability
Start placing the stones from the bottom up, ensuring each stone is level and properly aligned. Press each stone firmly against the wall, wiggling it slightly to ensure good contact with the adhesive. Use a level to check your work frequently, making sure the stones are straight and plumb. For larger stones, you may need to provide temporary support while the adhesive dries. This can be done using shims or small pieces of wood.
Pay close attention to the overall pattern as you place the stones. Vary the size, shape, and color of the stones to create a natural and visually appealing look. Avoid creating obvious patterns or lines, as this can make the wall look artificial. Overlap the stones slightly to create a staggered effect, which adds depth and texture to the finished wall. Proper stone placement is crucial for the overall aesthetic and structural integrity of the glued stacked stone installation.
Cutting and Fitting Stones: Achieving a Seamless and Natural Look
Inevitably, you’ll need to cut stones to fit around corners, edges, and other obstacles. A wet saw or angle grinder with a diamond blade is the best tool for this job. Always wear safety glasses and gloves when cutting stone. Measure the area you need to fill carefully, and mark the stone accordingly. Make clean, precise cuts to ensure a seamless fit.
When fitting the stones, try to maintain a natural look. Avoid creating perfectly straight lines or sharp angles. If necessary, use a hammer and chisel to break off small pieces of stone to create a more irregular edge. The goal is to make the cut stones blend in seamlessly with the rest of the wall. Using quality tools for cutting and fitting reduces waste and ensures customer satisfaction, and Top Source Stone packaging options also facilitate easy handling on job sites.
Maintaining Consistent Grout Lines: Using Spacers for Uniformity
While stacked stone is often installed without grout, maintaining consistent spacing between the stones is still important. Use spacers to create uniform grout lines, typically around 1/4 to 1/2 inch wide. These spacers help ensure that the stones are evenly spaced and that the adhesive has enough room to expand and contract with temperature changes. Remove the spacers after the adhesive has partially dried, but before it has fully hardened.
Consistent grout lines contribute to a professional and polished look. Clean up any excess adhesive that squeezes out between the stones using a damp sponge. Be careful not to smear the adhesive onto the face of the stones. With careful attention to detail and the use of spacers, you can achieve a beautiful and long-lasting step-by-step guide to installing glued stacked stone project.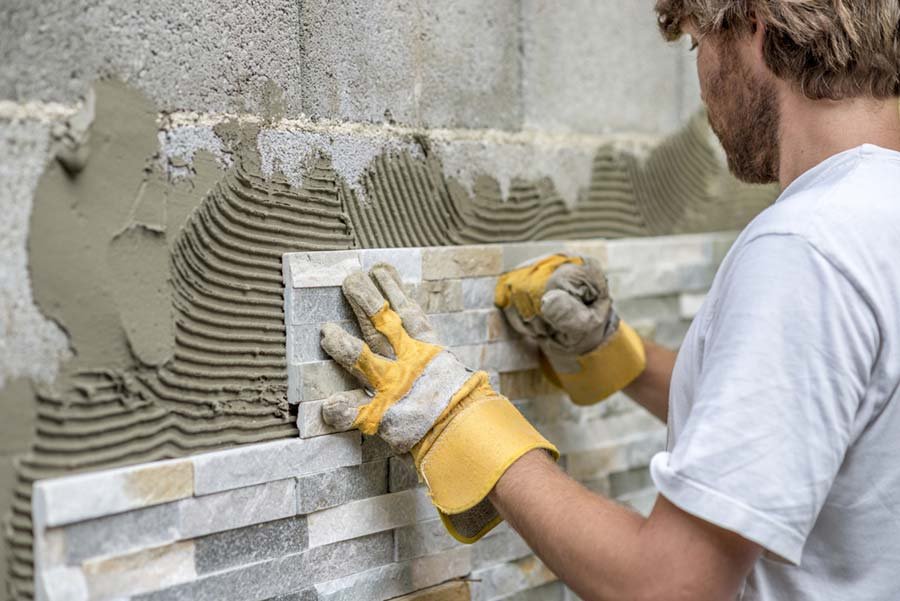
Recommended Adhesives for Different Stone Types
| Stone Type | Recommended Adhesive | Cure Time | Coverage per Gallon | Application Temperature |
|---|---|---|---|---|
| Natural Stone | Modified Thin-Set Mortar | 24-48 hours | 50-75 sq ft | 50-90°F |
| Manufactured Stone | Polymer-Modified Mortar | 24-72 hours | 60-80 sq ft | 40-95°F |
| Brick Veneer | Type S Masonry Cement | 24-48 hours | 40-60 sq ft | 40-100°F |
| Large Format Stone | Epoxy Mortar | 12-24 hours | 30-40 sq ft | 60-85°F |
| Lightweight Stone | Construction Adhesive | 24-48 hours | 80-100 sq ft | 40-90°F |
Protecting and Maintaining Your Outdoor Glued Stacked Stone: A Lasting Beauty
You’ve invested time and effort into your glued stacked stone installation, so it’s crucial to protect that investment. This chapter covers everything you need to know to ensure your outdoor stone feature remains beautiful and durable for years to come. From proper curing to routine maintenance, we’ve got you covered. Let’s keep that outdoor stone wall installation looking pristine!
“Proper curing, sealing, and drainage solutions are essential to prevent water damage and maintain the aesthetic appeal of your glued stacked stone installation over time.”
Allowing Ample Curing Time: Ensuring a Strong and Durable Bond
Curing time is a critical but often overlooked step. After installation, allow the adhesive sufficient time to fully cure before exposing the stone to the elements. This typically takes 24 to 72 hours, depending on the specific adhesive and weather conditions. Check the adhesive manufacturer’s instructions for the recommended curing time. Avoid applying any weight or stress to the stone during this period.
Rushing the curing process can compromise the bond between the stone and the substrate, leading to premature failure. Consider covering the installation with a tarp if rain is expected during the curing period. A little patience during this phase goes a long way in ensuring a strong and durable adhesive for stone veneer that will withstand the test of time. Think of it as letting your masterpiece “bake” properly!
Sealing the Stone: Protecting Against Water Damage and Staining
Sealing your stacked stone is essential for protecting it against water damage, staining, and discoloration. Apply a high-quality, breathable sealant specifically designed for natural stone. This sealant will create a protective barrier that repels water and prevents it from penetrating the stone. Apply the sealant evenly, following the manufacturer’s instructions. Reapply the sealant every 1 to 3 years, depending on your climate conditions and the type of sealant used.
Top Source Stone offers a range of sealant products and can advise on the frequency of re-application based on your local climate, emphasizing the value of protecting your investment. Different types of stone may require different sealants, so be sure to choose one that is compatible with your specific stone type. Sealing is a small price to pay for long-term protection and enhanced beauty.
Addressing Drainage Issues: Preventing Water Pooling and Premature Failure
Proper drainage is crucial for preventing water pooling and premature failure of your glued stacked stone installation. Ensure that the area around the installation is properly graded to allow water to drain away from the wall. Consider installing a drainage system, such as a French drain, to redirect water away from the foundation. Address any existing drainage issues before installing the stone.
Water pooling can lead to water damage, staining, and even structural problems. Pay close attention to areas where water tends to accumulate, such as near downspouts or in low-lying areas. Top Source Stone provides consultation services to address specific drainage challenges. By addressing drainage issues proactively, you can significantly extend the life of your stacked stone installation.
Routine Maintenance Tips: Cleaning and Inspecting Your Stacked Stone
Regular maintenance is key to keeping your stacked stone looking its best. Clean the stone regularly with a soft brush and a mild soap solution. Avoid using harsh chemicals or abrasive cleaners, as these can damage the stone. Inspect the stone periodically for any signs of damage, such as cracks or loose stones. Address any issues promptly to prevent them from escalating.
Power washing can be used, but with caution. Use a low-pressure setting and avoid directing the spray directly at the grout lines. Regularly inspecting and cleaning your stacked stone will help maintain its beauty and extend its lifespan. With just a little bit of care, your stone feature will continue to enhance your outdoor space for years to come. With regular upkeep, your how to maintain glued stacked stone outdoors will remain beautiful and durable.
Sealant Application Frequency Based on Climate
| Climate Type | Average Annual Rainfall (inches) | Recommended Sealing Frequency | Top Source Stone Sealant Recommendation | Potential Issues if Not Sealed |
|---|---|---|---|---|
| Arid | <10 | Every 3 years | Silicone-Based | Fading, Minor Staining |
| Temperate | 20-40 | Every 2 years | Acrylic-Based | Moderate Staining, Moss Growth |
| Humid Subtropical | 40-60 | Every 1-2 years | Penetrating Sealer | Significant Staining, Mold Growth |
| Tropical | >60 | Annually | High-Performance Sealer | Severe Staining, Algae, Structural Damage |
| Cold/Snowy | Varies | Every 2 years | Salt-Resistant Sealer | Efflorescence, Freeze-Thaw Damage |
Conclusion
From my years here at Top Source Stone, I’ve learned that a successful outdoor stacked stone installation boils down to three things: solid prep work, the right techniques, and protecting your investment. Skipping steps can be a total bummer, leading to headaches down the road.
As someone passionate about helping clients maximize value, I always emphasize that proper installation isn’t just about aesthetics; it’s about ensuring longevity and preventing costly repairs. I’ve seen firsthand how the right approach can transform a space and stand the test of time.
So, take your time, follow these steps, and don’t hesitate to reach out for expert advice. Your outdoor stone feature should be a source of pride for years to come.
FAQ
Q1: How do you install glued stacked stone for an outdoor use?
A1: To install glued stacked stone outdoors, ensure the surface is clean, dry, and flat. Apply a water-resistant adhesive and press the stone firmly into place. Secure the edges and allow it to cure as per the adhesive’s instructions to ensure stability.
Q2: What adhesive should I use for outdoor stone veneer?
A2: For outdoor stone veneer, use a high-quality, water-resistant construction adhesive designed for stone applications. Epoxies and polymer-modified adhesives often provide strong and long-lasting bonds.
Q3: Can you install stacked stone on drywall?
A3: Yes, stacked stone can be installed on drywall, but it’s recommended to use a cement backer board for added support, particularly when using heavier stone panels.
Q4: How do you ensure durability when installing stone cladding outdoors?
A4: Ensure durability by using weather-resistant adhesives, applying a water barrier if needed, and securely fixing each stone with mortar or construction adhesive designed for outdoor use.
Q5: How long does it take for stone veneer adhesive to cure?
A5: Adhesive cure time varies by product, but most stone veneer adhesives take 24-48 hours to fully cure. Check manufacturer’s guidelines for the specific adhesive used.
Q6: What is the best way to clean stone veneers after installation?
A6: To clean stone veneers, use a soft brush or non-abrasive cloth with warm water and mild detergent. Avoid using acid-based cleaners that can damage the stone surface.
Q7: Do I need a permit for installing an outdoor stone wall?
A7: Permit requirements for installing an outdoor stone wall vary by location. Check with local building authorities to determine if a permit is necessary for your project.
Q8: How can you maintain glued stacked stone outdoors?
A8: Regularly inspect the stone for damage, repair any loose pieces promptly, clean it annually, and reapply sealant if necessary to protect against weathering.
External Links
- How to Glue Wall Stone – Weekand
- How to Install Stacked Stone Veneer Wall Tiles
- DIY Guide: How To Install Stacked Stone Ledger Panels – MSI
- Stone Veneer Installation – 22 Tips to Finish Like a Pro | GenStone
- Can you install stone veneer with construction adhesive? – Remodel or Move
- Installation Guide for Stacked Stone Cladding
- Avoid 5 DIY Mistakes for a Pro Stacked Stone Finish – MSI
- Should I Glue Stack-able Wall Stones? – Select Stone Tools
