Installing stone veneer the right way protects your investment and creates a stunning accent wall that lasts for years. When you skip proper preparation or rush through the steps, you risk adhesion failure, cracking, or even structural damage down the line.
This guide walks you through every phase of the installation process with straightforward instructions, complete tool lists, and proven techniques from experienced installers. You’ll learn exactly what works and why it matters.
Whether you’re a homeowner tackling your first DIY project, a contractor refining your approach, or a designer overseeing an installation, following these methods will help you achieve results that look professional and stand the test of time.
Tools and Materials Needed for Installation
Getting your tools and materials ready upfront saves you from mid-project scrambles. You’ll need the right adhesives, cutting tools, and safety gear to create a professional-looking stone veneer wall that lasts. Here’s what you should gather before you start:
| Item | Purpose | Notes |
|---|---|---|
| Stone Veneer Panels | Main decorative material that creates the finished look | Choose a style that matches your design vision—natural stone offers authenticity while manufactured options provide consistency |
| Mortar (Thin-Set) | Adhesive that bonds stone to your wall | Mix to a thick cake batter consistency—too runny and it won’t hold, too thick and it won’t spread |
| Masonry Trowel & Notched Trowel | Apply and comb mortar for proper adhesion | Use the notched trowel on the back of each stone to create ridges that grip better |
| Mixing Bucket & Paddle | Mix mortar evenly and efficiently | A drill-mounted paddle speeds up mixing and gets you a smoother consistency |
| Level & String Line | Keep rows straight and level | Essential for a professional finish—your eye will catch crooked lines immediately |
| Masonry Saw or Wet Saw | Cut stone panels to fit corners and edges | Wear safety gear—stone dust is no joke, and flying chips can cause injuries |
| Chisel & Hammer | Trim stone edges for detailed cuts | Perfect for small adjustments where a saw would be overkill |
| cement board or Backer Board | Wall substrate that supports the stone’s weight | Strongly recommended over drywall—it handles moisture better and won’t sag under the stone’s weight |
| Water Spray Bottle | Mist absorptive stones before applying mortar | This step is crucial for sandstone and other porous materials—it prevents them from sucking moisture out of the mortar too quickly |
| Safety Equipment | Protective goggles and gloves | Always use during cutting and mixing—protecting yourself isn’t optional |
Step 1: Prepare the Interior Wall Surface
Before you even think about placing that first stone, you need to give it a foundation it can actually grip. If your drywall feels soft, damaged, or questionable in any way, don’t gamble with it—remove it and install cement board instead. Cement board gives you a stable, moisture-resistant base that mortar loves to bond with, and it won’t buckle or sag under the weight of your stone veneer.
Once your substrate is solid, take the time to clean the surface thoroughly. Wipe away dust, grease, or any old paint residue that could block the mortar from making full contact. Even a thin film of grime can weaken the bond and lead to stones popping off months down the line.
If you’re working in a bathroom, basement, or any space where humidity tends to creep in, install a moisture barrier over the wall. Yes, even on interior walls. Moisture trapped behind the stone can cause mold, weaken adhesion, and turn your beautiful accent wall into a maintenance nightmare. A simple vapor barrier now saves you from serious headaches later.
Step 2: Plan Layout and Mark Guidelines
Before you even open your mortar, take time to map out your stone placement. Grab a level and some string line to mark horizontal reference lines across your wall. These guides will keep your veneer rows straight and prevent that dreaded “wavy wall” look that screams amateur work.
You’ve got two options for where to start: bottom-up or top-down. Starting from the bottom lets you build a solid foundation row, while working from the top down keeps mortar drippings off your finished stones below. Think about your stone pattern and where awkward cuts might fall. You don’t want tiny slivers near corners or outlets because they’re a pain to install and rarely look good.
Take a few minutes now to measure and mark every outlet, switch, and corner location. Trust me, you’ll thank yourself later when you’re not frantically trying to figure out cuts with wet mortar drying on your trowel. This prep work separates installations that last from ones that become expensive do-overs.
Step 3: Apply Mortar and Set Stone Veneer
Getting your mortar to the right consistency is the foundation of a solid installation. Mix it until it reaches a thick cake batter texture—not too runny, not too stiff. This consistency grabs onto both the stone and your wall, giving you that durable bond you’re after.
Now comes the hands-on part. Use your notched trowel to spread mortar onto the back of each stone panel, then give it a slight twist as you press it into place. That twist motion creates ridges that lock the stone in, preventing it from sliding or separating down the road.
As you set each panel, keep checking your alignment with a level and your guide marks. Work methodically across the wall, pressing firmly and making sure each piece sits flush. Take your time here—this is where precision pays off in a finished look that feels intentional and professional.
Add Authentic Ledger Stone to Your Next Project
Explore durable, natural stone panels designed for versatile architectural styles. Save time and costs with our interlocking system, enjoy long-lasting beauty, and provide your clients with unmatched quality that stands the test of time.

Step 4: Cut and Fit Veneer Around Obstacles
You’ll face outlets, switches, and corners—don’t let them intimidate you. Measure twice, cut once. Use a masonry saw for straight cuts or a chisel for smaller adjustments. The goal is precision: if your stone doesn’t fit snugly around an outlet, you’ll see gaps that break the illusion of a seamless wall.
Corners deserve special attention. If your veneer kit includes L-shaped corner pieces, use them—they’re designed to hide seams and create clean lines. If you’re working with flat panels, miter your cuts at 45 degrees so the edges meet perfectly. This takes patience, but it’s what separates a DIY project from a professional-looking installation.
Smooth any rough edges after cutting. Jagged cuts catch the eye and prevent tight wall contact, which weakens the bond. Run your hand along each cut piece—if it feels sharp or uneven, refine it. Your veneer should sit flush against the wall, with no visible light bleeding through the seams.
Step 5: Finishing Touches and Sealing
Once you’ve finished setting your stone veneer, it’s time to protect your hard work. You’ll want to apply a high-quality natural stone sealer—this isn’t just about aesthetics, it’s about preserving the stone’s integrity. The sealer acts as a barrier against stains and makes routine cleaning much easier down the road.
Before sealing, take a moment to clean the surface carefully. Use a soft brush and clean water to gently remove any mortar residues that might’ve splashed onto the stones during installation. You don’t want to scrub too hard here—stone veneer can be more delicate than you’d think, and you’ve already put in too much effort to risk damaging it now.
For long-term maintenance, stick with pH-neutral stone cleaners. Regular cleaning with the right products will keep your veneer looking fresh and extend its lifespan. Think of it as a small investment that pays off every time you walk past that beautiful accent wall you’ve created.
Common Mistakes and How to Avoid Them
Even experienced DIYers can run into trouble when installing stone veneer. Let’s walk through the most common pitfalls so you can sidestep them and get a professional-looking result from the start.
| Common Mistake | How to Avoid |
|---|---|
| Installing directly on drywall without cement board | Drywall alone can’t handle the weight and moisture from mortar. Always reinforce your wall with cement board first—it gives you the sturdy substrate you need for a lasting installation. |
| Applying mortar too thin or too thick | Think of mortar like cake batter—too runny and it won’t hold, too thick and it won’t spread right. Mix to a consistent texture and maintain a 3/8″ to 3/4″ thickness for proper adhesion. |
| Not leveling strings or guides before starting | Eyeballing it might seem faster, but you’ll end up with crooked courses. Set level lines and use string guides from the start—it’s the difference between a rustic look and a messy one. |
| Neglecting to mist absorptive stones | Dry, porous stones like sandstone suck moisture right out of your mortar before it can bond. A light spray of water on the back creates the right conditions for strong adhesion. |
| Ignoring sealing after installation | Natural stone is gorgeous but vulnerable to stains and moisture. Apply a quality stone sealer once your installation is complete—it protects your investment and makes daily cleaning effortless. |
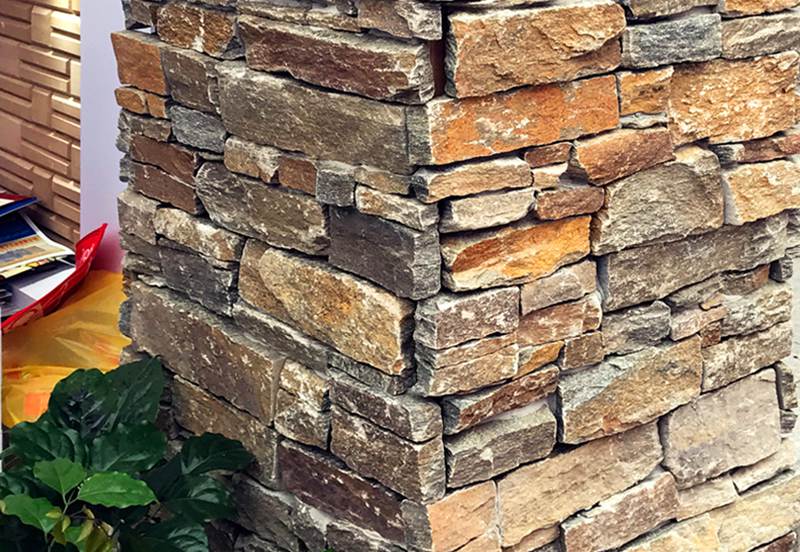
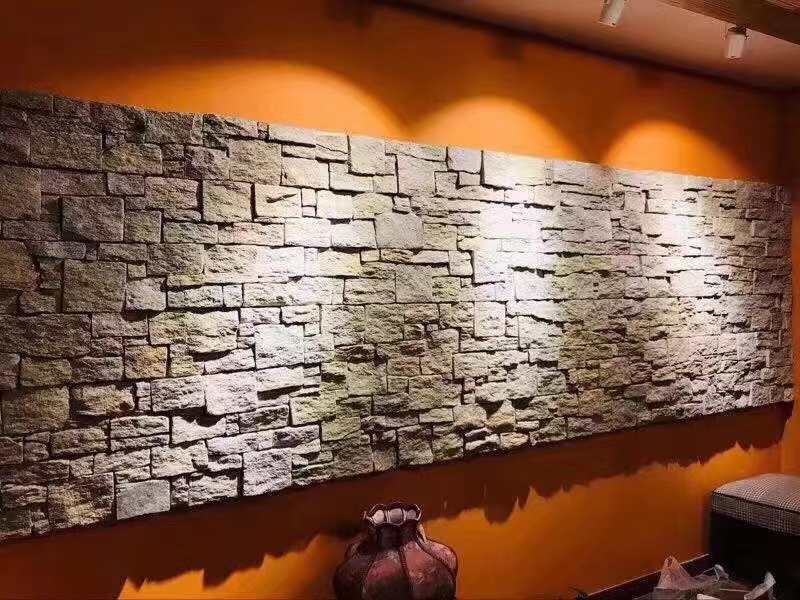
Selecting Stone Veneer Styles for Interior Walls
Your choice of stone veneer style sets the entire mood of your space, so pick one that speaks to your vision. If you’re going for a sleek, contemporary vibe, the Flat Series delivers clean lines and a polished finish that works beautifully in modern interiors. On the flip side, if you want warmth and character, the Rough Series brings rustic textures that add depth and a lived-in feel to any room.
For spaces where you want to make a real statement, the Pencil Series offers intricate detailing that elevates accent walls into focal points—perfect for high-end living rooms or entryways. The Marble Series takes things up another notch with timeless elegance, lending a luxurious touch to upscale designs. Just keep in mind that marble works best in spaces with good lighting to showcase its natural veining.
When you’re narrowing down your options, think about how your room’s lighting plays with different colors and textures. Natural light brings out the subtleties in lighter stones, while warmer artificial lighting can enhance earthy tones and create a cozy atmosphere. Your stone veneer should complement your existing design—not fight against it.
Preparing Wood Paneling Walls for Stone Veneer
Wood paneling isn’t the ideal substrate for stone veneer—it simply can’t handle the weight and moisture that comes with mortar installation. You’ll need to install a solid backing layer first, and cement board is your best bet here. It gives you the structural integrity you need and won’t buckle under the combined weight of mortar and stone.
Moisture is another concern you can’t ignore. Wood and water don’t mix well, and mortar introduces plenty of moisture during installation. Before you lay down that cement board, add a moisture barrier between it and the paneling. This protects your wood from warping or developing mold as the mortar cures and over time.
Here’s where planning pays off: use your stone layout to strategically cover those paneling seams. Map out your stone pattern before you start adhering anything. This way, you’ll hide joints and transitions naturally, creating that seamless accent wall look you’re after. Take measurements, do a dry layout on the floor if needed, and mark your cement board accordingly.
Frequently Asked Questions About Stone Veneer Installation
What is the average cost to install stone veneer on interior walls?
Costs vary widely based on the type of stone and project size, typically ranging from $10 to $45 per square foot for materials and labor. Natural stone veneer runs higher than manufactured options, while DIY installation can cut labor costs significantly if you’re comfortable with the work.
Is installing stone veneer a suitable DIY project for beginners?
Yes, it’s manageable for beginners willing to learn proper techniques. The process is forgiving since a slightly imperfect, rustic look adds character to interior spaces, making it less intimidating than precision-demanding projects.
Can stone veneer be installed directly on drywall?
You can install stone veneer on drywall using adhered installation methods with proper preparation. The key is ensuring your drywall is structurally sound and applying a scratch coat before setting the stones to create a strong bond.
How durable is stone veneer over time on interior walls?
Stone veneer is highly durable when properly installed, lasting decades with minimal maintenance. Both natural and manufactured options offer excellent longevity, requiring only occasional dusting and resealing to maintain their appearance.
What essential tools does this project require?
You’ll need a notched trowel, mixing bucket, level, masonry saw, and string line for alignment. Additional supplies include mortar, a mixing paddle, and water for proper adhesion and finishing work.
Bringing Your Vision to Life
You’ve got all the pieces now—the prep work, the installation steps, and the finishing touches. Installing stone veneer on your interior walls isn’t just doable; it’s a project that can completely transform your space when you follow the process carefully.
The key is giving your wall the foundation it needs. A properly prepared substrate and that crucial scratch coat make all the difference between a feature wall that lasts decades and one that develops problems down the road. Take your time with these early stages, and the rest falls into place naturally.
Once your stone is up, don’t skip the sealing step. A quality sealer protects your investment and keeps that natural beauty looking fresh. Regular dusting and occasional resealing will keep your accent wall stunning for years to come—no heavy maintenance required, just a little attention when needed.
