


Stone Panels Peeling Off the Wall: How to Identify the Failure Plane Before Anyone Assigns the Blame
Short answer: a delaminated stacked stone panel fails along one of three planes, and the plane tells you who is responsible. If the stone is still bonded to its mesh or cement backing and the whole sheet came off the wall, the failure is at the adhesive-to-substrate interface, which points at surface preparation, primer, or the bonding system. If the stone separated from the backing inside the panel, the failure is in the factory lamination. If adhesive sits on both the wall and the panel back, the adhesive itself failed, usually from skinning over, mixing error, or movement. Before any repair starts, photograph the break face, keep three panels and the adhesive batch records, and run a pull-off test on a still-attached area. The evidence, not the argument, settles who pays.
Fourteen months after handover, an exterior column starts shedding Z-clad panels in patches, and the meeting that follows is where projects lose money. The installer says the panels were defective. The supplier says the adhesive failed. The owner says both of them did. This article is the field method for turning that meeting into a diagnosis: which plane broke, what each plane means, which tests survive scrutiny, and what to preserve before the repair crew touches anything.
The Three Failure Planes and What Each One Means
Pull a detached panel off and look at its back, then at the wall behind it. There are only three informative outcomes. First: the panel back is intact, the mesh or cement backing still holds every stone, and the wall surface is bare or shows only a thin smear. The bond between adhesive and wall gave up. That interface is controlled by substrate preparation: dust, paint, release agents, missing primer, or a surface that was too porous or too dense for the adhesive system specified. Second: the backing is still on the wall with adhesive, but the stones have come off it, or the mesh has torn out of the cement layer. The failure is inside the panel, at the factory lamination, and no site procedure explains it. Third: adhesive is on both the wall and the panel back, and the break is within the adhesive layer itself, often glossy and smooth. That is adhesive failure, typically from applying an adhesive that skinned over before the panel was pressed, from incorrect mixing, or from movement the adhesive was never rated for.
Reading the Break Face Like a Forensics Technician
The break face carries the story if you look before you clean. A glossy, smooth adhesive surface on the panel back means the adhesive formed a skin before bedding, a classic sign of open-time overrun in warm or windy conditions. A dry, powdery residue on the wall means the substrate was dusty or the primer was skipped. Adhesive covering only the ridges of a notched trowel pattern, with valleys between, means insufficient coverage: the panel was spot-bonded where the system required full buttering. Dark staining or a musty smell at the interface points to chronic moisture behind the panels, which degrades most organic adhesives over time. None of these readings require a laboratory; they require a camera, a chisel, and the discipline to look before the repair crew power-washes the evidence away.
The Two Field Tests That Survive a Dispute
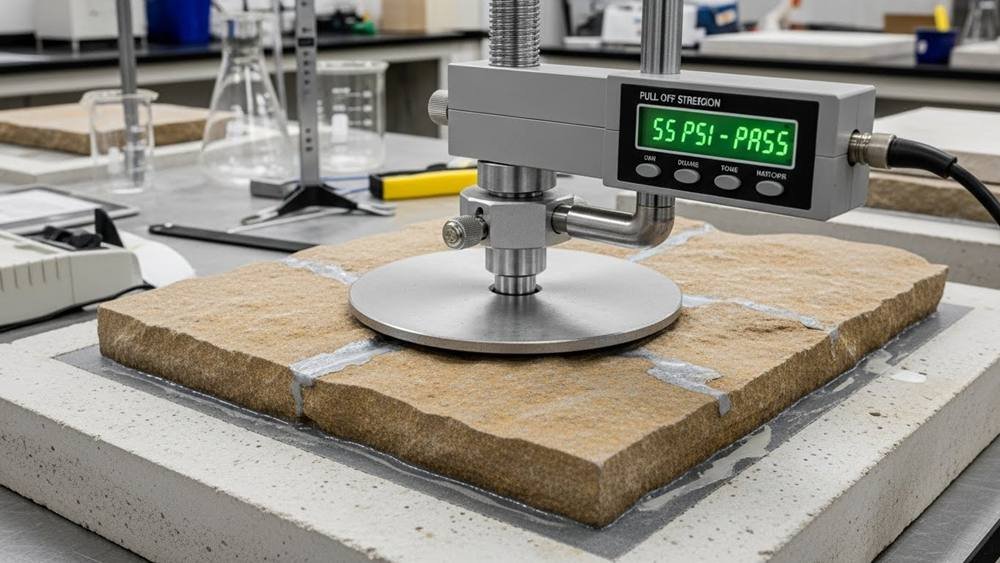
The first is the pull-off test. A portable dolly pull-off tester bonds a small disc to an intact area of cladding and measures the force needed to break the bond, in the same family of methods used for coating and anchor inspection. The number matters less than the comparison: test an area that is still sound, test near the failed zone, and compare both against the adhesive manufacturer’s published requirement. A sound area that passes while the failed area broke at the wall interface localizes the problem to what was different at the failed area, which is usually substrate preparation. The second test is the tap survey: a light tap across the wall maps the hollow zones, showing whether the problem is a patch or the whole elevation, and that single distinction decides between a local repair and a reclad conversation.
Both tests are inspection-grade work. If the sums involved justify it, bring an independent building inspector, the kind of professional whose reports are written to be read by the other side; the home-inspection trade body InterNACHI is a useful place to find that standard of practice. If the sums do not justify it, the photographs, the coverage observations and the moisture readings above still carry most of the weight.
Evidence to Preserve Before the Repair Crew Arrives
Repair destroys the crime scene, so preserve it first. Photograph every detached panel from both faces with a scale in frame, and photograph the wall behind at the same density. Keep at least three full panels, wrapped and labelled with their location. Retain the adhesive: the batch number from the bag or cartridge, any unopened stock, and a cured sample from the failed area if it can be chipped free. Pull a small substrate sample where the bond failed, bag it, and note the wall’s orientation and any recent works near it. Write a one-page timeline: specification date, delivery date, installation dates with weather, first movement noticed, inspection date. That packet is what converts a blame argument into a document review, and it is also what your supplier’s quality team will ask for before opening a claim, exactly the evidence chain described in our pre-shipment inspection guide applied in reverse, after installation instead of before shipping.
The Document Chain That Prevents the Argument Entirely
Most delamination disputes are decided before the first panel is hung, by what was written down. The chain that prevents the fight looks like this: the approved submittal naming the adhesive system and the substrate preparation required; a signed-off prep record for each elevation; weather and temperature logs during installation; coverage checks on a mock-up panel before the run started; and the supplier’s batch records for the panels. When those exist, a failure is a technical event with a cause. When they do not, a failure is a negotiation, and negotiations are won by whoever has the most lawyers rather than the best facts. The installation-error patterns that most often sit behind late delamination, from skipped primer to wrong-notch troweling, are catalogued in our installation errors and repairs guide.
Repair, Rebuild, or Reclaim: The Decision After Diagnosis
Once the plane is identified, the remedy follows. Factory lamination failures mean panel replacement under whatever warranty exists, and the retained panels plus batch records are the claim. Substrate-interface failures mean re-preparing the wall and re-bonding with the correct primer, and the question becomes how far the problem spreads, which the tap survey answers. Adhesive-cohesion failures usually mean the wrong product or the wrong open time for the conditions, and the fix is a different system, not a different supplier. The physical repair sequence for detached panels, from re-bonding to re-pointing the joints, is covered in our peeling stone wall repair guide; the commercial decision is whether the repair is a warranty item or a maintenance budget item, and that decision is only defensible with the evidence packet above.
What the Diagnosis Changes About the Repair Quote
The failure plane also protects your budget during the repair itself. A repair quoted without a diagnosis is a guess, and guesses get expensive: the crew re-bonds with the same adhesive over the same preparation that already failed once, the wall looks perfect at handover, and the second delamination arrives inside the repair warranty. Insist that the repair method names the plane it is fixing, and that the quote includes the preparation the original specification skipped, whether that is a primer coat, a different notch size, or full buttering on the panels. A supplier or installer confident in the diagnosis will write the method down; one who will not is repeating the experiment.
Conclusion: The Wall Tells You Who Failed
Delamination is not a mystery; it is a readable break. Stone still on the backing with a bare wall means preparation. Stone clean of the backing means the panel. Adhesive on both faces means the adhesive. Photograph it, test it, keep three panels and the paperwork, and the fourteen-month argument becomes a one-page diagnosis. The projects that never have this conversation are not luckier; they are the ones who specified the substrate preparation, logged the conditions, and kept the batch records from day one.
Frequently Asked Questions
The stone is still stuck to the mesh. Does that prove the panels are fine?
No. It shows the factory lamination held, which moves the suspicion to the adhesive-to-wall interface, but it does not prove the panel is innocent: a backing that tore out of the stone line would. Read all three faces, panel back, wall, and adhesive, before concluding.
How many panels should I keep as evidence?
At least three, from different failure locations, plus substrate samples and the adhesive batch records. Three shows whether the defect is systemic or local, which is the first question any warranty review asks.
Can a pull-off test damage a wall that is still sound?
It leaves small test discs and minor surface marks, which are cosmetic and repairable. Compared with an unresolved blame dispute, a few test points are the cheaper choice; do them next to the failed zone, not in the middle of the best elevation.
