Perfecting the fieldstone installation puzzle is the only way to prevent structural shifts and costly masonry rework on high-end residential or commercial facades. Mismanaging the layout leads to long, continuous mortar seams that compromise both the visual appeal and the physical integrity of the wall. Contractors who ignore the systematic placement of irregular stones often face project delays and increased material waste when patterns fail to align during the final phases of the build.
We outline the standard operating procedure for dry-fitting stones on the ground to solve the layout before mortar enters the equation. This technical walkthrough details how to apply the 3-point rule, balance large boulders with small filler stones, and maintain consistent grout widths across an irregular surface. Following these steps creates a repeatable workflow for installers to achieve a high-performance bond and a seamless aesthetic finish.
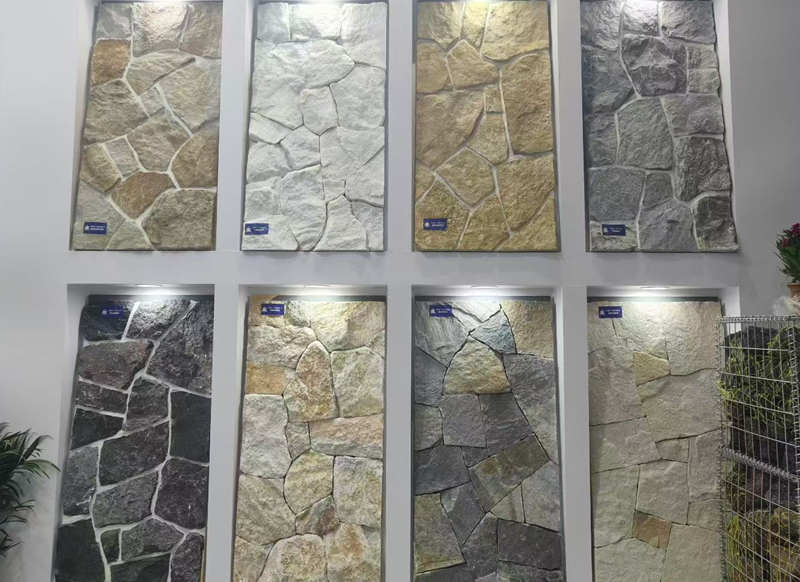
The Challenge of Random Shapes: Avoiding Long Mortar Seams
Structural integrity and aesthetic realism in thin stone veneer depend entirely on disrupting the human eye’s tendency to find linear patterns in random materials.
Disrupting Linear Joints with Bespoke Random-Lay Patterns
Achieving a natural look with loose stone requires installers to consciously avoid “running bonds” or stacked vertical joints. Unlike uniform brickwork, irregular thin stone veneer relies on a bespoke random-lay pattern where each piece is selected to nestle into the negative space of its neighbors. We provide loose stones in varied dimensions to ensure that no two identical pieces sit adjacent, which eliminates the long, straight grout lines that often ruin the illusion of a structural dry-stack wall.
| Installation Metric | Traditional Bulk Fieldstone | Top Source Sawn-Back Veneer |
|---|---|---|
| Joint Management | Wide, irregular gaps (1″+) | Tight, consistent joints (3/8″ – 1/2″) |
| Adhesion Surface | Irregular/Rough Back | 100% Sawn-Back Precision |
| On-site Labor Cost | High (Extensive sorting/chipping) | Low (Up to 30% reduction) |
Installers must prioritize the “broken joint” technique. This involves placing a larger stone over the junction of two smaller stones below it. By maintaining this staggered approach, the mortar seams remain secondary to the stone’s texture, ensuring the wall retains its full-depth visual integrity.
Managing Variable Thickness and Depth
Irregular stone faces create natural shadows that hide transitions, but thickness variations require careful mortar bed management. Our thin stone veneer is strictly maintained at 25–40mm to prevent excessive weight while providing enough relief for a rugged profile. We recommend medium-bed polymer-modified mortars to compensate for minor depth differences. This allows the mason to “float” the stones, ensuring the front faces align reasonably well while the sawn backs maintain a permanent, flat bond with the substrate.
- Apply mortar to the entire sawn back to eliminate air pockets that trap moisture.
- Keep mortar recessed from the stone face to enhance the natural shadow lines.
- Use quartzite or slate materials for projects requiring high-density resistance to freeze-thaw cycles.
Precision Cutting and Adhesive Selection
The key to a zero-repeat natural variation lies in the preparation of the material before it reaches the job site. We utilize diamond-tipped sawing equipment to create the flat bonding surface, which removes the need for installers to hammer-dress the back of every stone. For high-performance feature walls, polymer-modified mortars provide the necessary shear bond strength—often exceeding 300 PSI—to hold heavy irregular pieces in place without sagging.
Final quality checks involve verifying the edges of each loose stone piece. Removing flare and ensuring clean edges allows for tighter joints, which reduces the overall volume of grout needed and keeps the focus on the 100% natural mineral colors. This meticulous approach to material processing ensures that the final assembly looks like a hand-carved masterpiece rather than a mass-produced product.
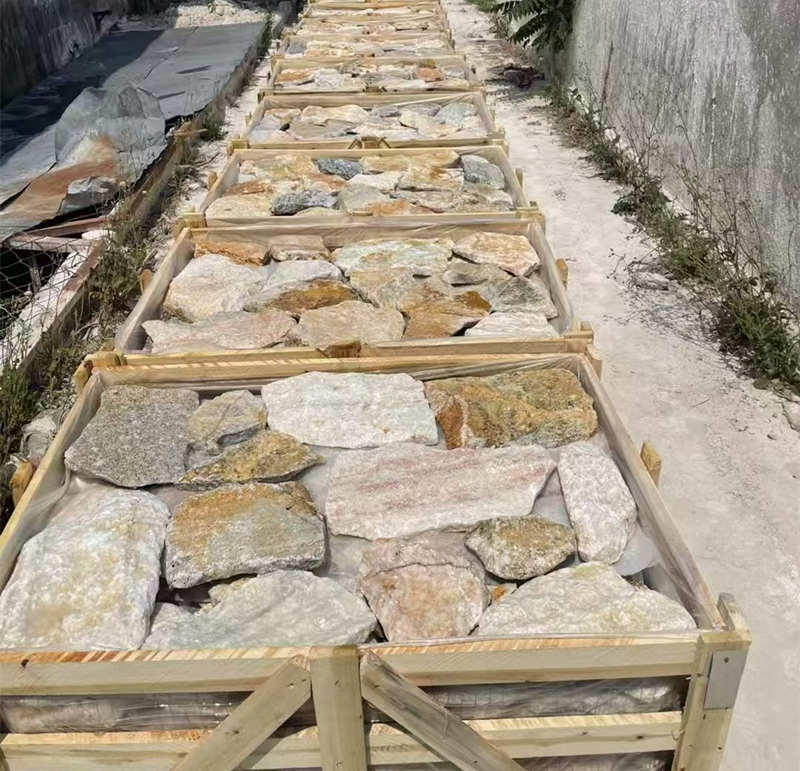
Laying Out Your Stone Puzzle on the Ground First
Pre-installing a dry-run layout on the ground reduces on-site cutting errors and ensures a “Bespoke Random-Lay Pattern” that factory-glued panels simply cannot replicate.
Arranging Natural Textures for Visual Flow
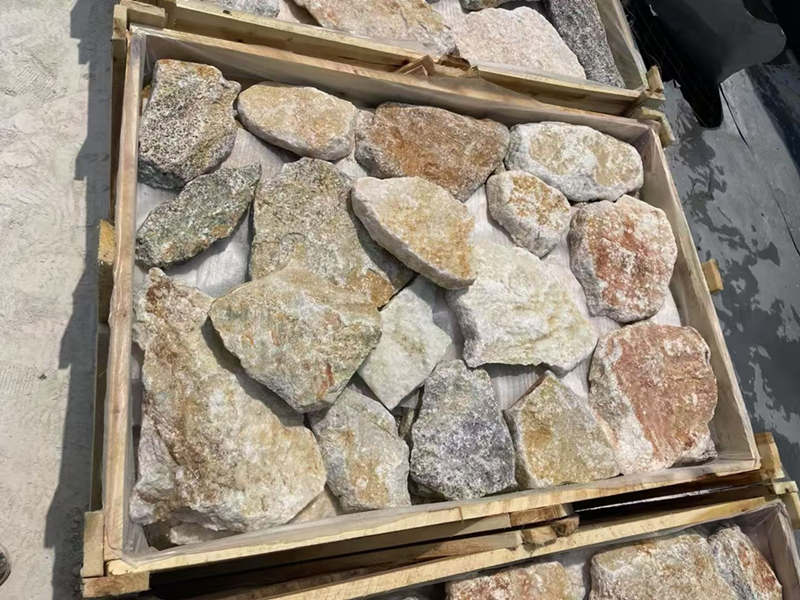
We recommend spreading individual loose stones on a flat surface to identify specific textures and surface variations before they reach the wall. This phase allows installers to prevent identical shapes or textures from sitting adjacent to each other, which is essential for maintaining a high-end architectural finish. By viewing the “Zero-Repeat Natural Variation” of our quartzite or slate veneer from above, masonry teams can ensure the project avoids the repetitive, artificial look common with manufactured concrete alternatives.
Designing the layout on the ground first highlights the unique character of genuine quarried stone. Our factory sourcing ensures that every piece in a single order comes from the same quarry vein, but natural shifts in grain and mineral deposits still occur. Spreading the stones allows for a controlled aesthetic flow that aligns perfectly with the architectural requirements of 2026 commercial facades or luxury residential fireplaces.
Boost Profitability with
Premium Stacked Stone
Secure factory-direct pricing on durable, interlocking panels that significantly reduce labor costs and installation time. Our rigorous quality control and direct quarry ownership ensure a consistent supply for your high-volume commercial and residential projects.

Managing Tonal Consistency Across Batches
Successful thin stone veneer projects require mixing material from multiple crates simultaneously. Natural stone like our Blue Diamond Ledgestone or Ivory Sandstone inherently features subtle tonal shifts. Spreading these pieces out first prevents sudden “color blocks” that can disrupt the visual continuity of a large-scale wall. This method ensures a gradual transition between lighter and darker shades across the entire surface.
| Feature | Standard Fieldstone | Top Source Stone Sawn-Back |
|---|---|---|
| Backing Finish | Rough / Irregular | 100% Precision Sawn-Back |
| Thickness Control | 30mm – 80mm (Variable) | Strict 25mm – 40mm |
| Installation Speed | Slow (Requires Shimming) | 30% Faster (Flat Bonding) |
| Corner Integrity | Mitered Flats | Authentic L-Shape Corner Wraps |
Integrating Authentic Masonry Corner Wraps
For loose stone installations, the transition between flat wall areas and external corners is where professional craftsmanship is most visible. Mapping the layout on the ground allows contractors to integrate our L-shaped corner pieces with flat panels seamlessly. This step eliminates the need for complex, time-consuming miter cuts on-site and preserves the “Full-Depth Visual Integrity” of the wall. When the 25–40mm veneer is correctly paired with these matching corners, the finished project becomes indistinguishable from a traditional, heavy structural stone wall.
Pre-fitting these pieces on a 1:1 scale template on the ground helps project managers meet tight 2026 deadlines by streamlining the actual mortaring process. We emphasize using this layout time to check the fit of each sawn-back stone, ensuring that the final hand-laid installation achieves the organic, dry-stack aesthetic specified by architects without the structural weight of full-bed stone.
- Mix stones from at least three different crates to ensure color harmony.
- Position L-shaped corners first in the dry-run to set the vertical rhythm.
- Identify and set aside any pieces that require minor trimming for a tight “dry stack” look.
- Use the sawn-back surface to your advantage for perfectly flat ground-testing.
The 3-Point Rule: Ensuring Each Stone Touches Three Others
Structural integrity in irregular fieldstone veneer relies on a nesting technique where each stone locks into three adjacent pieces to create a self-supporting web that prevents sagging during the mortar cure.
Structural Stability Through Multi-Point Contact
Natural stone installation requires more than just adhesive strength; it demands mechanical interlocking. By positioning each stone so it physically contacts at least three adjacent stones, you create a stable framework that distributes vertical weight across multiple points. This prevents the concentration of pressure on a single underlying stone, which often leads to shifting or cracking in the facade over time.
Using this 3-point contact method effectively minimizes the need for temporary shims. Because the stones “nest” into one another, they remain secure while the high-strength polymer-modified mortar sets. This is particularly vital for our heavy 25–40mm thick veneer, where gravity constantly pulls at the bond before it reaches full shear strength.
| Installation Metric | Standard Loose Stone | Top Source Stone Spec |
|---|---|---|
| Backing Finish | Natural/Uneven | 100% Individually Sawn-Back |
| Thickness Control | Varies (30-60mm) | Strict 25–40mm Range |
| Weight Management | Heavy/Inconsistent | Approx. 65kg/m² (Lightweight) |
Eliminating Long Vertical and Horizontal Seams
Applying the 3-point rule naturally breaks up the linear path of mortar joints, a move essential for both structural integrity and visual authenticity. When you ensure three points of contact, you force a staggered layout. This prevents the formation of “running joints”—long vertical or horizontal lines—that weaken the facade and scream “amateur installation.”
This technique replicates the look of traditional dry-stack masonry by filling voids with stones of varying shapes. By avoiding straight lines, you hide the panelized nature of modern veneer and create a bespoke feature wall that looks like a structural stone block. It creates a seamless finish that emphasizes the stone’s natural variation rather than the mortar grid.
Optimizing Stone Selection for Tight Interlocking
Executing the 3-point rule successfully depends on your ability to select the right stone shapes to fill gaps efficiently. Professional installers often pull from different crates to mix sizes, using smaller filler stones to bridge the gaps between larger boulders. This ensures that every piece in the “Bespoke Random-Lay Pattern” contributes to the overall stability of the wall.
Maintaining tight tolerances between stones reduces the volume of exposed adhesive, which enhances the “Full-Depth Visual Integrity” of the project. We recommend dry-laying sections on the ground to test these contact points before applying the scratch coat. This pre-planning phase saves significant on-site labor and guarantees a zero-repeat natural aesthetic once the stones move to the vertical substrate.
- Mix different stone dimensions to avoid placing identical shapes side-by-side.
- Rotate stones at various angles to maintain a truly random orientation.
- Utilize sawn-back edges for a flat bonding surface that maximizes contact area.
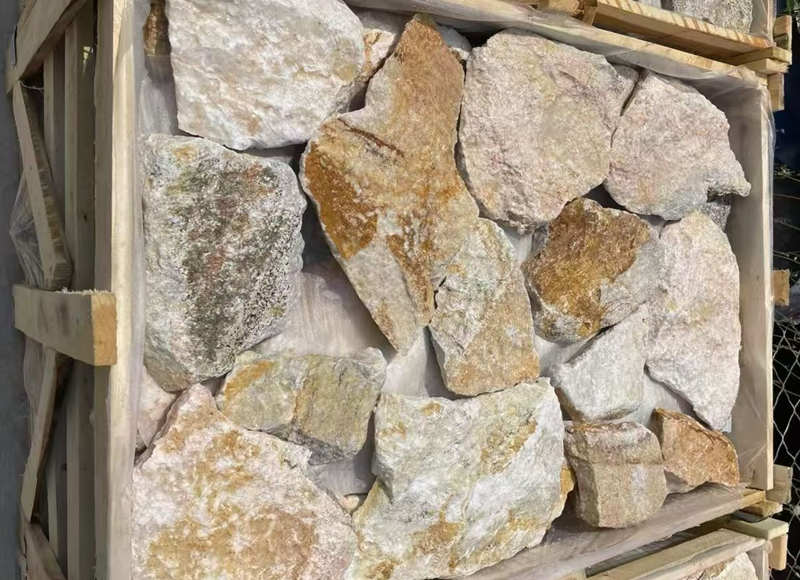
Mixing Large Boulders with Small Filler Stones
Achieving a natural fieldstone aesthetic requires a deliberate 70/30 distribution ratio, using large boulders as structural anchors and small filler stones to eliminate artificial-looking voids.
Focal Point Selection with Large Boulders
Large boulders dictate the visual weight and scale of the entire installation. We select stones with unique natural textures—such as our Rustic Irregular series—to serve as the primary anchors. Installers must position these heavy units first to define the boundaries and structural layout. Since Top Source Stone provides individually sawn-back pieces, even these larger boulders maintain a flat bonding surface, which prevents the “rolling” effect common with rounded natural fieldstone.
Stability starts at the base. Every large boulder must sit securely on a stable substrate to prevent shifting during the curing process. In high-end B2B projects, these focal stones create the “Full-Depth Visual Integrity” that distinguishes a premium quarry-sourced wall from cheap, repetitive concrete casts. By anchoring the design with these substantial pieces, you establish a sense of permanence and geological authenticity.
Using Filler Stones for Seamless Transitions
Smaller filler stones function as the connective tissue of the masonry. These pieces bridge the irregular gaps between large boulders, eliminating large mortar “pools” that signal a low-quality installation. We recommend packing these smaller stones tightly into crevices to maximize stone-to-stone contact. This technique not only improves the “Bespoke Random-Lay Pattern” but also enhances the structural interlocking of the wall.
To maintain a cohesive look, installers should pull filler stones from the same quarry vein as the boulders. This ensures color harmony across the surface. Varying the size and orientation of these small pieces is essential; predictable patterns make a natural stone wall look like a factory product. A skilled mason uses these fillers to hide the sawn edges of adjacent stones, ensuring only the natural face remains visible.
Modern Bonding Techniques for Stability in 2026
Modern masonry in 2026 relies on high-performance polymer-modified mortars rather than basic Type N mixes. These adhesives provide the shear bond strength necessary to hold heavy boulders on vertical surfaces without sagging. For outdoor applications in freeze-thaw climates like the Northern USA or Canada, these polymers allow the bond to flex slightly with thermal expansion, preventing the cracks that typically form in rigid, traditional mortar joints.
When working with significant protrusions, we implement mechanical anchors or mesh backing to supplement the chemical bond. Moisture-resistant barriers are non-negotiable for exterior features. These systems protect the substrate from water infiltration while the “Climate-Tested Durability” of our natural quartzite and granite ensures the stone itself remains impervious to staining or salt damage over decades of exposure.
Balancing Texture and Weight in Stone Designs
A successful layout balances the rugged, high-dimension look of boulders with the flatter profiles of filler panels. We aim for a ratio of approximately 70% large stones to 30% filler. This specific balance mimics a natural quarry face and prevents the wall from looking too “busy” or, conversely, too sparse. Combining different textures—like our Rough Series with flatter Blue Quartzite—creates dynamic shadows that change throughout the day.
Weight management remains a critical technical constraint. Standard wall substrates typically handle 8-13 lbs per square foot. Our thin stone veneer is strictly maintained at 25–40mm thickness, bringing the average weight to approximately 65kg/m². This allows architects to specify “Full-Depth Visual Integrity” without the massive structural reinforcement required by traditional 6-inch thick building stone.
Applying the Scratch Coat and Buttering Irregular Backs
Achieving a permanent bond with heavy thin stone veneer requires a dual-stage mortar strategy that prioritizes mechanical interlocking at the substrate and 100% surface contact on the stone back.
Establishing a Strong Mechanical Bond
The scratch coat functions as the structural foundation for the entire masonry assembly. Installers apply a consistent layer of Type-S or polymer-modified mortar over the metal lath, ensuring the mix fully embeds into the mesh to create a robust moisture barrier. This layer must not be left smooth; while the mortar remains damp, we use a scarifier rake to etch horizontal grooves across the surface.
These “teeth” are vital for 2026 installation standards, as they significantly increase the surface area available for the bond coat. By creating these deep, horizontal ridges, the wall system gains the mechanical grip necessary to support the 65kg/m² weight of Top Source Stone natural quartzite or granite. Without this textured profile, the risk of “curling” or shear failure increases under thermal expansion.
Back-Buttering for Full Surface Contact
Natural loose stone features irregular, split-face textures that naturally create air pockets if pressed directly onto a flat wall. To solve this, we utilize the back-buttering technique, applying a thin, 1/2-inch layer of high-strength mortar directly to the sawn-back surface of each individual stone. This step fills the microscopic voids and ensures the adhesive reaches every millimeter of the stone’s footprint.
Top Source Stone products come with a 100% sawn-back finish, which already reduces the volume of mortar needed compared to rough-back fieldstone. However, back-buttering remains a non-negotiable step to prevent water from pooling behind the veneer. Full coverage ensures the stone and the scratch coat become a monolithic unit once cured, eliminating the “hollow” sound often found in substandard B2B masonry projects.
Managing Adhesion and Curing Standards
Timing dictates the long-term success of the installation. We require the scratch coat to cure for 48 to 72 hours before mounting the first course of stone. This resting period allows the mortar to reach sufficient compressive strength to support the weight of the veneer, which typically ranges from 8-13 lbs per square foot depending on the specific stone density.
Before application, we use a soft brush to remove quarry dust or debris from the sawn-back surface. If the stone is overly dry or the environment is hot, dampening the back of the stone prevents the masonry from “robbing” moisture from the mortar, which would otherwise lead to a brittle, weak bond. This disciplined approach to moisture management and curing ensures the feature wall maintains its structural integrity through decades of freeze-thaw cycles.
Conclusion
Precision installation transforms loose fieldstone into a bespoke random-lay pattern that mirrors traditional dry-stack masonry. Following the 3-point rule and utilizing individually sawn-back stones ensures structural stability while reducing on-site labor time. This method results in a natural aesthetic and full-depth visual integrity that mass-produced panels cannot replicate.
Review our technical product range at topsourcestone.com to explore wholesale sourcing options for natural quartzite and sandstone veneers. Reach out to our team to discuss bulk order specifications and quarry-direct pricing for your next project.
Frequently Asked Questions
How do you install irregular fieldstone veneer?
Installation begins with proper substrate preparation and a scratch coat. Apply a generous layer of mortar to the back of each stone—known as “back-buttering”—and press the stone firmly into the mortar bed to ensure full saturation and consolidation. This technique minimizes lippage and ensures a durable, long-term bond for variable-thickness materials.
How wide should grout lines be for fieldstone?
For irregular fieldstone, grout lines typically range from 1/2 inch to 1 inch wide. This width is necessary to accommodate the natural variance in stone shapes and thicknesses, allowing the installer to manage the puzzle-like layout while maintaining structural integrity and a uniform aesthetic.
Do you start stone veneer at the top or bottom?
You should always start the installation from the bottom and work your way up. This approach allows the bottom rows of stone to provide physical support for the weight of the courses above, preventing sliding or sagging while the mortar sets.
How to lay out random stone veneer patterns?
To achieve a successful random layout, perform a “dry lay” on the ground before applying any mortar. Mix various stone sizes and colors to avoid clusters, and ensure you break up vertical and horizontal lines (avoiding “runners”) to create a natural, puzzle-like appearance that ensures proper weight distribution.
Best mortar for heavy irregular stone veneer?
The industry standard for heavy or variable-thickness stone is a medium-bed mortar. This specialized mortar provides superior non-sag characteristics and can be applied in thicker layers than standard thin-set, which is critical for supporting the weight and depth variations of heavy irregular fieldstone.
