Ledgestone Installation errors leave contractors facing rework, schedule overruns, and potential OSHA fines. Missed vapor barriers, improperly fastened metal lath, or a weak scratch coat lead to adhesion failures, moisture claims, and costly callbacks that erode margins and extend project timelines. On commercial sites a single failed elevation can trigger inspections, work stoppages, and added safety risks for crews, so getting the prep and bonding sequence right is a business-critical control point.
This guide lays out a field-ready SOP covering the crucial steps: preparing the wall with vapor barriers and correctly installed metal lath; applying a scratch coat that creates a durable bonding surface; what dry-stacking involves for a seamless ledgestone look; proper buttering of veneer panels to ensure full contact; and techniques to manage mortar squeeze-out and keep stones clean. It closes with practical answers to the questions installers ask most — do you grout ledgestone veneer, is a scratch coat required, how to set panels, and how much mortar to use for dry-stack ledgestone — so crews and project managers have clear pass/fail checkpoints and inspection criteria on every job.
Preparing the Wall: Vapor Barriers and Metal Lath
Install a continuous WRB, specify corrosion-resistant lath, and fasten to solid backing so the scratch coat keys uniformly and the veneer load transfers to structure.
Assessing and Preparing the Substrate
Confirm the substrate carries the veneer load and provides a clean, stable surface. Remove loose material, oil, frost, or flaky paint; verify walls are plumb and free of movement that could crack the mortar bond. For interior gypsum walls, install a cement board or approved cementitious backer per the manufacturer before you install lath and apply the scratch coat.
- Verify substrate is structurally sound, plumb and free of loose material, paint, oil or frost.
- For exterior wood- or steel-framed walls, confirm sheathing and framing meet local load and deflection limits for veneer.
- On interior gypsum, install cement board or an approved cementitious backer per manufacturer recommendations before lath.
- Remove trim, fixtures or obstructions that prevent continuous WRB, lath or flashing installation.
- Fill large gaps and level shallow irregularities with compatible filler so lath and scratch coat seat uniformly.
Choosing and Installing Vapor Barriers (WRB)
Select a WRB that matches the wall assembly and local climate, then install it continuously and shingled over flashings so water drains to the exterior. Terminate the WRB into through-wall flashings or a weep screed at the veneer base and integrate the WRB at window and door openings to avoid trapped moisture.
Protect the WRB during construction and repair any tears with compatible tape or patches before you apply lath. Follow manufacturer guidance and local code; as of 2026, use the WRB types approved by both the veneer manufacturer and the authority having jurisdiction.
| Preparation Item | Typical Industry Minimum | Top Source Stone Guidance |
|---|---|---|
| WRB & Flashing Compliance | Housewrap or self-adhered membrane shingled over flashings; overlaps ≥2″ horizontally. | Use WRB accepted by the veneer manufacturer and local code; terminate into through-wall flashings or weep screed. |
| Lath Specs & Overlaps | G60–G90 galvanized or stainless in high-moisture zones; overlaps: ≥1″ sides, staggered seams. | Specify G90 or stainless for exterior; for Top Source veneer, confirm lath/furring depth for a uniform scratch-coat bed. |
| Veneer Load & Keying | Typical thin veneer thickness varies; installer confirms load path and structural support. | Plan for 25–40mm sawn-back stones (~65kg/m²); ensure full mechanical key in the scratch-coat. |
Selecting Metal Lath Types and Corrosion Resistance
Choose lath type based on required scratch-coat depth and the substrate. Use self-furring lath when the system requires a consistent cavity between sheathing and scratch coat; use woven or expanded diamond mesh where heavy reinforcement needs distribute loads. Prioritize corrosion-resistant finishes — specify G-90 galvanized or stainless steel in exterior or humid applications.
- Select lath type: woven/expanded diamond mesh, self-furring lath, or rib lath depending on required scratch-coat depth and substrate.
- Specify corrosion-resistant finishes (galvanized, G-90 or better, or stainless steel) for exterior or high-moisture locations.
- Use self-furring lath where you need consistent mortar thickness between lath and sheathing.
- Ensure lath provides full coverage behind the veneer area and overlaps at edges per manufacturer guidance (typically minimum 1 inch).
- For heavy ledgestone or deep-profile panels, consult product installer instructions for lath class and reinforcement requirements.
Fastening, Overlaps and Terminations
Anchor lath with corrosion-resistant fasteners sized to penetrate backing or framing as the manufacturer specifies. Apply washers where required to prevent pull-through and tighten fasteners to allow the lath to remain self-furred where a cavity is specified. Stagger and overlap joints to avoid continuous weak seams and terminate neatly at control joints and openings.
- Use corrosion-resistant fasteners sized and spaced per lath and veneer manufacturer guidance; use closer spacing at edges and openings.
- Apply washers where required to prevent pull-through and verify fasteners penetrate solid backing or framing as specified.
- Overlap lath edges and ends per guidance (commonly 1 inch on sides and 2 inches at ends) and stagger joints.
- Terminate lath and WRB neatly at control joints, corners and openings; provide mechanical anchorage or edge reinforcement at terminations.
- Avoid compressing WRB under fasteners; allow the lath to maintain the required cavity or furring where specified.
Integrating Flashing, Weep Screeds and Penetrations
Coordinate flashings and weep screeds before lath installation so the WRB can shingle into those details and provide a clear drainage path. Install through-wall flashing and weep screed at the veneer base, and integrate counter-flashing at windows and doors to shed water away from the cladding interface.
- Install through-wall flashing and weep screed at the base of the veneer before lath so WRB can be shingled into these items.
- Provide counter-flashing and head flashings at window and door openings; integrate WRB and lath with those flashings to prevent water entry.
- Detail penetrations (pipes, conduits) with flexible flashing and sealants compatible with WRB and veneer materials.
- Include a drainage plane and clear path for any moisture behind the veneer; ensure weeps or venting are accessible and not blocked by mortar.
- Document flashing and termination details on the mock-up or shop drawings and confirm field inspection prior to applying the scratch coat.
The Scratch Coat: Creating the Perfect Bonding Surface
A correctly mixed, keyed scratch coat over properly installed metal lath locks the veneer to the substrate and carries the stone load without premature delamination.
Purpose and composition of the scratch coat
The scratch coat provides a mechanical and mortar bond between the metal lath or substrate and the stone veneer. It transfers the veneer weight to the structure, resists shear forces from thermal movement, and creates the keyed surface that prevents sliding or blow-off. For thin stone veneer — individually sawn-back, non-panelized product that typically weighs about 65 kg/m² (≈14–15 lb/ft²) — a robust scratch coat is essential.
Use mixes designed for wall applications: Portland cement with clean masonry sand at roughly 1:3 to 1:4 by volume. Add a small quantity of hydrated lime for plasticity and workability where required, or use a factory preblended masonry mortar rated for veneer. When specs call for improved adhesion or flexibility, dose an acrylic/latex bonding admixture per the manufacturer’s instructions. Select a mix rated for the exposure — exterior, freeze-thaw, or wet locations — rather than defaulting to thinset or polymer mortars unless they carry explicit veneer ratings.
| Specification | Typical Field Mix | Top Source Stone Guidance |
|---|---|---|
| Function, Load & Thickness | Keyed bonding layer; supports ~65 kg/m² (14–15 lb/ft²) load; Target thickness 3/8″–3/4″. | Use with Individually Sawn-Back thin stone veneer; ensure WRB, flashing and weep screed are in place. |
| Mix Ratios & Components | Portland cement : masonry sand (1:3–1:4); Optional hydrated lime for workability. | Follow acrylic/latex admixture instructions; mix to trowelable consistency (not soupy). |
| Key Depth & Curing Window | Key depth ~1/4″ for mechanical bond; ensure stable cure environment. | Confirm mortar choice for freeze‑thaw exposure; follow cure window 24–72 hrs before setting stone. |
Preparing the substrate and installing metal lath
Start with a clean, sound substrate. Remove loose paint, dirt, oil and other contaminants. On exterior framed walls install a weather‑resistive barrier (WRB) over sheathing and integrate flashing at sills, penetrations and terminations before attaching lath. Fasten the WRB per its manufacturer and local code.
- Lath selection: use corrosion-resistant diamond or 3.4 lb. galvanized or stainless metal lath sized and gauged per code and mortar manufacturer guidance.
- Attachment: secure lath to framing or sheathing with corrosion-resistant nails or screws at commonly 6″–8″ on-center at framing members; overlap and tie seams per spec.
- Edge details: install a weep screed at the base, integrate through‑wall flashing at horizontal terminations, and properly flash corners and penetrations to control water and prevent staining.
Mixing, applying and keying the scratch coat
Batch measured materials and clean water produce consistent batches. Mix to a cohesive, trowelable consistency — not runny. Add admixtures strictly to manufacturer dosing and mix thoroughly. Apply a uniform scratch coat in the 3/8″–3/4″ (10–19 mm) range, guided by lath type and product directions; avoid under‑thickness that sacrifices key or over‑thickness that increases cracking risk.
Tool the coat smooth with a float, then create a keyed surface using a scratcher or comb. Make horizontal grooves about 1/4″ deep spaced roughly 3/4″–1″ apart to create consistent mechanical keys. Set veneer when the scratch coat has firmed up but retains slight surface moisture — typically within 24–72 hours depending on temperature and humidity — and always follow the mortar product’s specified setting window.
Curing, inspection and common mistakes to avoid
Control curing conditions. Protect the scratch coat from rapid drying, high heat, strong wind and freezing. In hot, dry environments lightly mist per manufacturer guidance to prevent surface crazing or weak crust formation. Follow cure times exactly before applying additional loads.
- Inspection checklist: confirm lath securement and spacing, verify uniform scratch depth and coat thickness, check for contaminants, and ensure flashing/WRB details are correct before stone installation.
- Common errors: using the wrong mortar type, overworking and removing the key, setting veneer on an insufficiently cured coat, and missing flashing or drainage details.
- Remedies: remove and reapply areas with poor bond, replace loose or improperly secured lath, and follow manufacturer cure times and substrate prep notes. For high installations or unusual substrates consult an engineer or the veneer manufacturer.
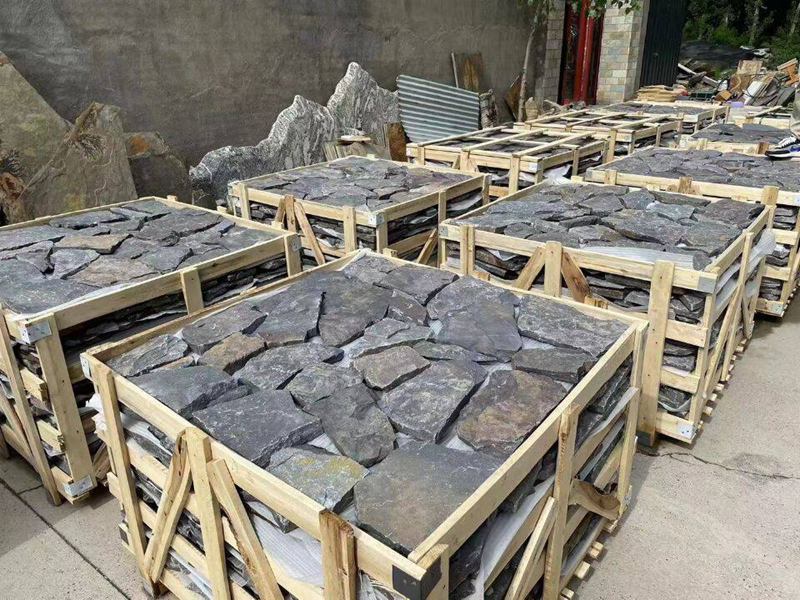
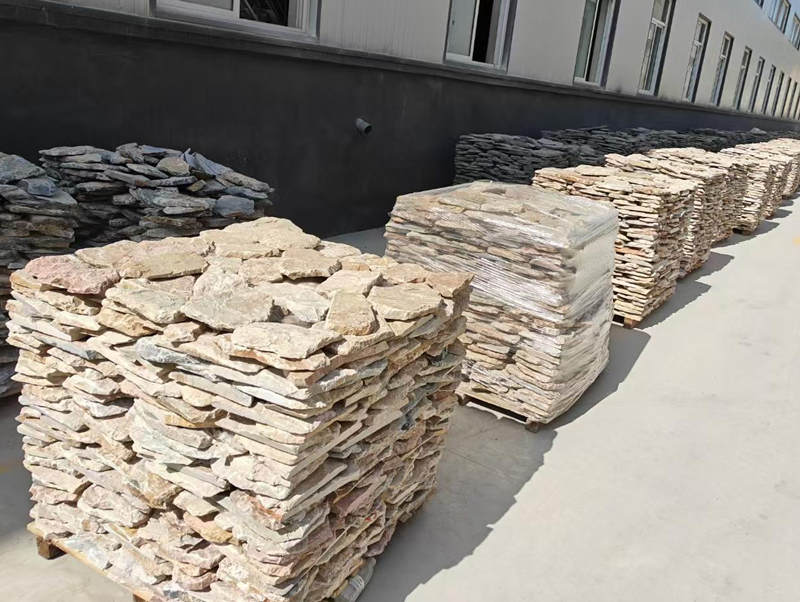
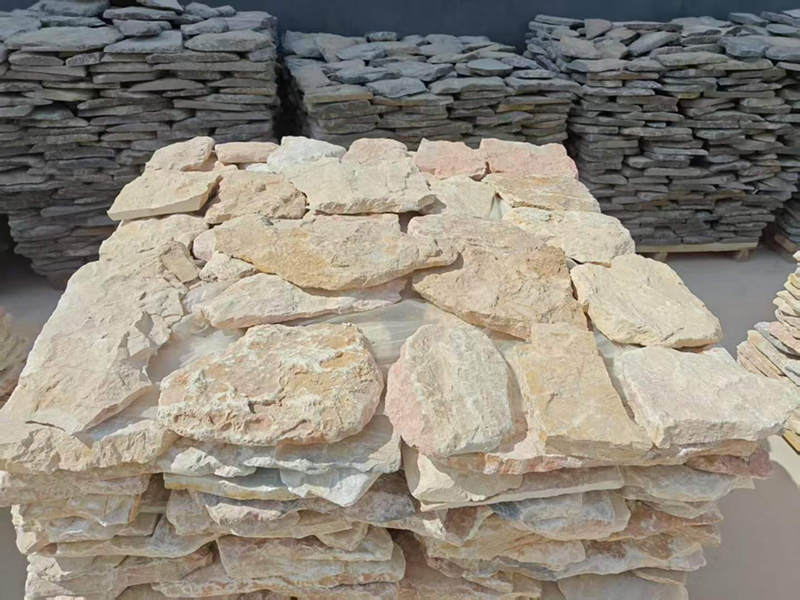
Premium Stacked Stone—Faster Installs, Higher Margins

What is Dry-Stacking? The Seamless Ledgestone Look
Dry-stacking achieves a continuous ledgestone face by tight-fitting, individually sawn-back pieces bonded with high-strength adhesives, delivering the look of full-depth masonry with lower weight and faster install times.
Dry-Stacking vs Mortar-Bed Installation
Dry-stacking refers to a non-panelized system where individually sawn-back stones are placed tightly against one another with minimal visible joint profile and secured with adhesive at the back and contact points. The method relies on precise stone sizing, a flat substrate, and mechanical seating to produce a seamless, stacked appearance; installers hand-set each piece in a bespoke random-lay pattern to avoid repeating modules.
A mortar-bed installation uses a continuous wet bedding layer and visible mortar joints to set full-thickness or irregular stones. Mortar-bed handles heavy, variable-thickness material and uneven substrates better, but it adds weight, slows labor, and produces a different visual (more mortar lines). Typical thin stone veneer weighs about 65 kg/m² (≈13 lb/ft²); engineered lightweight systems can run lower (8–13 lb/ft²), so choose the method based on stone thickness, substrate capacity, and schedule. Adhesives for dry-stacking range from polymer-modified thinset to high-strength epoxy—select per manufacturer instructions and the substrate type.
Substrate Preparation for a Seamless Finish
Dry-stacking demands a stable, flat, and clean substrate because the finish depends on direct stone-to-backing contact rather than a thick bedding mortar. Verify structural capacity and flatness before work starts; typical tolerance guidance is 1/4″ over 10 ft, but always follow the stone supplier or adhesive manufacturer’s spec for tolerances.
- Install an approved water-resistive barrier and flashing for exterior or wet-area use; stone veneer does not substitute for WRB or drainage detailing.
- For gypsum or wood-framed walls, mount cement backer board or an approved substrate before veneer; for concrete or masonry, remove loose material and clean to a sound surface.
- Where codes or the chosen adhesive require mechanical keying, use metal lath and a scratch coat to transfer load to the framing—follow thickness and curing requirements from the mortar spec.
- Eliminate dust, oil, paint, curing agents, and other bond inhibitors. Prime or abrade very smooth substrates when the adhesive manufacturer requires it.
Panel Placement and Interlock Technique
Plan the layout from a true plumb and level reference line rather than from the top edge to avoid cumulative drift. Dry-fit stones to confirm color flow and corner pieces; rotate units as needed to blend natural variation and avoid pattern repeats. Visual planning prevents awkward cuts and reduces on-site adjustments.
Back-butter each stone with the recommended adhesive, focusing on high-contact zones and leaving small fillets around the perimeter if the manufacturer specifies them. Seat each stone by hand and use a rubber mallet to close tight joints—aim for full edge contact without crushing thin edges. Stagger vertical seams by at least one piece width to keep continuous vertical lines from forming and to preserve the stacked look.
Finishing, Corners, and Edge Treatments
Use manufacturer-matched L-shaped corners (authentic masonry corner wrap) to maintain full-depth visual integrity at returns. If matching corners are not available, field-cut complementary pieces and place thin complementary pieces at the edge rather than large miter cuts to keep the appearance natural and reduce visible joints.
Fill small gaps with color-matched stone filler or a flexible, paintable sealant in areas that require movement or expansion joints. After adhesives fully cure, apply a compatible natural-stone sealer recommended by the stone supplier to protect against stains and simplify maintenance. Clean adhesive squeeze-out immediately with the solvent or mechanical method the manufacturer approves to avoid permanent staining or surface damage.
Benefits, Limitations, and Best Applications
Dry-stacked, individually sawn-back ledgestone delivers a continuous, high-impact look with faster installation and lower structural load compared with full-thickness stone. The technique suits projects where appearance, speed, and reduced dead load matter, but it requires experienced installers and strict substrate prep.
- Benefits: continuous natural appearance, lower labor hours, reduced structural demands, and bespoke random-lay results that avoid factory repetition.
- Limitations: the veneer system does not act as a waterproof barrier—exterior or wet-area use requires proper WRB, flashing, and drainage; batch-to-batch color variation requires mockups and sample approvals for large runs.
- Best applications: interior feature walls, fireplace surrounds, storefront and lobby accents, and commercial facades where schedule and aesthetics matter.
- Execution note: specify experienced installers and enforce manufacturer directions for adhesive selection, backing, and sealing to achieve a durable, seam-free result.
Buttering the Back of Ledgestone Veneer Panels
Back-buttering produces a full-contact mortar bed that eliminates hollow spots and locks sawn-back ledgestone into a durable, long-term bond.
Why Back-Buttering Matters
Back-buttering fills voids behind each veneer unit and establishes continuous mortar contact across the sawn-back surface. That contact transfers shear and tensile loads into the substrate, reduces movement, and prevents delamination under thermal or structural stress.
Without consistent back-buttering installers risk air pockets that trap moisture, create hollow spots, and accelerate freeze-thaw damage. Proper buttering also evens out irregular backs so stones sit flush and joints remain predictable during final pointing.
- Creates a continuous bed of mortar that transfers loads and resists delamination.
- Reduces air pockets and voids that can trap moisture and cause freeze-thaw damage.
- Improves alignment and seating so panels sit flush and joints remain consistent.
- Mitigates variations in panel thickness or irregular backs by adding a leveling layer.
Recommended Mortar Types and Mix Consistency
Pick a mortar compatible with the substrate, exposure and installation method. For adhered veneer over a prepared substrate use a polymer‑modified thinset or masonry adhesive the manufacturer approves; for scratch-coat systems over metal lath use a cement-based mortar (Type S or specified mix). Mix to a tacky, peanut-butter–like body so the mortar stays on the back without slumping.
Adjust water slowly, measure additives per instructions, and discard any batch that begins to set. For Top Source Stone loose veneer—individually sawn-back pieces in the 25–40mm thickness range—use products that tolerate slight movement and maintain bond under wet/freezing cycles.
| Parameter | Common Field Practice | Top Source Stone Guidance |
|---|---|---|
| Mortar Selection & Application | Polymer-modified thinset for direct-bond; Cement Type S for scratch-coat. | Use manufacturer-specified polymer thinset for adhered installations; Type S over metal lath. |
| Consistency & Buttering | Mix to a tacky, peanut-butter consistency for reliable grip. | Use full-contact buttering technique for sawn-back ledgestone (25–40mm thickness). |
| Batch Control & Mixing | Maintain uniform mix across batches; avoid over-watering. | Strictly control water, follow additive dosing, and avoid using overworked/partially set batches. |
- For adhered veneer, use a polymer-modified thinset or approved masonry adhesive for better flexibility and bond.
- For exterior scratch-coat systems over metal lath, use a properly proportioned cement mortar (Type S or manufacturer-recommended mix).
- Aim for a tacky, peanut-butter–like consistency: spreadable but not soupy; add water incrementally.
- Follow manufacturer instructions for additives or bonding agents; use measured mixes and discard mortar that begins to set.
Step-by-Step Buttering Technique
Establish a repeatable workflow: clean the back, apply a full-contact butter coat, and seat the unit with firm, even pressure. For individually sawn-back ledgestone pieces work methodically so each stone receives a consistent butter layer that covers seams and hollows.
When using full-contact bonding avoid excessive notching that recreates voids. Seat, twist slightly, and tap to expel trapped air; remove squeeze-out immediately to prevent staining and uneven joints.
- Clean panel backs of dust, debris or packaging residue before buttering.
- Use a flat trowel to spread a full contact layer, targeting seams, edges and hollows for even coverage.
- Comb or notch only if the adhesive system requires it; for full-contact bonding avoid deep grooves that leave voids.
- Set the unit to the substrate with firm pressure, twist slightly to seat mortar, and tap with a rubber mallet to eliminate trapped air.
- Check level and alignment immediately; remove excess mortar squeeze-out with a trowel or stiff brush.
Common Errors and Quality Checks
Common failures trace back to inconsistent mixes, poor surface prep, and incomplete coverage. Avoid thin, watery mortar that causes slip and weak bonds; skip areas and you create hollow spots that fail under load or freeze-thaw cycles.
Institute simple field checks: random pull tests, visual coverage inspection after initial set, and probing suspect areas. Clean squeeze-out before it hardens to prevent permanent stains on natural stone.
- Do not use mortar that is too wet; thin mixes reduce bond strength and increase slip.
- Avoid under-buttering: aim for near-continuous contact and fill voids behind stones, especially large pieces.
- Do not install onto dusty, oily or frozen surfaces; clean and, if needed, dampen substrate to control suction.
- Use a pull test or probe random pieces after initial cure to confirm adhesion and detect hollow spots early.
- Watch for excessive squeeze-out that can stain stone; clean before it hardens to avoid difficult remediation.
Curing, Protection and Cleanup
Respect manufacturer cure times and protect fresh work from rain, freeze or rapid drying. Rapid evaporation under hot sun or wind can weaken mortar through shrinkage; cover or shade as required until initial set completes.
Use water and a soft brush to remove mortar film while fresh; apply stone-safe cleaners for cured residue. Document any field deviations and run a final adhesion check before finishing trades proceed.
- Follow mortar manufacturer cure times; avoid loading or exposing bonded units to rain or freeze during initial set.
- Protect newly installed veneer from direct sun and wind when required to control rapid drying and shrinkage.
- Remove mortar stains and haze while fresh using water and a soft brush; use stone-safe cleaners for cured mortar residue.
- Once cured, inspect joints and perform final pointing or sealing per project specifications and the stone supplier’s recommendations.
- Document field deviations and perform a final adhesion check before handing off to finishing trades.
Managing Mortar Squeeze-Out to Keep Stones Clean
Control mortar consistency, substrate spacing, and handling so squeeze-out stays predictable and removable before it cures.
Preventing Squeeze-Out: Pre-installation Controls
Start before you load mortar. Mix for a stiff, tacky consistency that holds shape under pressure instead of a soupy mix that oozes when you seat stones. Dry-fit the loose stones to check joint widths and surface alignment and correct any unevenness with shims or backing adjustments so you maintain a uniform grout gap.
Use consistent spacers or temporary shims to avoid compressing the joint space during setting and back-butter only a thin, even bed—especially with Individually Sawn-Back (Non-Panelized) veneer, which bonds well with a minimal back butter. Protect adjacent faces and sensitive finishes with low-tack painter’s tape or thin protective film where clearance is tight so small squeeze-out won’t mar the visible stone.
Application Techniques During Installation
Place mortar where you need it, not everywhere. Load mortar into a grout bag or use a tuckpointer for targeted joint filling and avoid overfilling. Seat stones or small sections incrementally, pressing evenly while watching joints for immediate squeeze-out and adjusting pressure to keep mortar within the joint.
Work in small, manageable runs so you can clean fresh squeeze-out before it sets. Use temporary spacers and alignment clips to prevent panels or loose stones from being forced flush and driving mortar out. If you plan to tool or point later, strike joints to a uniform, slightly recessed depth as you go so you leave controlled room for finishing mortar.
Immediate Cleanup for Fresh Mortar
Clean while mortar stays workable. Remove bulk squeeze-out within minutes using a margin trowel or plastic scraper to prevent scratching the stone. Follow with a damp sponge using a figure-eight motion and rinse the sponge frequently in clean water to avoid smearing solids back onto the stone.
For textured faces use a stiff nylon brush with water to lift mortar from crevices and repeat until the surface looks uniform. Avoid acid or strong alkaline cleaners on unknown natural stones; test any cleaner on an inconspicuous piece first. Always work top-to-bottom so rinse water flows away from cleaned areas and change rinse water often to prevent redepositing sediment.
Removing Partially or Fully Cured Mortar
When mortar cures, switch to mechanical methods before chemicals. Chip thin flakes away with a wooden or plastic wedge and a light hammer or hand chisel, then use brass or plastic scrapers for stubborn spots to avoid gouging the stone. Reserve metal scrapers only for very durable stone and only with extreme care.
If residue remains, try a pH-neutral stone cleaner and a nylon brush, following dwell times on the label and rinsing thoroughly. Use chemical mortar removers only after testing on a hidden area and avoid acidic products on calcareous stones like marble or limestone. For extensive cured mortar on highly durable stone, consider wet-sanding with fine-grit diamond pads or bring in a stone restoration specialist to avoid surface damage.
Final Protection and Maintenance After Cleaning
Let cleaned areas dry and any repair mortar fully cure before you apply sealers or protective coatings. Match the sealer to the stone type and exposure; a correct natural-stone sealer reduces future staining and makes routine cleanup easier. Record the products and methods you used and hand that documentation to the owner or maintenance team for consistent future care.
Recommend soft brushes, pH-neutral cleaners, and prompt removal of any new mortar splatter during follow-up work. For exterior or high-traffic projects schedule a 30–60 day post-install inspection to spot residual staining or cured mortar and address issues before they become permanent.
Conclusion
Following the dry-stack installation steps—proper vapor barriers and metal lath, a true scratch coat, careful back-buttering of ledgestone, and control of mortar squeeze-out—delivers a durable, weather-resistant veneer that reads like full-depth masonry. These practices protect workers, help meet OSHA safety expectations and local code requirements, and reduce callbacks by extending the wall assembly’s service life.
Before you begin, verify your substrate, anchoring details and material quantities against the project specs, and confirm you have individually sawn-back loose stones and matching masonry corners for a seamless finish. Contact your Top Source Stone dealer for certified catalogs, sample crates, or technical support to specify quarry-consistent veneer for your next project.
Frequently Asked Questions
Do you grout ledgestone veneer?
Typically ledgestone veneer is installed dry‑stack (no exposed grout) to preserve the natural, layered appearance; stones are bedded with mortar or adhesive behind the faces but joints are kept tight and minimally visible. Grouting is optional—use grout only if you want filled joints or additional stabilization; otherwise use a thin bedding mortar and point only where needed, and always follow the stone manufacturer’s recommendations.
How to install ledgestone veneer?
Prepare the substrate with a proper weather‑resistive barrier and flashing, install corrosion‑resistant metal lath if attaching to framed walls, apply a cement scratch coat where required, then set stones with a full‑bed or buttered mortar bed starting at the base and working up. Maintain tight, staggered joints, use a level and string lines for courses, cut stones as needed with a wet saw, install control/expansion joints and flashing at openings and the top of the veneer, and clean and seal per manufacturer guidance once mortar has cured.
Does ledgestone need a scratch coat?
Yes when installing over sheathed framed walls with metal lath you should apply a cement scratch coat (commonly 3/8″ to 1/2″) that is scored to provide a good mechanical key for the veneer. If you are adhering panels to clean masonry or using factory‑backed panel systems and the manufacturer permits direct bonding, a scratch coat may not be required; always follow substrate‑specific and manufacturer instructions.
How to install ledgestone veneer panels?
For ledgestone veneer panels, prepare the substrate with WRB and flashing, lay out panels beginning at the lowest point, apply the recommended adhesive or polymer‑modified thinset to the panel backs or substrate, press panels into place and mechanically fasten per manufacturer specs, stagger panel seams and maintain recommended gaps for movement, trim panels with a wet saw as needed, finish joints or grout if required, and install proper flashing, weep screeds and control joints for long‑term performance.
How much mortar to use for dry-stack ledgestone?
For dry‑stack ledgestone use a thin bedding/back‑butter of mortar—generally about 1/4″ to 3/8″ thickness behind each stone to ensure full contact while keeping joints tight and mostly invisible; avoid wide joint fills. Provide enough mortar to fully bed and shim stones so they bear evenly, and order roughly 10–20% extra material to cover waste, cuts and touchups.
