

Cutting & Shaping drives on-time delivery and protects profit margins; mistakes on highly textured ledgestone create rework, material waste, and schedule slippage that can erase 10–20% of project revenue and trigger client claims. On-site miscuts and poor edges also raise safety risks during installation, force unplanned downtime for repairs, and undermine bids on future jobs—so installers, contractors, and project managers must treat every cut as a measurable operational risk.
This guide serves as a shop-floor SOP for ledgestone veneer: how to choose the right wet saw and continuous diamond blade, mark cuts on uneven stone, cut clean receptacle holes, and decide between mitering or using pre-made L-shaped corners. Expect practical specs, recommended blade types and feed rates, water-management tips, layout and jig strategies, tolerance targets, and step-by-step sequences installers can follow to reduce scrap, speed installation, and deliver consistent corner and edge quality.
The Challenge of Cutting Highly Textured Ledgestone
Cutting highly textured ledgestone requires staged, low-feed wet cutting with a continuous diamond rim, rigid support under the piece, and blade selection tuned to the hardest zones to prevent chipping and premature wear.
Understanding Ledgestone Texture and Its Impact on Cutting
Ledgestone presents a wide range of surface relief: thin, flat lamina give predictable engagement, while deeply riven or jagged profiles produce sudden blade load changes. Expect blade wandering and vibration where relief jumps or fissures appear; slow feed rates and firm support reduce that movement and lower chip risk.
Hardness and porosity can vary across a single stone panel, so choose blade bond and cutting speed based on the hardest zones you’ll meet rather than the average. Irregular thickness increases exit- and entry-chipping risk; score the cut line shallowly first, then complete the cut in a controlled pass or with multiple shallow passes for deep relief.
Selecting the Right Wet Saw and Continuous Diamond Blade
Pick a wet saw with a rigid table, a strong motor that holds RPM under load, consistent water flow, and a stable fence to keep straight cuts. For veneer-style ledgestone, prefer a continuous-rim or specialty continuous diamond blade: it reduces breakout on thin sawn-backs and produces cleaner edges than segmented profiles.
Match blade bond and grit to the stone: use softer diamond bonds against very hard stone (to expose fresh diamonds) and harder bonds for softer or abrasive material. Run conservative blade speed and feed—let the blade cut without forcing—to limit vibration, heat buildup, and glazing that shortens blade life.
Marking and Securing Uneven Surfaces for Accurate Cuts
Use painter’s tape over cut lines to create a stable marking surface and write with a grease pencil or fine permanent marker for visibility on textured faces. For complex joins or irregular edges, make a cardboard or thin-plywood template and transfer it precisely to the stone before cutting.
Support irregular pieces on a flat sacrificial bed or use foam pads plus spread clamps to prevent rocking. Score the line shallowly first, then finish with one controlled pass when possible; for panels with deep relief, make several shallow passes rather than a single aggressive cut.
Cutting Receptacle Holes for Outlets and Switches
Transfer box locations using a rigid template and verify dimensions and orientation twice before cutting. For round penetrations use a diamond core bit in a wet drill; for rectangular openings use a wet angle grinder with a fine continuous diamond blade or score the outline with the wet saw and remove the waste with a grinder.
Cut slightly larger than the final box when possible, then trim to fit on-site with an angle grinder or rasp for tight tolerances. Always support the area around the cut to avoid stress fractures, dry-fit the panel and the device, and only final-adhere or mechanically fasten after confirming fit and alignment.
Mitering vs Using Pre-Made L-Shaped Ledgestone Corners
Mitering produces a continuous, high-end appearance but demands precise 45-degree cuts, tight joint prep, and skilled finishing to hide small gaps; expect higher labor, more cutting waste, and the need for careful sanding or filler at the joint. Use mitering where pattern continuity and visible corner aesthetics justify the extra time.
Pre-made L-shaped corners cut field labor and waste, ensure matching profiles, and simplify installation for crews under schedule pressure. For large runs or labor-sensitive projects choose pre-made corners; for bespoke, visible corners choose mitering. In either case dry-fit pieces, leave a small tolerance joint for adhesive or color-matched sealant, and never force mating pieces together—forcing causes edge cracks.
Choosing the Right Wet Saw and Continuous Diamond Blade
Pick a saw and continuous‑rim blade that match the stone’s hardness, veneer thickness and longest required cut to reduce chipping, extend blade life and keep production predictable.
Wet Saw Types and Key Specifications
Select the saw type to match the pieces you cut most often. Use bench/tabletop saws for shop work and small loose stones; choose bridge/rail saws when you need straight, repeatable long cuts or to process longer L‑corners; deploy walk‑behind masonry saws for heavy duty jobsite cuts and thicker stock. Confirm motor power, blade diameter capacity and table/rail travel before you set up a workflow.
- Match saw to application: bench/tabletop for small pieces and shop work; bridge/rail for precise long cuts and larger panels; walk‑behind for jobsite slab and paver cutting.
- Check motor power and supply: choose sufficient HP/kW and whether single‑phase or three‑phase power fits the site.
- Confirm cut capacity: maximum blade diameter, maximum cutting depth, and table/rail travel length must meet your largest expected cut.
- Evaluate build and features: solid fence system, water tray design, stable rail or table, anti‑vibration mounts and easy blade change access.
- Prioritize safety and serviceability: splash guards, GFCI protection, accessible bearings and a reliable water pump for cooling.
| Spec Area | Typical Saw/Range | Top Source Stone Implication |
|---|---|---|
| Blade diameter / cutting depth / travel | Bench: ≤300–350mm blades (12–14″) with shallow depth; Bridge/Rail: 350–450mm (14–18″) for longer pieces; Walk‑behind: 450–900mm (18–36″) for large slabs; travel varies by rail length. | Thin stone veneer (25–40mm) cuts cleanly on bench/bridge saws; L‑corners up to 150–250mm long require sufficient table/rail travel and fixturing to support longer pieces during the cut. |
Continuous Diamond Blade Selection Criteria
Choose a continuous‑rim blade when surface finish and minimal chipping matter. Continuous rims deliver smooth edges on thin natural stone veneers and porcelain; use turbo or segmented diamonds only when you accept more edge fracture in exchange for faster material removal. Match bond hardness and diamond concentration to the stone’s abrasiveness to avoid glazing or rapid wear.
- Prefer continuous rim for thin veneer and applications demanding a clean finish; use turbo or segmented profiles when faster material removal matters and chipping tolerance exists.
- Select bond hardness by material: harder bond for abrasive soft stone, softer bond for very hard stone so diamonds expose faster.
- Look at diamond quality and concentration: higher-quality diamonds and appropriate concentration yield longer life and consistent cutting.
- Check manufacturing method: laser‑welded rims offer strong joints for wet cutting; sintered rims vary by manufacturer.
- Confirm blade intended use: some continuous blades specify porcelain/tile only, while others are rated for natural stone—follow manufacturer guidance.
Blade Size, Arbor and RPM Compatibility
Verify blade diameter, arbor size and maximum RPM before mounting. A blade that exceeds the saw’s max diameter or runs over its RPM rating creates a safety hazard and ruins cut quality. Use correct adapters, clean flanges and set proper torque to minimize runout and vibration.
- Verify the saw’s maximum blade diameter and choose a blade that fits within that limit.
- Match the blade arbor hole to the saw spindle or use the correct reducer/adapter supplied by the blade maker.
- Never exceed the blade’s maximum RPM rating; check both the blade and motor RPM and adjust saw settings or choose a different blade if they mismatch.
- Ensure proper blade mounting: clean flanges, correct torque and correct rotation direction reduce vibration and runout.
- Consider cut speed: larger diameter blades change peripheral speed—confirm the blade’s rated cutting speed aligns with your saw.
Water Delivery, Cooling and Slurry Management
Wet cutting extends blade life and cuts dust; deliver steady, even water to the rim and manage slurry to protect blades and the site. Use a pump sized for continuous flow, align nozzles to cover the rim, and collect or treat slurry per local rules to avoid fines and environmental issues.
- Provide continuous, even water flow to the blade rim to prevent glazing and overheating; check pump capacity and nozzle alignment regularly.
- Use filtration or settling systems when reusing water to remove abrasive particles that accelerate blade wear.
- Design slurry containment and disposal to comply with local regulations and avoid environmental contamination on site.
- Inspect water seals, trays and hoses frequently; replace worn parts to maintain reliable cooling.
- Combine wet cutting with mechanical guards and barriers to minimize operator splash and maintain a safer work area.
Cutting Technique, Blade Care and Troubleshooting
Use steady feeds, solid fixturing and routine inspections to keep cuts consistent and blades productive. Monitor cut speed and edge quality; if you see glazing, slow the feed, increase water or change to a fresher blade. Secure every loose stone and support long pieces to prevent vibration and binding.
- Use a steady, moderate feed rate and let the blade do the work; avoid forcing the cut or rapid start/stops that stress the blade.
- Secure material firmly and support long pieces to prevent vibration and binding during the cut.
- Monitor blade condition: look for glazing, reduced cut speed or vibration and replace blades when performance drops.
- If cuts chip, reduce feed speed, check blade choice (switch to continuous rim) and confirm proper water flow.
- If blade overheats or glazing appears, increase water flow, slow feed rate and inspect for worn diamonds; replace the blade if dressing doesn’t help.
- Follow safety practices: wear eye and ear protection, use GFCI on water-exposed circuits and maintain guards and PPE at all times.
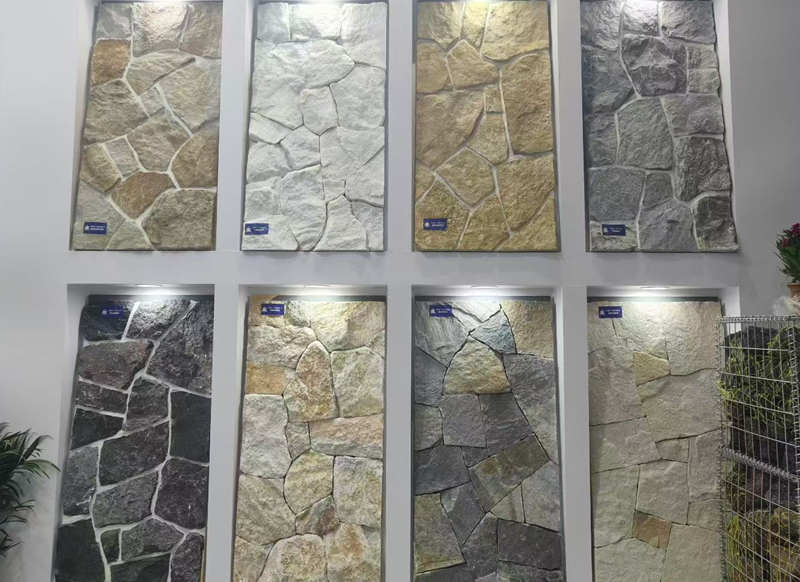
Premium Stacked Stone for Profitable Projects

Marking Cuts on an Uneven Stone Surface
Start by defining stable datum lines and capturing the true profile with templates — that prevents cuts from following peaks and reduces rework at installation.
Assess the surface and establish reference lines
Survey the stone face first. Identify highs and lows, pick permanent reference edges, and record thickness variation; these reference points control blade depth, reveal, and where you allow extra margin for trimming.
- Clean the surface of dust and loose debris so marks stay visible and templates seat flat.
- Use a straightedge and a level to find high spots and hollows; mark their positions as adjustment points for later trimming.
- Select permanent reference edges (top, bottom, or a consistent vertical edge) and strike chalk or pencil datum lines across the work area.
- Measure and note thickness variation on a simple sketch — record the thickest face points to set saw depth and kerf allowance.
- Number or tag adjacent panels and mark grain/orientation to preserve pattern continuity after cutting.
Select marking tools and make templates
Pick durable marking tools and build templates that transfer real profiles to the stone. Use rigid or flexible templates depending on the cut complexity and the local surface topography.
- Use soapstone sticks, carpenter’s pencils, or grease pencils for high contrast on rough faces; use a diamond-tipped scribe for fine permanent lines.
- Employ contour gauges (profile gauges) or flexible template material (thin plywood, PVC, or heavy cardboard) to capture irregular edges accurately.
- Make templates oversized by the blade kerf and any required reveal; note the kerf on the template (typical wet saw kerf ≈ 1/8″, confirm for your blade).
- Reinforce templates with tape or backing so they don’t flex when you transfer the line to textured stone.
- For complex layouts, create a full-size paper or cardboard mockup and label cutouts and reference points before you touch the stone.
Techniques for transferring marks to uneven textures
Use contact methods and temporary smoothing to transfer the true profile instead of tracing only peaks. Work in points if the surface won’t accept a continuous line, then join those points to recreate the real edge.
- Press flexible templates firmly into the stone face so they conform to valleys rather than bridge peaks before tracing.
- Apply thin strips of painter’s tape over a textured area to create a smoother marking surface; mark directly on the tape for later transfer.
- Take a series of scribed points from the template around the cut perimeter, then join points with a straightedge, flexible ruler, or spline to create a continuous line.
- When marking internal cutouts, transfer centerlines first and then scribe the outline with a punch or small carbide scribe so the guide remains visible during cutting.
- Wet the surface lightly if dust hides marks; let water dissipate and re-mark with soapstone as needed.
Marking for complex cutouts and fittings
Plan openings and corner details before you cut so test-fitting requires minimal trimming. Mark both the functional clearance and the visible edge you will finish — that reduces mismatches on installation.
- Lay out electrical boxes and plumbing fixtures using the actual box or a template; mark the cut outline and the required clearances for box thickness and backset.
- Leave a small removable margin around openings to allow test-fitting and final trimming on the saw or with a grinder.
- For inside and outside corners, transfer miter lines from adjacent panels so edges match when installed; mark orientation arrows to prevent reversed pieces.
- When coping irregular joints, mark the cut line on the face that will be trimmed, not on the hidden edge, so you see the true cut profile while trimming.
- Number each cutout and record its corresponding panel on your layout sketch to avoid mix-ups during installation.
Verify marks and prepare for cutting
Double-check everything before the blade touches stone. Dry-fit templates, confirm diagonal and repetitive dimensions, and set saw depth to the thickest measured point plus kerf allowance.
- Measure key distances twice and confirm diagonals where applicable to catch layout errors early.
- Dry-fit templates or trimmed scrap pieces against adjoining panels to confirm alignment and pattern continuity before cutting the production piece.
- Mark the intended cut direction and blade entry points so the cutter follows the planned sequence and minimizes chipping.
- Record kerf allowance and set saw depth based on the thickest point measured on the stone face; subtract the backing thickness if using sawn-back veneers to avoid overcutting.
- Wear eye protection and gloves when tracing and scribing; clamp or otherwise secure panels so marks do not shift during cutting.
Cutting Receptacle Holes for Outlets and Switches
Make receptacle openings with diamond tooling, firm backing and back-side cuts whenever possible to protect the finished face and ensure device flushness and code compliance.
Tools and Equipment
Select tools to match substrate thickness and finish. For thin, sawn-back natural stone veneer work with diamond or carbide abrasives and cut from the back; for full masonry use core drills or grinders. Always pair the cutting method with dust or slurry control and the correct PPE.
- Marking tools: tape measure, carpenter’s square, pencil/marker and masking tape to protect the finished face.
- Hole-cutting bits: diamond-grit or carbide-tipped hole saws for stone and masonry; bi-metal or carbide hole saws for wood backing.
- Hand and power tools: oscillating multi-tool with carbide/diamond blade for veneers, angle grinder with diamond blade for trimming, jigsaw for wood backing.
- Core drills: wet or dry diamond core bits for full-thickness masonry/concrete where circular cores are required.
- Accessories: use the electrical box or a rigid template, portable vacuum extractor or shop vac, and PPE: eye, ear, respiratory (N95+), and cut-resistant gloves.
| Substrate / Cut Type | Recommended Tool / Bit | Top Source Stone Notes |
|---|---|---|
| Thin sawn-back ledgestone veneer (25–40mm) | Oscillating multi-tool (carbide/diamond), diamond-grit hole saw (wet), angle grinder for relief cuts | Sawn-back pieces allow rear cutting; secure structural backing and use box extensions so devices sit flush. Allow 1/8″–1/4″ clearance for cover plates and sealant. |
Marking and Layout
Accurate layout prevents rework. Transfer the electrical centerlines to the finished surface, protect the face with tape, and always confirm what sits behind the face before you cut.
- Determine box location from plans, then transfer centerlines to the finished surface using a square and level.
- Apply masking tape over finished surfaces to prevent chipping and to create a clean marking plane.
- Trace the exact box or template outline; allow 1/8″–1/4″ for device depth, cover plates and sealant.
- Scan or probe behind the panel to verify studs, backing, conduits and fasteners before cutting.
- Sequence cuts to minimize visible damage: cut from the substrate or rear when the stone permits, then finish the face edge gently.
Cutting Techniques by Substrate
Match technique to material to protect the finished face and deliver a precise fit. Use slow, controlled passes with diamond tooling on stone and prefer plunge or relief cuts over aggressive sawing when working near the visible surface.
- Stone veneer on backer: score then plunge-cut with an oscillating tool or use an angle grinder for relief cuts; cut from the back when possible to avoid chipping the visible face.
- Thin natural stone strips/ledgestone: make shallow relief passes with a diamond blade, then complete the cut with steady, low-feed passes; consider full-depth relief cuts near corners.
- Masonry/concrete: use a diamond core for round holes; use grinder or wall chaser plus chisel for rectangular openings and square the edges by hand.
- Wood or plywood backer: use a jigsaw or hole saw sized to the box; clamp the panel to prevent vibration and tearout.
- Gypsum/drywall: cut with a drywall saw or oscillating tool; if stone covers gypsum, install cement board or other approved backing before cutting openings.
Safety and Code Considerations
Protect people and systems: de-energize circuits, control silica dust, and follow electrical box accessibility and mounting rules. Verify local code for box depth and device mounting before finalizing cuts.
- De-energize circuits in the work area and confirm dead with a voltage tester before cutting near wiring.
- Wear PPE: eye protection, N95+ respirator or equivalent for silica, hearing protection, and cut-resistant gloves.
- Follow electrical and building codes: boxes must stay accessible; devices must be flush with or extend to the finished surface; meet box fill and grounding requirements.
- Scan for hidden plumbing, HVAC, or embedded conduits and fasteners before cutting.
- Control dust and slurry: use wet cutting or local extraction to protect workers and avoid contaminating finished areas.
Finishing, Fit and Testing
Fit the box and device before wiring. Adjust openings with rasps or diamond files, secure the box to structural backing, and seal cut edges to protect against moisture and movement.
- Dry-fit the outlet box and device cover; fine-tune the opening with a diamond rasp or file for precise edge contact.
- Protect and seal cut stone edges with a stone-appropriate sealant or edge trim to prevent moisture ingress and tidy transitions.
- Use box extension rings or mud rings to manage depth so device faces sit flush with the finished stone surface.
- Secure the electrical box to structural backing behind the veneer; do not rely on thin stone pieces to support devices.
- After wiring, test continuity, polarity, grounding and any required GFCI/AFCI functions before final sign-off.
Mitering vs Using Pre-Made L-Shaped Ledgestone Corners
Choose mitering when visual continuity and custom fit matter most; choose factory L-corners when you need predictable installs, lower on-site waste, and matched, sawn-back edges from the factory.
Pros and Cons of Mitered Corners
Mitering requires cutting stone edges on-site at precise angles to form a 45° joint. When crews hit tolerances and match thickness, miters deliver a continuous, built-in look that blends across the face of the wall; when tolerances slip, gaps, exposed end grain, and irregular texture make the joint obvious and require remedial surface blending.
| Attribute | Mitered (Field‑Cut) | Pre‑Made L‑Corner (Top Source Stone) |
|---|---|---|
| Appearance / Labor / Waste | Near‑seamless if cuts repeat accurately; demands skilled masons, wet saws and angle guides; generates higher scrap and test cuts, increasing cycle time. | Factory‑matched texture and color with sawn‑back finish; installs quicker with lower skill requirements; dimensions: long side 150–250mm, short side 50–100mm, ~25kg/lineal‑meter; reduces on‑site waste. |
- Requires accurate, repeatable cuts and consistent panel thickness to avoid gaps or uneven faces.
- Needs skilled masons and proper tools (wet saw with diamond blade, angle guides, reliable measuring).
- Can produce exposed end grain or irregular texture at the seam that may need filling or surface blending.
- Generates more material waste from trimming and test cuts; may extend schedule for fitting and finish work.
- Offers best aesthetic continuity for custom jobs when tolerances and stone matching are controlled.
Pros and Cons of Pre-Made L-Shaped Corners
Pre-made L-corners arrive factory-formed to match face texture and color, so installers get a finished-looking corner without field mitering. That predictability reduces the need for specialist cutters on site and minimizes exposed cut edges that can spall during handling or weathering.
- Factory-matched texture and color reduce visible seams and eliminate exposed cut edges.
- Shortens install time and lowers skill requirements—fit like a finished piece rather than a field-fabricated joint.
- Limited to available profiles, sizes, and batches; mismatched batches can show slight color or vein differences unless sourced from the same quarry vein.
- Adds cost for molded pieces and requires storage/handling; custom corner runs may carry minimum order quantities.
- Reduces on-site waste and risk of cutting errors, improving first-time-right rates for installers.
Installation Time and Labor Comparison
Mitered corners add steps: measure, mark, cut test pieces, dry-fit, adjust, and finish joints. Each corner creates a fit-and-check cycle that slows crews and raises the value of experienced masons. By contrast, pre-made L-corners convert those steps into handling, adhesive application, and final pointing, which crews execute faster and with fewer specialized tools.
- Mitering: measure, mark, cut multiple test pieces, dry-fit, adjust, glue/anchor, finish joints—each corner adds cycle time.
- Pre-made: fewer cuts, mostly adhesive and fastening steps plus final caulking or touch-up.
- Pre-made corners lower the need for specialist cutting tools on-site and reduce skill-related rework.
- Mitered work can slow crews on tight schedules; pre-made parts help meet compressed timelines.
Aesthetics, Fit, and Long-Term Performance
Aesthetic success depends on cut quality and material matching. Perfect miters read as continuous stone when installers control thickness and texture; poorly cut miters reveal joints and weather differently. Factory L-corners maintain face continuity and typically resist edge spalling better because the corner forms a single, matched piece.
- Seam visibility depends on cut quality, stone variation, and installer skill—mitered seams can be nearly invisible when done well.
- Pre-made corners avoid exposed edges, giving a factory-finished look that stays consistent across installations.
- Thermal expansion, substrate movement, and freeze-thaw cycles can open poorly executed miters; use appropriate flexible joint fills.
- Both methods need correct substrate preparation, drainage, and proper adhesive to prevent delamination or moisture traps.
Cost and Waste Considerations
Mitering lowers part procurement costs but raises labor, cutting time, and scrap; expect extra pieces for trial cuts and replacements. Pre-made corners raise material cost and logistics but reduce on-site waste, rework, and labor hours—making them cost-effective on larger, repeatable projects where consistency matters.
- Mitering: lower inventory cost for parts but higher labor hours and cutting waste; budget for replacement pieces and disposal.
- Pre-made: higher unit cost and shipping/stocking needs; fewer on-site adjustments lower labor expense.
- Project scale matters: large, repeated jobs often justify pre-made corners; one-off custom jobs may favor mitering for flexibility.
- Account for travel and tool costs, potential call-backs for poor miters, and the value of faster installs when planning budgets.
Conclusion
Accurate cutting, marking, and corner treatment protect installers, meet OSHA and local code expectations, and reduce rework on stone veneer projects. These practices also preserve blades and saws, extending equipment life while helping the veneer deliver full-depth visual integrity on the finished wall.
Before you mobilize, inspect your crew’s cutting setup and blade inventory to avoid on-site delays. If you need samples, technical documentation, or a certified lighting catalog/sample, contact Top Source Stone to request matching L-shaped corners and project-ready data.
Frequently Asked Questions
How to cut ledgestone veneer?
Mark and measure the piece, support it on a flat, stable table, and cut with a wet diamond blade on a masonry wet saw whenever possible; for highly textured or irregular pieces use an angle grinder with a diamond cup or turbo trimming wheel for shaping and profiling, make multiple shallow passes rather than one deep pass, keep the stone wet to reduce dust and prevent overheating, clamp the piece so it does not shift, wear proper PPE including respirator, eye and ear protection, and finish edges with a grinder, rasp, or chisel to match the texture before dry-fitting and installing.
What kind of blade to cut natural ledgestone?
Use a high-quality diamond blade designed for natural stone — turbo or segmented diamond blades are common for ledgestone; turbo blades give a fast, reasonably clean cut on textured stone, segmented blades are best for aggressive, fast masonry cuts, and continuous rim blades are reserved for ultra-smooth finish cuts such as porcelain; choose a blade rated for the stone type and use wet cutting whenever possible to extend blade life and control dust.
How to cut corners for ledgestone veneer?
Best options are to use factory corner pieces where available; if not, create corners by ripping full veneer pieces into return strips and assembling a stepped overlap, or miter pieces at 45 degrees when the stone geometry allows a clean joint; rip thin slices on a wet saw for returns, shape and texture the cut edges with an angle grinder or rasp to blend, dry-fit and stagger joints for a natural look, then set with thinset or mortar so the joint is tight and structurally solid.
Can you cut ledgestone with a tile saw?
Yes — a wet tile saw fitted with a diamond blade rated for natural stone will cut ledgestone veneer effectively for straight cuts and rip cuts; for very thick or highly irregular pieces you may need a larger masonry saw or to finish shapes with an angle grinder, and you should make multiple shallow passes rather than forcing a single deep cut while keeping the work wet and supported.
How to cut around electrical outlets on a stone wall?
Turn off power and remove the device and cover, make a cardboard or paper template from the electrical box and transfer it to the stone piece before installing when possible, then cut the hole slightly oversized for tolerance using a diamond hole saw for round cuts or an angle grinder with a diamond blade for rectangular openings, finish and square the opening with a masonry chisel or rasp, ensure the stone does not pinch the electrical box and maintain required clearances, and reinstall the box and device following code; if the stone is already installed, carefully cut the opening with an angle grinder while supporting surrounding material and using wet cutting or a dust-control respirator.
