White/Light Fieldstone can make or break your exterior schedule—installation errors or inadequate sealing lead to moisture intrusion, costly remediation, and warranty claims that eat into project margins.
This guide acts as a field-ready SOP for architects, spec writers, and contractors: we compare white limestone and quartzite fieldstone profiles, outline attachment, flashing, and substrate prep details, show how to pair light stone with dark roofs and black windows for controlled contrast, and set clear criteria for choosing white versus charcoal mortar. You’ll also get step-by-step sealing protocols to prevent dirt and organic stains, inspection checklists, and concise answers to common questions about cleaning, grout color, stain resistance, and modern farmhouse applications so teams can reduce callbacks and protect long-term value.
The Evolution of the Modern Farmhouse Exterior
Designers translated simple, regional farmhouse forms into a contemporary language by pairing light-toned fieldstone veneers and precision sawn-backs with streamlined trim, darker roofing, and graphic window frames to deliver authenticity with modern performance.
Historical roots and the farmhouse revival
Traditional farmhouses grew from local materials and functional needs: rough-cut lumber, locally quarried stone, and straightforward gabled forms. Recent revivals keep those compositional cues but tighten proportions, enlarge glazed areas, and adopt lighter finishes so the aesthetic reads fresh rather than purely historic.
Design teams keep specific vernacular elements to preserve authenticity while updating execution for contemporary construction:
- Gabled roofs and simple rooflines that define silhouette
- Porches and sheltered entries as human-scale anchors
- Board-and-batten or clapboard siding paired with stone accents
- Natural stone used selectively to ground the facade—chimneys, piers, entry walls
Material shifts: white and light fieldstone in contemporary farmhouse
Designers choose white and pale fieldstone to brighten elevations and reflect natural light, which complements neutral palettes and large expanses of glazing. Common choices include pale limestone, white quartzite, and lightly veined fieldstones; each offers slightly different texture and veining that influence perceived warmth and scale.
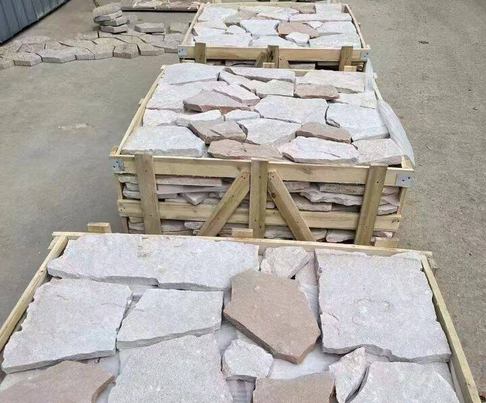
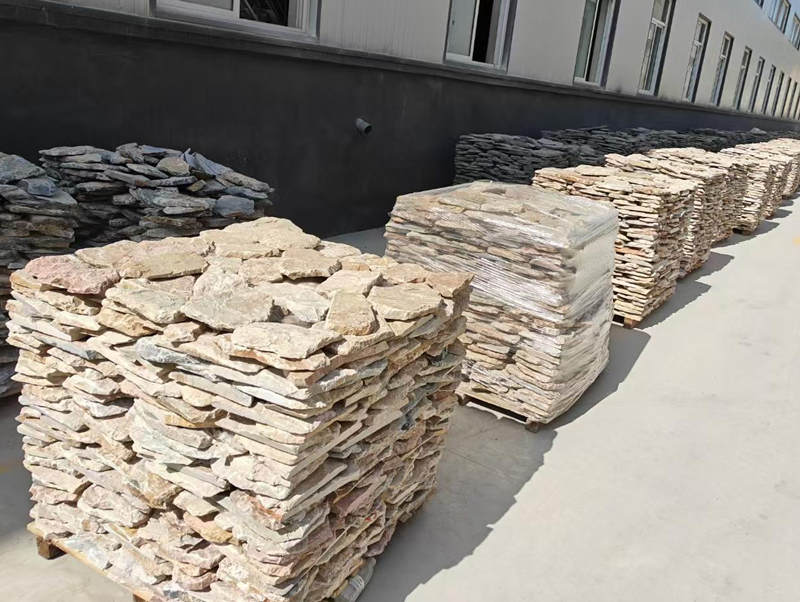
From a build perspective, thin stone veneer specified as loose, individually sawn-back pieces (25–40mm thick) reduces dead load and speeds installation compared with full-depth masonry. Use sawn-back, random-size stones with matching L-corners to preserve full-depth visual integrity while controlling weight (typical installed weight ~65kg/m²). Always plan for compatible substrate, adhesion method, and flashing details.
Color, contrast and composition: pairing light stone with dark roofs and black windows
Dark roofs and black window frames give light stone facades crisp edges and modern definition. Standing-seam metal roofs add a clean profile and a contemporary sheen; dark composite shingles offer a more traditional texture but still provide strong contrast. Select roof type based on desired silhouette and regional performance requirements.
Use matte black or deep-charcoal window frames with thinner sightlines to emphasize geometry without overpowering the stone. Offset large light-stone masses with darker or mid-tone siding on secondary volumes to prevent a washed-out appearance, and reserve stone for focal elements such as entry walls, chimneys, or low perimeter walls.
Joint detailing, mortar color and long-term care for light fieldstone
Mortar color and joint profile determine whether the stone reads monolithic or articulated. Choose white or pale mortar for a seamless, wall-like appearance; pick charcoal or mid-gray mortar to define each stone and increase textural depth. Narrow, struck joints read modern and flatter the plane; raked or recessed joints deepen shadow and reinforce a rustic character.
Protect performance by detailing moisture management: continuous WRB, correct through-flashing at sills and terminations, and weep/venting provisions behind veneer. Apply a breathable, penetrating stone sealer when required by exposure to limit dirt and organic staining, and schedule inspections—reapply sealant based on product guidance and local climate. For clean, fast transitions at corners, specify matching L-shaped corners (authentic masonry corner wrap) to preserve visual mass and speed installation.
White Limestone and Quartzite Fieldstone Profiles
Choose quartzite for high-wear, exposed exteriors where hardness and low porosity matter; choose white limestone when workability, softer edges, and warm veining support the design and installation constraints.
Geological and material properties
White limestone forms as a calcite-rich sedimentary rock; it cuts predictably and shows fossils or cream undertones in the face. Quartzite starts as sandstone and becomes a silica-dominant metamorphic rock with a crisp grain and occasional sparkle from quartz crystals. On-site this difference matters: limestone machines and splits cleanly for honed or split-face looks, while quartzite requires diamond tooling and stricter dust/wet-cut control.
Quartzite rates much higher on the Mohs scale and resists abrasion and surface scratching better than limestone. Limestone shows higher porosity and greater water uptake, so it needs more aggressive sealing and will demand attention in freeze–thaw climates. Quartzite carries higher density and weight per area, which affects cutting time and handling logistics. Typical assembled veneer weights cluster around 8–13 lbs/ft² (Top Source Stone lists ~65 kg/m² or about 13.3 lbs/ft² for comparable 25–40 mm sawn-back veneer).
| Characteristic | White Limestone (typ.) | Quartzite (typ.) |
|---|---|---|
| Composition & Hardness | Calcite-dominant; Mohs hardness ~3–4. | Silica/quartz-dominant; Mohs hardness ~7. |
| Porosity & Resistance | Higher porosity; absorbs more water/liquids. | Low porosity; superior abrasion and weather resistance. |
| Fabrication & Tooling | Cuts and splits predictably; easier handheld tooling; ideal for honed or split-face. | Requires diamond blades and wet cutting; yields crisper, durable architectural edges. |
Typical visual profiles and finishes
Designers choose profiles—flat, rough/split-face, and pencil—to control texture and shadow. Flat profiles produce restrained, modern facades; rough split-face creates deep shadow and a rugged, three-dimensional appearance; pencil strips read as a linear, contemporary ledgestone. Select profile to match the building scale and trim details.
Finish options include natural cleft/split-face for organic texture, sawn or honed faces for cleaner reflectance, and light sandblasting to mute gloss. White limestone provides subtle veining and fossil marks that warm an elevation; quartzite gives brighter whites and a crisper grain. For consistent tone across an elevation, source from the same quarry vein and request pre-production grading to minimize visible batch shifts.
Installation methods and panel system compatibility
Top Source Stone supplies individually sawn-back loose veneer intended for hand-lay installation and full-depth visual integrity using matching L-shaped corners. Installers set these pieces over a structurally sound substrate—cement board, concrete, or masonry—and bond each stone to the wall to recreate a bespoke random-lay pattern rather than factoryized panel systems.
Bonding requires a flat, clean sawn-back surface and a high-strength stone adhesive or polymer-modified mortar compatible with natural stone. Where job conditions demand extra security—tall walls, high wind load, or thin veneer sections—supplement adhesion with mechanical anchors. Use diamond blades with water suppression for quartzite cuts and inspect edges for chip-out before installation. Matching L-corners eliminate field mitering and speed lineal runs on corners.
Durability, maintenance, and sealing recommendations
Quartzite shows superior weathering and UV stability and tolerates freeze–thaw cycles better than limestone. Stone itself resists many forms of weathering, but a veneer assembly does not replace a weather-resistive barrier. Always install a WRB, through-wall flashing at transitions, and proper weep paths for exterior use.
Seal porous white limestone after installation with a breathable natural-stone sealer to reduce staining and organic growth; reapply on a schedule set by exposure (typically every 2–5 years). Clean with soft brushes, water, or a pH-neutral stone cleaner. Avoid acidic cleaners and high-pressure washing that can erode faces and joint material. During production and before shipping, inspect bonded backs and corners to prevent delamination—confirm full contact across the sawn-back surface and consistent adhesion before crate packing.
Premium Stacked Stone — Faster Installs, Higher ROI

Pairing White Fieldstone with Dark Roofs and Black Windows
A crisp, high-contrast palette—white fieldstone, a dark roof, and black windows—reads as defined massing when you coordinate material tones, edge details, and performance specs from roof to window.
Why white fieldstone pairs well with dark roofs and black windows
White or light fieldstone reflects daylight and reveals texture; a dark roof visually anchors the building and black window frames act as punctuation marks that define openings. When you control each element’s tone, the roof mass, wall plane, and window voids read as three distinct layers, which improves legibility at a distance and at the scale of the street.
This combination suits modern farmhouse, contemporary, and transitional exteriors because it balances rustic materiality with refined accents. Use natural choices like Ice White Quartzite or Ivory Sandstone Thin Stone Veneer for consistent light fieldstone, and plan roof and window choices so they tighten silhouette without flattening texture.
Choosing roofing materials and profiles for a dark roof
Select roof materials that deliver a stable dark tone and a compatible texture with fieldstone. Slate, dark composite/asphalt shingles with a granular texture, and standing-seam metal in matte or low-gloss finishes all read well against loose-laid, sawn-back fieldstone veneers. Prefer low-reflectance finishes to avoid visual competition with textured stone.
- Profile and slope: steeper pitches and textured shingles create a strong silhouette; if you use low slopes, detail flashing and waterproofing rigorously to avoid staining the stone below.
- Color stability: choose UV-stable pigments and long-life coatings so the roof retains a consistent dark tone over time.
- Edge details: specify gutters, fascias, and coping in matching dark tones so the roof edge reads as a single, intentional line against the light stone.
Selecting window frame materials and black finishes
For sharp sightlines and durable black finishes, powder-coated aluminum offers the narrowest profiles and the crispest contrast with white stone. Fiberglass and wood-clad frames work if you need improved thermal performance or a warmer interior reveal; in that case pick a true-black exterior finish that resists gloss and handles weathering.
- Finish spec: require AAMA-rated powder coatings in matte or satin black to reduce glare and extend color life.
- Thermal performance: use thermally broken frames and select glazing packages to meet local energy code while keeping narrow sightlines.
- Hardware and trim: match or intentionally tone hardware and trim to the window finish so details read cohesive rather than visually noisy.
Balancing contrast, mortar, and detailing
Mortar choice controls how stark or integrated the stone will read. Light mortar yields a seamless, monolithic field; medium or charcoal mortar increases definition and visually ties the stone to black windows and trim. Pick the mortar tone with the intended level of contrast in mind and test full-size mockups in situ under natural light.
- Joint width and tooling: narrow, well-tooled joints read clean and contemporary; wider joints emphasize shadow and rustic texture.
- Trim and flashings: use muted trims or a subtle bridging color on flashings to connect white stone with black frames without breaking the composition.
- Lighting and planting: specify warm facade lighting and layered planting to soften contrast at night and help the stone sit within the landscape.
Practical considerations: weathering, maintenance, and installation
Design for drainage and durability from the start. Continuous flashing, adequate roof overhangs, properly sloped gutters, and drip edges prevent water from streaking or entering the stone wall. Use breathable, stone-compatible sealers selectively to reduce staining while allowing moisture vapor to escape.
- Sealing and cleaning: choose a breathable sealer rated for light-colored quartzite or sandstone and specify a maintenance schedule that avoids acidic or abrasive cleaners.
- Material ordering: specify consistent quarry batches—Quarry-to-Project Consistency—and order enough material up front to avoid visible color variation across elevations.
- Installation notes: require Individually Sawn-Back (Non-Panelized) stones and Authentic Masonry Corner Wraps where corners occur; coordinate installer details for window reveals, corner pieces, and mortar transitions so you preserve clean lines and allow for thermal movement.
Choosing White vs Charcoal Mortar for Light Stones
Mortar color is a functional design decision: it controls perceived massing, joint definition and long-term maintenance, so choose by design intent, exposure and validated mockups.
Aesthetic effects: visual outcomes and design intent
White mortar reduces contrast and lets light stones read as a continuous plane. That enlarges perceived space and softens texture, which suits traditional or airy modern farmhouse facades and foundation skirts. In tight compositions or small elevations, white mortar helps the wall recede and lets trim, windows and roof color define form.
Charcoal mortar raises contrast and highlights individual pieces, producing a sculpted, grid-like rhythm that reads contemporary and architectural. Mid-gray or toned mortars give partial definition without a hard outline when you want stone shape to remain visible but not dominant. Always confirm the effect with a full-size mockup under the project’s actual daylight and artificial lighting—photos and small chips mislead on scale and shadow.
| Mortar Color | Visual & Architectural Impact | Maintenance & Best Use |
|---|---|---|
| White Mortar | Low contrast—creates a continuous plane with Ice White Quartzite or Ivory Sandstone. | Shows dirt/biological staining; best for sheltered facades; requires frequent cleaning or a sealer. |
| Charcoal Mortar | High contrast—accentuates individually sawn-back stone and random-lay patterns. | Hides soot and grime but can reveal light efflorescence; suits contemporary black trims. |
| Mid/Gray Mortar | Balanced definition—reduces visual harshness while keeping stone shapes legible. | Lowers visible soiling vs white; recommended when stone undertones vary. |
Color matching: undertones, batch variation and test samples
Match mortar to the stone’s undertones—warm stones take slightly warm-tinted mortars, cool stones take cool-tinted mortars. Order sample mixes from your mortar supplier and lay them on spare stone pieces to observe wet-to-dry shifts and how the tint reads at different times of day. Record the pigment, cement type and water ratio used for each sample.
Check batch-to-batch variance and plan logistics so a single run covers the visible elevation. If the project requires multiple batches, blend them on-site to avoid color seams. Remember that additives, polymer modifiers and curing conditions change the final hue—note the exact mix and curing regime for repeatability.
Maintenance and staining: practical trade-offs
White mortar highlights dirt, soot and organic staining and demands more frequent cleaning on exposed facades and splash zones. Charcoal mortar conceals grime and pollution and reduces perceived maintenance, but it can make light-colored efflorescence stand out. Select mortar color with the site’s pollution, roof run-off and vegetation exposure in mind.
Use a quality breathable stone sealer on both stone and mortar where appropriate, and set a maintenance schedule based on exposure: high splash areas and fireplace surrounds need earlier reviews. For urban or high-traffic sites, choose darker or medium-toned mortars to lower cleaning frequency and lifecycle costs.
Installation and technical factors: joint width, tooling and material performance
Joint width and tooling change the final read: narrow joints with light mortar approach a continuous plane, while wide, dark joints create strong banding. Test tooling styles—concave, struck, raked—on a mockup because each tooling choice casts different shadows and alters the perceived color edge.
Specify colorfast pigments and polymer-modified mortars for long runs where color stability matters, and avoid unproven site tints on large elevations. Ensure consistent curing and cleaning protocols: improper wash-off or uneven hydration produces blotchy color. Finally, coordinate mortar selection with Top Source Stone’s individually sawn-back loose stones so installers can plan joint layout and mortar quantity before laying begins.
Sealing White Fieldstone to Prevent Dirt and Organic Stains
A breathable, non‑darkening impregnating sealer applied to clean, fully dry white fieldstone significantly reduces pore absorption and slows biological staining while preserving the stone’s natural appearance.
Why seal white fieldstone?
White and pale stones show soiling and organic growth quickly because contrast makes even light discoloration obvious. A correct sealer stops contaminants from entering the pore structure, keeps water from lingering where algae and lichen take hold, and makes routine cleaning far easier.
- Reduces penetration of dirt, oils, and organic matter into the stone’s pore network.
- Limits water retention that encourages algae, moss, lichen and staining.
- Preserves natural color and minimizes patchy darkening on light tones.
- Makes routine cleaning easier—soil tends to sit on the surface instead of embedding.
- Does not replace proper flashing or waterproofing; sealants slow absorption but do not create a watertight assembly.
| Thin Stone Veneer Spec | Why it matters for sealing | Sealer recommendation |
|---|---|---|
| Thickness: 25–40mm; Individually sawn‑back loose stones. | Thin profile and sawn backs demand deep but breathable penetration. | Use a penetrating silane/siloxane or fluoropolymer impregnator labeled non‑darkening. |
| Approx. 65kg/m² weight load. | Weight and exposure points can lead to weather and biological retention. | Apply until stone rejects product for full saturation/penetration. |
| L‑shape corners available for full-stone look. | Corner geometry exposes multiple edges to severe weather. | Treat all corners and sawn edges carefully to ensure zero-gap sealing. |
Choosing the right sealant for light-colored natural stone
Pick a breathable impregnating product formulated for natural stone and labeled non‑darkening or low‑enhance. Penetrating chemistries (silane/siloxane, siloxane blends, or fluoropolymer impregnators) protect pores without forming a surface film that changes the stone’s look.
- Prefer penetrating silane/siloxane or fluoropolymer-based impregnators for breathability and longevity.
- Choose products explicitly tested as non‑darkening or ‘low‑enhance’ for white and pale stones.
- Water‑based formulas reduce odor and solvent exposure on site; solvent options may penetrate deeper but can darken some stones.
- Topical, film‑forming sealers offer stronger surface protection but often change appearance and require more maintenance—avoid if you need a natural finish.
- Always test the chosen sealer on a small, inconspicuous area to confirm appearance and compatibility with adhesives or prior treatments.
Surface preparation and application best practices
Clean and treat surfaces before sealing; trapped dirt or live biological growth will remain under the sealer and defeat protection. Allow the stone to dry fully to manufacturer specs—most impregnators require 24–72 hours of actual dry surface time depending on local humidity and temperature.
- Remove loose dirt and biological growth with a soft brush and pH‑neutral stone cleaner; apply a biocide when you find active algae, moss, or lichen.
- Rinse thoroughly and let stone dry—do not shortcut the drying window; moisture blocks penetration.
- Avoid high‑pressure washing on fragile faces; use low‑pressure rinse to clear residues.
- Apply sealer with a low‑pressure sprayer, roller, or brush and wet the stone until it rejects further product—that saturation point ensures depth of protection.
- Work in manageable sections, maintain a wet edge to avoid lap marks, and respect temperature/humidity application windows in product data sheets.
- Document a test patch and allow full cure before judging final appearance or proceeding to complete coverage.
Maintenance: recoating, cleaning, and treating organic stains
Inspect repellency annually and after severe weather. When water stops beading and begins to absorb, clean the stone and reapply the impregnator following the manufacturer’s recoating rules. Use targeted cleaners for organic stains and avoid acids or abrasives that harm stone and shorten sealer life.
- Check repellency by wetting a small area—beading indicates effective protection; flat absorption signals the need to recoat.
- Clean routine dirt with a soft brush and pH‑neutral stone cleaner; do not use bleach or muriatic acid on natural stone.
- Treat biological stains with an appropriate biocide or enzyme cleaner; allow manufacturer‑recommended dwell time and rinse thoroughly.
- For embedded organic stains, apply a poultice or enlist a professional stone cleaner to avoid surface damage.
- When recoating, clean first and follow surface‑prep notes; some impregnators allow direct recoat while others require stripping—check technical data.
- Keep records of product chosen, lot numbers, application dates and test patch results to ensure repeatable maintenance and warranty compliance.
Conclusion
Proper installation of white fieldstone veneer preserves architectural intent and reduces long-term maintenance. Correct substrate preparation, adhesive selection, and hand-laid placement of Individually Sawn-Back (Non-Panelized) stones ensure jobsite safety, compliance with OSHA and local codes, and improved longevity of the cladding and adjacent building systems.
Next, review your project’s facade assembly and detailing, or contact Top Source Stone for certified catalogs and loose-stone samples formatted for specification review. Visit topsourcestone.com to request samples, technical data, and quarry-to-project sourcing support.
Frequently Asked Questions
Is white fieldstone hard to keep clean?
White fieldstone is not inherently difficult to keep clean, but its light color and textured surface make dirt, pollen, and biological growth more visible. Regular low-pressure rinsing, occasional soft-scrubbing with a pH-neutral masonry cleaner, and applying a breathable stone sealer every 3–7 years will keep it looking fresh. Avoid harsh acids or undiluted bleach and test cleaners on a small area first.
Modern farmhouse stone exterior ideas?
Use white or light fieldstone as a base material paired with board-and-batten or horizontal siding above; apply stone as a full facade, lower wainscot, chimney/entry accents, or porch columns for variety. Pair with matte-black windows, warm wood beams and porch ceilings, simple gabled rooflines, and standing-seam metal roofing for contrast; keep mortar warm-neutral and use integrated landscape lighting to emphasize texture. Maintain clean trim lines, balanced proportions, and limited material palette to keep the look contemporary rather than overly rustic.
White fieldstone veneer with white grout?
Yes—white fieldstone veneer with white grout produces a seamless, monochromatic facade that reads clean and modern. Benefits include a bright, unified appearance; drawbacks are that pure-white grout can show dirt and slight color variation more readily. Use a high-quality polymer-modified mortar/grout, include proper flashing and movement joints, and consider a slightly warm-toned grout or a breathable sealer if you want less clinical brightness while preserving the cohesive look.
Does natural white stone stain easily?
Natural white stone can show stains more readily than darker stone because contrasts are more visible, and many fieldstones are porous and can absorb oils, tannins, and iron. Protect surfaces with a breathable penetrating sealer, clean spills promptly with pH-neutral cleaners, and use poultices or specialized stone cleaners for stubborn oil or rust stains. For exterior installations choose hydrophobic but vapor-permeable treatments to avoid trapping moisture.
Pairing black windows with white fieldstone?
Black windows are an excellent companion to white fieldstone— they create crisp contrast and a modern farmhouse aesthetic. Use slim, deep-set matte-black frames and repeat black elements (gutters, light fixtures, garage doors) to create cohesion; soften the contrast with warm mortar tones, natural wood accents, and landscaping to avoid a sterile look.
