
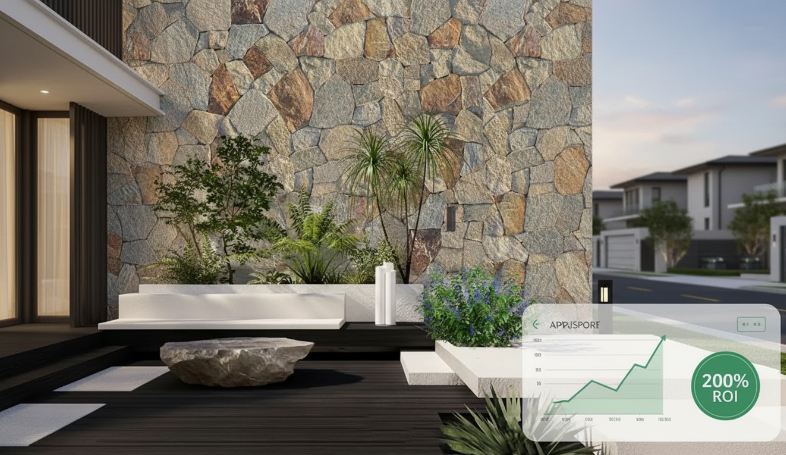
Mortar Mix Specs can make the difference between a secure ledgestone veneer installation and costly rework, extended schedule delays, and potential liability from falling stone that triggers warranty claims or OSHA fines. Dry-stack ledgestone demands high-tack mortar because the stones rely on minimal mortar contact and tight, seamless joints; get the mix wrong and stones slide, seams open, and crews spend hours fixing failures on site. Commercial installers face lost billable time, unhappy owners, and failed inspections when mortar performance doesn’t match the substrate and stone texture.
This guide serves as a field-ready SOP for contractors, spec writers, and project managers. We cover why dry-stack ledgestone needs high-tack mortar, compare polymer-modified thin-set to standard Type S, provide the exact water-to-powder ratios needed for vertical hold, walk through proper back-buttering for rough textures, and show proven methods to control mortar squeeze-out on seamless joints. Follow these step-by-step specs and techniques to reduce rework, control labor hours, and meet quality inspections on natural ledgestone veneer projects.
Why Dry-Stack Ledgestone Requires High-Tack Mortar
Dry-stack ledgestone demands a mortar that grabs instantly—limited contact area and near-zero joint thickness create immediate slip risk that only a high-tack, rheology-controlled mix will prevent.
Adhesion Challenges with Dry-Stack Ledgestone
Loose, sawn-back ledgestone veneers present a small, irregular contact footprint: thin pieces and uneven backs reduce mechanical bonding area and leave less mortar to key into. Installations that expose minimal joint thickness remove the usual mortar bed depth installers rely on to tolerate small gaps and voids.
On vertical façades every heavy piece creates immediate shear and gravity loads before the mortar cures. Thermal cycling, wind, and building vibration add peel and shear forces at the interface. A high-tack mortar supplies the immediate grab required to hold stones in place while the chemical and mechanical bond develops.
Key Mortar Properties That Provide High Tack
Polymer modification—acrylic, styrene-butadiene, or proprietary latex—raises initial adhesion and adds flexibility that tolerates differential movement between stone and substrate. Formulations that combine polymers with rheology control create high initial grab without sacrificing spreadability, so installers can press pieces into place and trust they will stay put.
Thixotropic or sag-resistant behavior prevents vertical creep on walls; good water retention keeps hydration uniform across the thin bond line; and high ultimate bond strength resists long-term shear and peel. Specify a mortar with documented grab values and lab-tested adhesion to natural stone for reliable performance.
Installation Practices That Depend on High-Tack Mortar
High-tack mixes make best practices effective. Back-buttering fills voids on sawn backs and forces mortar into contact with the substrate; without an adhesive grab the back-butter will slump or leave hollow spots. Clean, sound, and properly dampened substrates slow moisture loss and help the mortar retain its engineered workability.
Mix to the manufacturer’s water-to-powder ratio to preserve tack and rheology; overwatering destroys grab and increases slippage. Apply mortar generously where stones are heavy or deeply textured, and temporary support large panels and corners until the mortar reaches sufficient set to carry the load.
Risks of Using Low-Tack or Standard Type S Mortars
Standard, low-grab mortars designed for full-thickness masonry rely on thicker beds and positive keying; they do not provide the instant adhesion dry-stack veneers require. Expect stone slippage during cure, misaligned courses, and motorized callbacks when installers attempt thin-bedded dry-stack with these mixes.
Hollow pockets under veneer reduce load transfer, raise freeze-thaw and moisture risks, and increase delamination probability. Those failures create safety hazards and often breach manufacturer or warranty requirements. For thin, sawn-back ledgestone veneers choose a mortar specified for high grab and sag resistance rather than defaulting to standard Type S mixes.
Polymer-Modified Thin-Set vs Standard Type S Mortar
Choose polymer-modified thin-set when you need high-adhesion, thin-bed bonding to dense backings; pick Type S when the installation demands structural shear and compressive capacity in a thicker bedding system.
Material Composition and Bonding Mechanisms
Polymer-modified thin-set combines Portland cement, graded sand and added polymers (latex or redispersible powders). Those polymers form a continuous film as the mortar cures, boosting chemical adhesion to low-porosity substrates and increasing tensile bond strength at the interface. The mix also holds water longer, improving hydration under thin-bed conditions.
Standard Type S mortar contains Portland cement, hydrated lime and sand formulated for higher compressive and shear strength. Type S depends mainly on cement hydration and mechanical interlock with rough or porous substrates—its bond comes from aggregate interlock and cured cement matrix rather than polymer film. Use Type S where load transfer and bulk strength matter.
Performance Metrics: Strength, Flexibility, and Durability
Expect different trade-offs: Type S delivers higher compressive and shear strength, so installers choose it for full-bed bedding, heavy veneers and where code or engineering calls for structural mortar. Polymer-modified thin-set delivers superior flexural performance and tensile adhesion in thin-bed veneers, resisting differential movement and reducing microcracking under thermal cycling.
Polymer modification also improves freeze-thaw resistance and long-term bond retention when manufacturers’ instructions are followed. That makes polymer-modified thin-sets attractive for sawn-back thin stone veneer where you need reliable adhesion to cement board, waterproof membranes or dense concrete backings.
| Property | Polymer-Modified Thin-Set | Standard Type S Mortar |
|---|---|---|
| Key characteristics | Cement + sand + polymers; film-forming adhesion; thin-bed (3–10 mm); high tensile/bond strength to dense backings; better flex and freeze-thaw performance; higher material cost, lower labor for veneer. | Cement + lime + sand; relies on mechanical interlock; full-bed or thick bedding (6–25 mm+); higher compressive/shear capacity; robust for heavy loads and structural bedding; typically lower raw material cost, higher installation labor. |
Appropriate Use Cases and Substrate Compatibility
Choose polymer-modified thin-set for thin-bed installations of sawn-back thin stone veneer, tile and cement-board systems, especially when substrates include dense concrete, cement backer board, or waterproof membranes. The polymers help the mortar adhere to low-porosity backings that standard mortars struggle with.
Reserve Type S for full-bed settings, heavy stone veneers or installations that require high shear and compressive strength—exterior below-grade work, heavy L-shaped corners or applications specified by an engineer. For natural ledgestone veneer from Top Source Stone, use polymer-modified thin-set for thin-bed, sawn-back installations and Type S when you must build a full-bed system or meet structural specs.
Mixing, Application, and Curing Best Practices
Follow manufacturers’ water-to-powder ratios exactly; too much water lowers strength and increases shrinkage. For polymer-modified products, use the specified liquid polymer or pre-blended formulation, allow any recommended slake time and mix to a creamy, trowelable consistency appropriate for thin-bed application.
When using Type S for full-bed installs, mix to a stiffer, workable consistency, achieve full contact with bedding mortar and tool joints correctly. In both systems, clean, sound substrates and back-buttering irregular stones improve contact. Protect fresh work from rapid drying, freezing and heavy rain during cure and run mock-ups for new stone/mortar pairings.
Specification, Cost and Risk Trade-Offs
Compare total installed cost, not just bag price. Type S bags cost less per unit but demand more labor and longer cure times for full-bed work. Polymer-modified thin-set costs more per bag but can reduce labor and speed schedule on thin-bed veneer installations.
Specify product line and required polymer content, cite applicable standards (or manufacturer test data), and require mock-ups and bond tests on real substrates. For exterior cladding in severe climates or seismic zones, coordinate mortar selection with flashing, WRB, anchors and engineer-specified details to reduce risk on projects using Top Source Stone thin stone veneer.
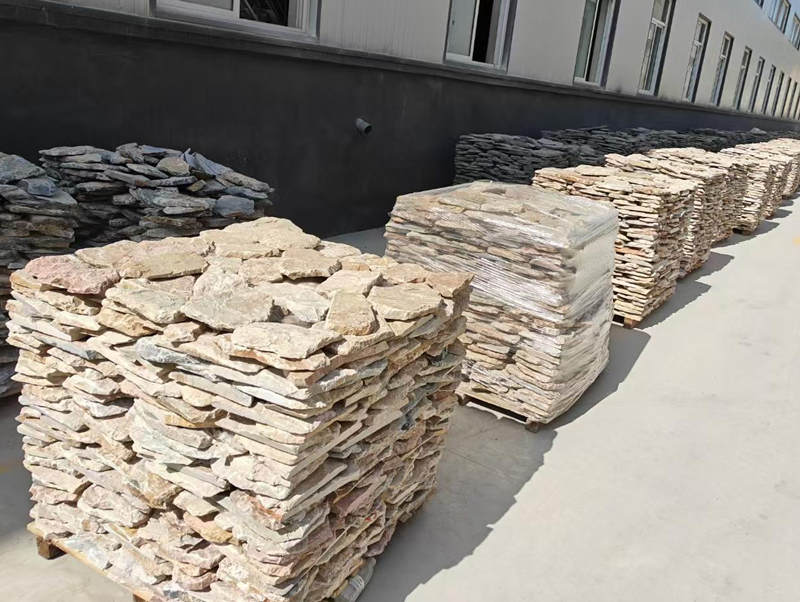
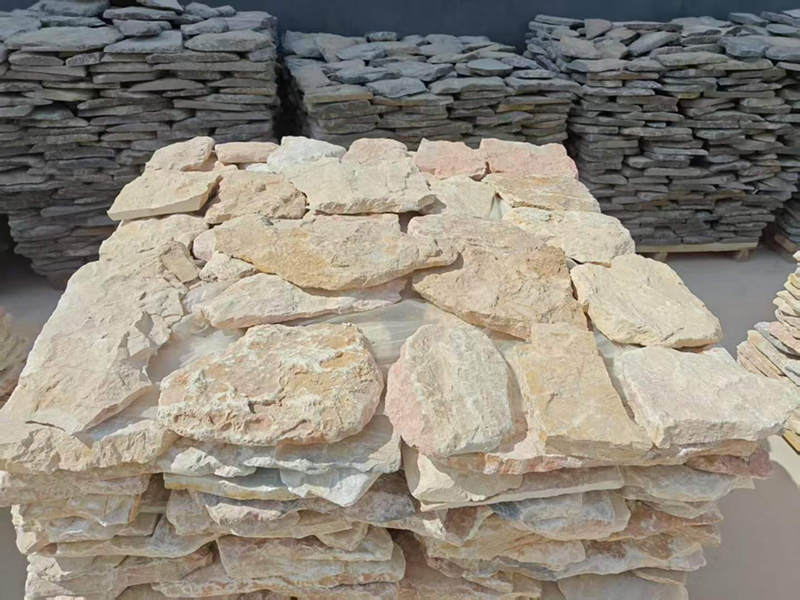
Premium Stacked Stone for Faster Installs

The Exact Water-to-Powder Mixing Ratio for Vertical Hold
For reliable dry‑stack ledgestone vertical hold, target a stiff, non‑sag paste and control water by measured batches, not by feel.
Typical water-to-powder ranges for vertical applications
For polymer‑modified thin‑set used on vertical veneer work, expect a narrow water window: roughly 4.5–5.5 pints (2.1–2.6 L) per 50 lb (22.7 kg) bag as a starting point. Preblended stone‑setting mortars sit stiffer than floor mixes and require the manufacturer’s labeled water; epoxies and pure resins follow strict resin:hardener ratios and accept no water substitution.
- Polymer‑modified thin‑set: about 4.5–5.5 pints/50 lb bag — aim for non‑sag, trowelable paste.
- Preblended stone‑setting mortars: mix per label; manufacturers design these stiffer for vertical grab.
- Epoxy/adhesives: use manufacturer resin:hardener ratios; do not add water.
- Do not add extra water to extend working time — that reduces bond strength and increases slump.
| Product Type | Typical Mix / 50 lb Bag | Field Notes |
|---|---|---|
| Polymer‑modified thin‑set; Preblended stone‑setting; Epoxy adhesives | Thin‑set: 4.5–5.5 pints (2.1–2.6 L) water / 50 lb bag; Stone‑setting: follow label (stiffer than floor mixes); Epoxy: manufacturer resin:hardener ratios — no water. | Aim for heavy peanut‑butter consistency; record water per batch; avoid adding water to extend open time; use non‑staining polymers for natural stone. |
Mixing procedure and target consistency for vertical hold
Work in repeatable, measured batches. Pour the measured water into the mixer, add powder gradually while mixing, run a paddle at low speed 2–3 minutes, let the mix slake 5–10 minutes, then remix before use. Use a calibrated container or graduated bucket so every batch receives the same water volume.
Target a paste that behaves like heavy peanut‑butter to firm toothpaste: it will move under trowel ridges but resist downward flow. Make only tiny water adjustments — 2–4 fluid ounces at a time — and log each adjustment so you reproduce the consistency across the job.
Role of polymer modifiers and liquid additives
Polymers raise wet tack and flexural bond strength, which directly improves vertical grab for sawn‑back ledgestone veneers. Use polymer modifiers that the mortar manufacturer approves and follow the exact dosage; adding extra polymer above recommendations can change set time and color and risk bleeding or staining on some stones.
- Liquid polymers lower water demand and increase cohesion — use them within the technical data limits.
- For natural stone, select non‑staining polymer products and trial on scrap pieces before full application.
- Never substitute water for required polymer content; water thins the mix and reduces bond strength.
Field checks, testing and substrate preparation
Prepare the substrate so it stays clean, sound, and mechanically keyed. Dampen absorbent substrates per the mortar manufacturer but do not allow puddles. Back‑butter large or uneven stones to ensure full contact and increase the bond area on vertical pieces.
Run a small test panel before you commit. Check trowel‑coverage percentage, watch for vertical sag over a 30–60 minute window, and perform a simple grab or pull‑off test after initial set. Monitor temperature and humidity: cold slows cure and may require warmer conditions or modified mixes, hot conditions shorten open time and demand faster work cycles.
Proper Back-Buttering Techniques for Rough Textures
Back-buttering fills voids behind profiled ledgestone so the mortar achieves near-complete contact, prevents point-loading and greatly reduces long-term loosening or moisture migration.
Why back-buttering matters for rough-textured veneer
Rough backs on individual ledgestone pieces create cavities and air pockets that a thin bond coat alone will not fill. When mortar only bears on high points the load concentrates at those contacts and stones can crack, shift, or detach under weight, freeze-thaw cycles, or wind. Back-buttering creates a continuous bed so the stone bears across a wide area and the bond works as intended.
You should verify coverage visually and by feel: press each stone and look for mortar extrusion around edges to confirm contact. Proper back-buttering also reduces reliance on mechanical anchors for most veneers and limits trapped moisture that leads to staining or freeze damage.
Choosing mortar and consistency for rough backs
Select a mortar specified for adhered natural stone veneer and adjust slump so buttered mortar stays on the back without sliding off. Polymer-modified, high-tack mortars or approved thin-set blends deliver higher adhesion and flexibility than plain cement mixes. Aim for a trowelable consistency—peanut-butter to soft putty—so the buttered layer keys into peaks and valleys without slumping; for deep profiles use a slightly stiffer mix so the material holds until it sets.
| Parameter | Common Practice | Top Source Stone Guidance |
|---|---|---|
| Mortar type, consistency, and substrate | Type N or S site mixes; many crews use conventional cement-sand blends mixed to a soft workable paste; inconsistency in water content causes variable hold. | Use polymer-modified, high-tack mortar for individually sawn-back ledgestone (25–40mm). Mix to a stiff, trowelable—peanut-butter to putty—follow manufacturer water-to-powder ranges and adjust for temperature; avoid slump and excess water to maintain bond and color consistency. |
Step-by-step back-buttering and setting technique
Start by cleaning dust and loose particles from stone backs; when stone is highly absorbent dampen lightly but do not soak. Use a margin trowel or pointing tool to butter the back, working mortar into low areas and building enough thickness to fill voids. For best initial contact apply a thin back-bedding coat to the substrate when needed, then butter the stone and press it into the bedding layer.
Seat each stone with firm, even pressure and give a slight twist or short slide to key mortar into the rough texture and expel trapped air. Tool joints and clean excess mortar immediately to avoid staining and to produce consistent reveals. For large or corner pieces support mechanically or by temporary shims until initial set, and follow project anchor specifications where required.
Common problems and site controls
Inspect coverage regularly: randomly remove a set stone during early set to confirm the butter reached the full back—aim for very high coverage on exterior and high-load areas. Avoid over-buttering; excess mortar creates wide joints and shrinkage lines as it cures, so strike off visible surplus before it skins.
Control environment: protect fresh mortar from rapid drying in hot, windy conditions and from freezing temperatures with temporary shelter or damp curing. Keep tools and hands clean to prevent contamination that reduces bond, and train crews on consistent trowel technique and pressure. Document unusual stone profiles and consult the mortar manufacturer for large-format or highly profiled pieces to confirm adhesion and cure recommendations.
Managing Mortar Squeeze-Out on Seamless Joints
In a dry-stack installation, the goal is a tight, mortar-free joint appearance. However, achieving 100% bond coverage often forces excess mortar to the edges. If not managed, this “squeeze-out” smears the stone face, clogs the seamless texture, and creates hours of post-installation cleaning.
The “Recessed Perimeter” Buttering Technique
To prevent squeeze-out before it happens, use a recessed buttering method. Instead of spreading mortar to the very edge of the stone, leave a 5–10 mm (approx. 1/4″ to 3/8″) clean margin around the perimeter of the stone back.
-
The Goal: When the stone is pressed against the substrate, the mortar spreads horizontally to fill the void without breaching the front seam.
-
The Result: A full structural bond in the center and mid-edges, while keeping the visible joints clean and “dry.”
Handling Fresh Squeeze-Out
Despite best efforts, some mortar will inevitably reach the surface. The timing of your response is critical:
-
Never Wipe Wet: Do not attempt to wipe wet, fluid mortar with a rag or sponge immediately. This smears the cement paste into the pores of the natural stone, leading to permanent staining or a “hazy” finish.
-
The “Crumbly” Stage: Wait until the squeezed mortar reaches a semi-dry, crumbly state (usually 20–40 minutes depending on humidity).
-
Wooden Shims & Brushes: Use a small wooden shim or a stiff-bristled nylon brush to flick the dried crumbs out of the joint. This removes the bulk without pushing pigment into the stone’s face.
Site Controls and Cleaning
-
Keep Water Clean: If you must use a sponge for minor touch-ups, change your water bucket frequently. “Ghosting” or haze on dark stones like basalt or slate is often caused by washing with contaminated, silty water.
-
Avoid Metal Tools on Faces: Using steel scrapers can leave metallic streaks or scratches on softer stones. Stick to wood or plastic tools for joint cleaning.
-
Pre-Sealing Option: For highly porous stones, consider applying a breathable pre-sealer (consolidant) to the face of the stone before installation. This prevents the mortar from “keying” into the surface texture if a spill occurs.
Conclusion
Using the right high-tack, polymer‑modified thin‑set, precise water‑to‑powder ratios, and proper back‑buttering gives ledgestone veneer a secure vertical hold and reduces mortar squeeze‑out. These steps prevent stone slippage, moisture intrusion, and costly rework, and they help preserve the finished wall’s long‑term performance. Follow jobsite safety practices and local regulations, including OSHA where applicable, to protect crews and extend tool and assembly life.
Before you begin, inspect your substrate and mock up a small section to verify bond and adjust the mix. For project‑specific guidance or to request a certified Top Source Stone thin stone veneer catalog and sample pack, contact our technical sales team.
Frequently Asked Questions
What is the best mortar mix for natural ledgestone veneer?
Use a polymer‑modified, high‑bond mortar specifically formulated for thin natural stone veneer; in practice that means a pre‑bagged polymer‑modified stone veneer or thinset mortar (often labeled high‑tack or adhesive mortar) or a cement‑lime mortar (Type N) modified with an acrylic/polymer admixture to improve adhesion and flexibility; for heavier exterior or below‑grade assemblies choose a higher strength polymer‑modified mortar (equivalent to Type S properties) and always follow the stone and substrate manufacturer recommendations.
Can you use Type S mortar for ledgestone?
Yes — Type S can be used where higher compressive strength and lateral resistance are required (for example heavy exterior veneers or below‑grade work), but it is stiffer and less forgiving than polymer‑modified veneer mortars; for thin dry‑stack ledgestone installations a polymer‑modified high‑bond mortar is usually preferred to reduce risk of stone cracking, improve adhesion, and provide non‑sag properties, so choose Type S only when the project and stone manufacturer call for it or when extra strength is needed.
How do you mix mortar for dry stack ledgestone?
Use a pre‑bagged polymer‑modified high‑bond mortar or mix a cement‑lime/sand mortar and add a bonding polymer per manufacturer instructions; target a stiff, low‑slump consistency so the mortar holds on vertical faces — mix powder and the recommended amount of water, let slake 5–10 minutes, then remix to a peanut‑butter to soft‑toothpaste body; for best adhesion back‑butter each stone, press with a twist action to achieve full contact, and support large pieces until the mortar cures.
Why is my ledgestone sliding down the wall?
Sliding usually means inadequate adhesion or support: common causes are using the wrong mortar (non‑polymer or too wet), insufficient back‑buttering or contact area, no mechanical anchorage or proper lath/scratch coat, setting stones before the mortar develops tack, oversized/heavy pieces without temporary support, or substrate contamination; correct the problem by removing slipped stones, cleaning substrate and stone backs, using a high‑bond polymer‑modified mortar, providing mechanical ties or lath where required, and bracing stones until mortar has set.
How to clean mortar squeeze-out off ledgestone faces?
Remove fresh mortar while still plastic with a soft brush and plenty of clean water, wiping with a damp sponge; for mortar haze after initial set use a nylon brush, water and a neutral pH stone cleaner or a commercial mortar haze remover following label directions; avoid strong acids on calcareous stone (limestone, marble) — if muriatic acid is required for siliceous stone dilute heavily and test first, rinse and neutralize thoroughly, and always protect adjacent surfaces.
